Calibration 2-7
3. Choose which of the calibration tests summarized in Table 2-2 you want to run at the
CAL: RUN prompt. Use the up and down range keys to scroll through the options;
select your choice by pressing ENTER.
Front panel short and open calibration
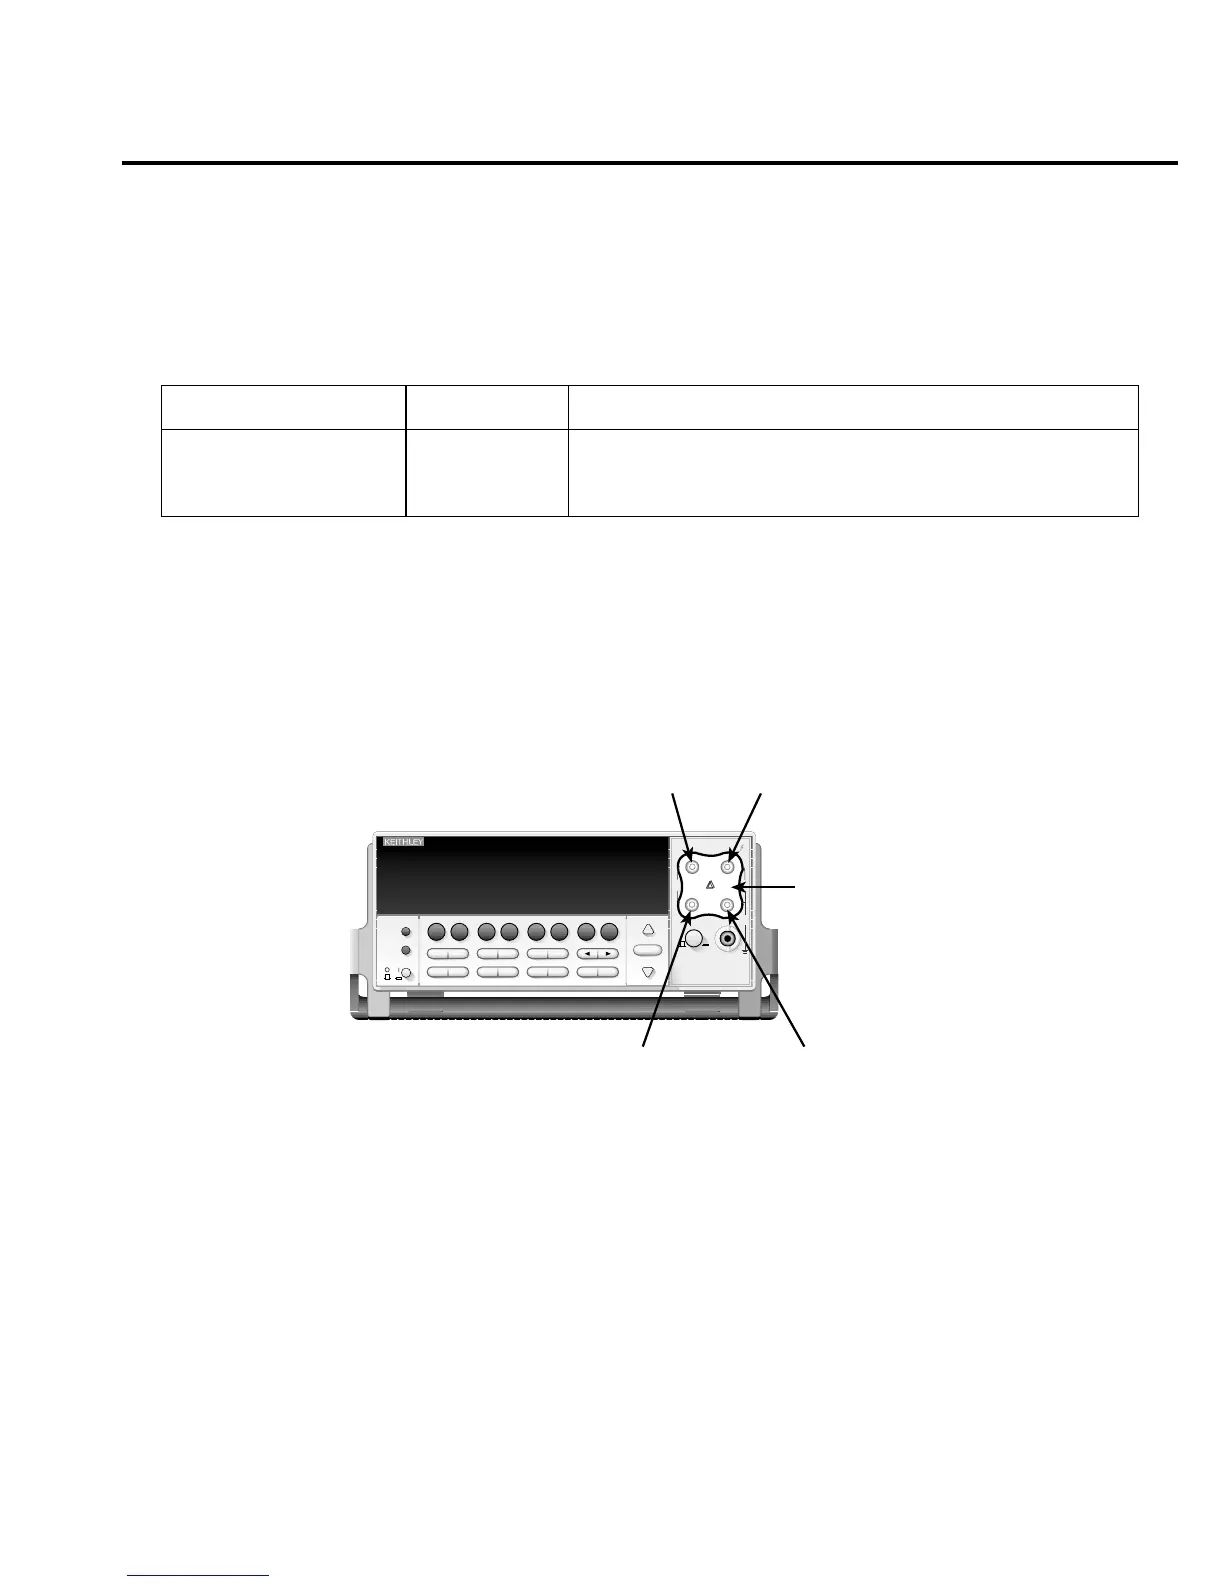
At the Model 2700 prompt for a front panel short, do the following:
1. Connect the Model 8610 low-thermal short to the instrument front panel INPUT and
SENSE terminals as shown in Figure 2-1. Make sure the INPUTS button is not pressed
in so that the front inputs are selected. Wait at least three minutes before proceeding to
allow for thermal equilibrium.
NOTE Be sure to connect the low-thermal short properly to the HI, LO, and SENSE termi-
nals. Keep drafts away from low-thermal connections to avoid thermal drift, which
could affect calibration accuracy.
Table 2-2
Comprehensive calibration procedures
Procedure Menu choice Procedures
Full calibration
DCV, DCI, and ohms
ACV and ACI
ALL
DC
AC
All comprehensive calibration steps (DC and AC)
DC voltage, DC current, and resistance calibration
AC voltage and AC current calibration
F
Model 8610
Low-thermal
short
S+
HI
S-
LO
!
F
Model 2700
Model 2700 Multimeter / Data Acquisition System
RANGE
!
F
500V
PEAK
FRONT/REAR
3A 250V
AMPS
HI
INPUT
LO
SENSE
Ω 4 WIRE
INPUTS
350V
PEAK
1000V
PEAK
AUTO
SHIFT
LOCAL
POWER
RANGE
R
EXIT ENTER
DIGITS RATE
RELFILTER
TRIG
EX TRIG
STORE
RECALL
OPEN
DCV
DCI
MATH
OUTPUT
RATIO
ACV
ACI
Ω2 Ω4
FREQ
TEMP
CH AVG
CONT
PERIOD SENSOR
LIMITS ON/OFFDELAY
HOLD
SAVE SETUP
CONFIG HALT
TYPE
LSYNC
TEST
MONITOR
STEP SCAN
OCOMP
CH-OFF CARD
CLOSE
Integra Series
RS-232
GPIB
gure
-
Low-thermal short
connections