6482-901-01 Rev. A / August 2012 Return to Section Topics 17-5
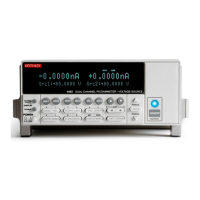
Model 6482 Dual-Channel Picoammeter / Voltage Source Reference Manual Section 17: Calibration
Test considerations
When performing the verification procedures:
• Be sure to restore factory front-panel defaults, as previously outlined.
• Make sure that the test equipment is fully warmed up and properly connected to the correct
Model 6482 terminals as required.
• Allow signals to settle before making a measurement.
• Do not connect test equipment to the Model 6482 through a scanner, multiplexer, or other
switching equipment.
WARNING The maximum common-mode voltage (voltage between LO and chassis
ground) is 200 V DC. Exceeding this value may cause a shock hazard.
CAUTION Maximum signal on OUTPUT connectors is 30 V at 20 mA DC. Maximum signal
on INPUT connectors is 20 mA. Exceeding these values may result in damage
to the instrument.
Current measurement accuracy
Follow the steps below to verify that the Model 6482 current measurement accuracy is within
specified limits. This test involves applying a current to the Model 6482 and verifying that the
measured readings are within required limits. The current applied is from either a Model 6430 or a
Model 5700A.
NOTE The following steps verify the 2 nA through 2
μ
A ranges on channel 1.
1. With the power off, connect the Model 6430 to the channel 1 INPUT triaxial connector through
the preamp as shown in Figure 17-1.
2. Turn on the Model 6482 and the Model 6430, and allow them to warm up for at least one hour.
3. Restore front-panel bench defaults as outlined in Restoring factory defaults.
4. On the Model 6482, press the MSR1 key, and then select the 2 nA range on channel 1 with the
RANGE key.
5. Select the Model 6430 amperes function and choose the 2 nA range.
6. Set the Model 6430 output to 1.90000 nA, and turn the output on.
7. Verify that the Model 6482 current reading is within the limits for the 2 nA range shown in
Table 17-2.
8. Repeat steps 4 through 7 for the 20 nA through 2 μA ranges.
NOTE The following steps verify the 2 nA through 2
μ
A ranges on channel 2.
9. With the power off, connect the Model 6430 to the channel 2 INPUT triaxial connector through
the preamp as shown in Figure 17-1.
10. Repeat the procedure for channel 2 (step 4 through step 8). Make sure to select channel 2 by
pressing the MSR2 key.
NOTE The following steps verify the 20
μ
A through 20 mA ranges on channel 1.
11. With the power off, connect the Model 5700A to the Model 6482 channel 1 INPUT triaxial
connector as shown in Figure 17-2.
12. Turn on the Model 6482 and the Model 5700A, and allow them to warm up for at least one hour.
13. On the Model 6482, press the MSR1 key, and then select the 20 μA range on channel 1 using
the RANGE and keys (the 20 μA range has the following format: +00.0000 μA).
14. Select the Model 5700A amperes function and choose the 20 μA range.