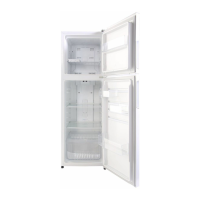
CLEANING THE LID
MAINTENANCE & REPAIR 35
If the lid has been removed from the cabinet, wash
with plenty of non-abrasive soap or detergent and
water. Use the bare hand to feel and dislodge any
caked soil. Rinse thoroughly with clean water. Do not
use hard, rough cloths that will scratch the surface of
the plastic lid. Dry with a clean, damp chamois.
If the lid is on the cabinet where water cannot be used
freely, it should first be lightly dusted (not wiped) with
a soft, clean cloth. Then the surface can be wiped
carefully with a wet cloth or chamois. The cloth or
chamois should be kept free of grit by frequent rinsing
in clean water.
Do not use solvents such as acetone, alcohol,
benzene, carbon tetrachloride, fire extinguisher fluid,
dry-cleaning fluid, and lacquer thinners, since they
attack the plastic part of the lid. Do not use window
sprays or kitchen scouring compounds.
TOUCH-UP PAINTING INSTRUCTIONS
-SPRAY PAINT
White 9 oz. Touch-up Paint:
Part No. 26-0899-01
1. Sand the entire bare metal or affected area and its
edges until the edges are smooth or feathered. This
insures that you are spraying on to a painted area
that has adhesion.
2. Use an automotive primer (lacquer) over the bare area.
3. Scuff sand the primered area lightly.
4. Test spray can before using on cabinet surface.
Apply in short, even strokes holding can 10" to 12"
from surface, and moving rapidly during use. Apply
top coat of paint in thin layers (4-5 layers minimum)
with air drying time in between coats. Scuff sand
very lightly between coats. This will remove uneven
spots or roughness and will create a high gloss,
smooth finish.
5. Use rubbing compound (preferred) or wax over the
finished area after a few days of hardening/drying
time.
Dipping Cabinet 1298.02 2/3/03 1:14 PM Page 37
 Loading...