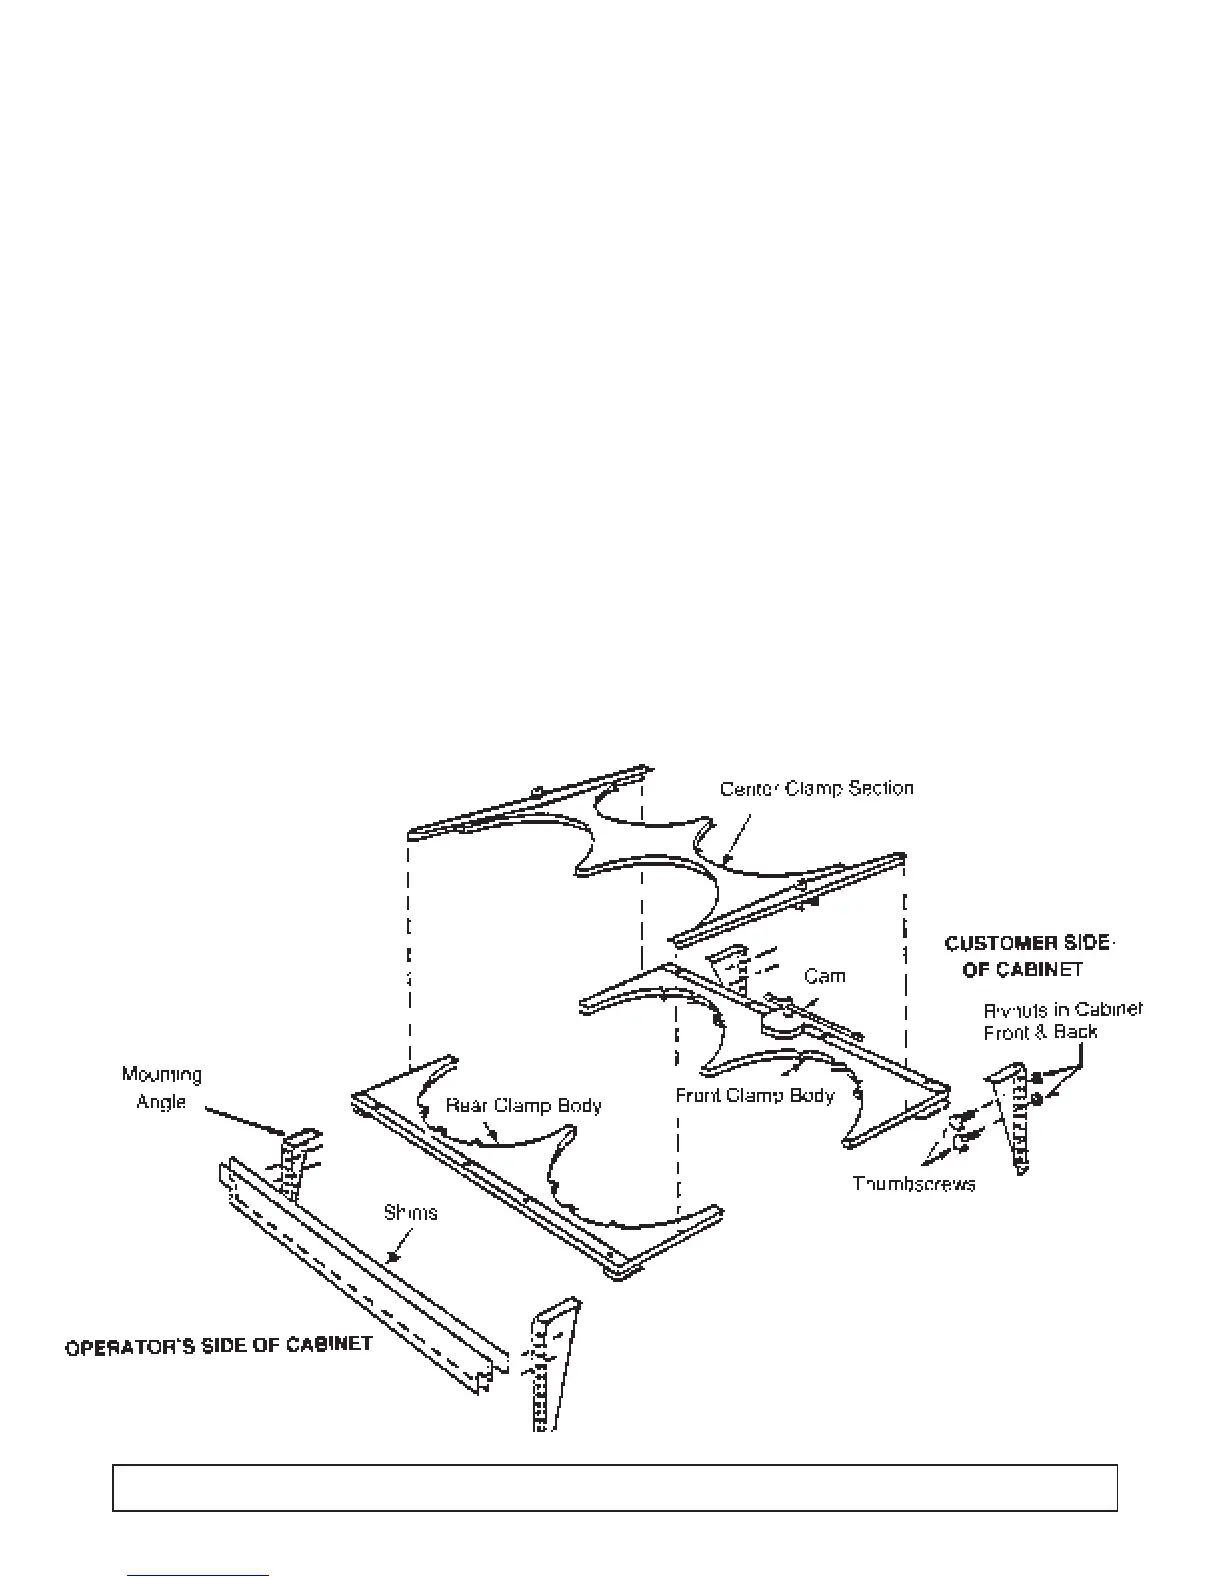
Each accessory contains parts to clamp one 4-can
cluster of ice cream containers.
1. Install 4 mounting angles, using 2 thumbscrews
each. Select a hole location which will meet your
height requirements. Other cans or other means to
obtain proper height of the four cans in relation to
the can clamps may be used.
NOTE: Cans cannot extend above clamps more
than 1-1/2" in order for the cam handle to clear the
top of the cans. Can clamp mounting angles offer
approximately 4" of adjustment.
2. Slide rear clamp body (without cam) on mounting
angles on operator’s side.
3. Slide front clamp body (with cam) on mounting
angles on customer’s side. Position 4 cans against
front and rear clamp bodies.
4. Drop in the center clamp section and turn cam about
90 degrees to lock in cans.
5. If it is necessary to increase clamping pressure,
install plastic shim or shims. Rest the notched-
out corners on the mounting angles (operator’s
side) between the rear of the rear clamp body and
the liner wall. Shims drop in place without
removing parts.
PARTS LIST
Center Clamp Section .................................. 764183P
Front Clamp Body ...................................... 764181 P
Rear Clamp Body ........................................ 764182P
R-12 Mounting Angle, LH ............................ 764185P
R-12 Mounting Angle, RH ............................ 764184P
R-22 Metal Mounting Bracket, Flat .......... 01-0917-00
R-22 Metal Mounting Bracket, Curved .... 01-0918-00
Thumbscrews .............................................. 530536P
Thumbnuts .................................................. 548905P
Handle .......................................................... 371057P
Cam ................................................................ 371059
Cap .............................................................. 430243P
ACCESSORIES 75
INSTALLATION INSTRUCTIONS - ACCESSORY PART NO. 52-1874-01
ROUND CAN CLAMP - 9
1
Ú4" to 9
5
Ú8" Dia. - PLASTIC CANS
Dipping Cabinet 1298.02 2/3/03 1:15 PM Page 77
 Loading...