14
Caster Angle and Squaring
To maintain optimal performance of your Rogue 2 or Rogue XP, the front caster housing should always be
aligned perpendicular to the ground. Your Rogue 2 or Rogue XP is shipped aligned. It is recommended
that caster squareness is checked after making adjustments to the chair configuration related to any of the
following items: caster size or type, camber, rear wheel, tire, center of gravity and seat heights. Caster
squareness should always be the last check made prior to use after adjustments or changes to the chair
have been made.
After all other adjustments are made you should check your caster housing alignment and realign if the
housing is not perpendicular to the ground.
Caster flutter is another issue relating to caster angle and squaring. This is often caused by high speeds,
misalignment of caster to ground and looseness in the caster/fork/stem assembly. To address caster
flutter, first ensure all fasteners in the caster, fork and stem assembly have been appropriately tightened
down and there is no excessive play between any of the parts. If the issue remains, ensure the caster is
square by adjusting the caster angle as demonstrated below. Lastly, if the flutter still remains, open the
caster angle. You can open the caster angle 1° at a time, up to 2° forward or 2° rearward. This is done in
the same manner as squaring the caster but changing the angle 1° at a time, testing the flutter then
adjusting again if needed. An angle finder is helpful when changing 1° at a time.
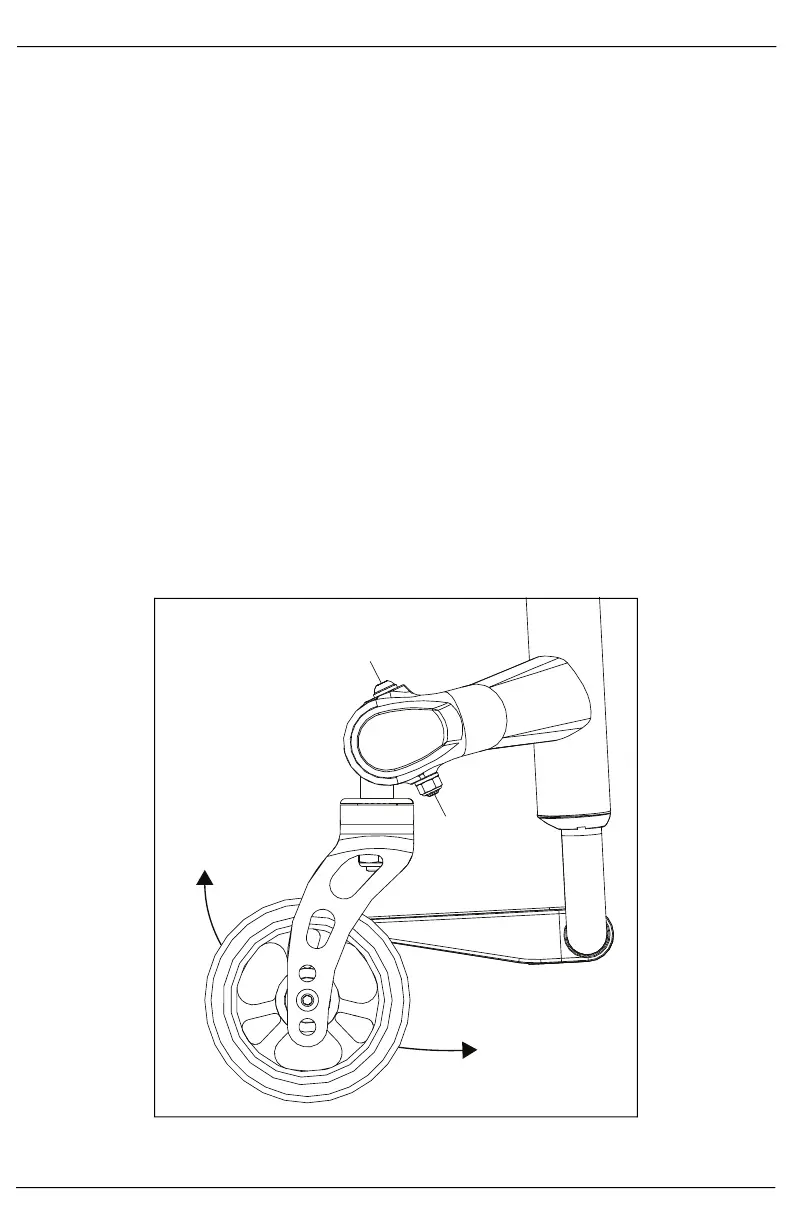
Adjusting the Caster Angle:
1. Loosen the lower nut (B) a quarter turn using a 10mm wrench.
2. Turn the button head cap screw (A) with a 4mm Allen wrench.
3. The caster assembly will move toward the front of the chair when adjusted clockwise and away from
the chair when adjusted counter-clockwise.
4. Set the bubble level clip on the fork and set the caster perpendicular to the ground.
5. Tighten the lower nut (B) to 50 in/lbs when all adjustments are set and final.