21
Backrest Assembly - Rogue 2
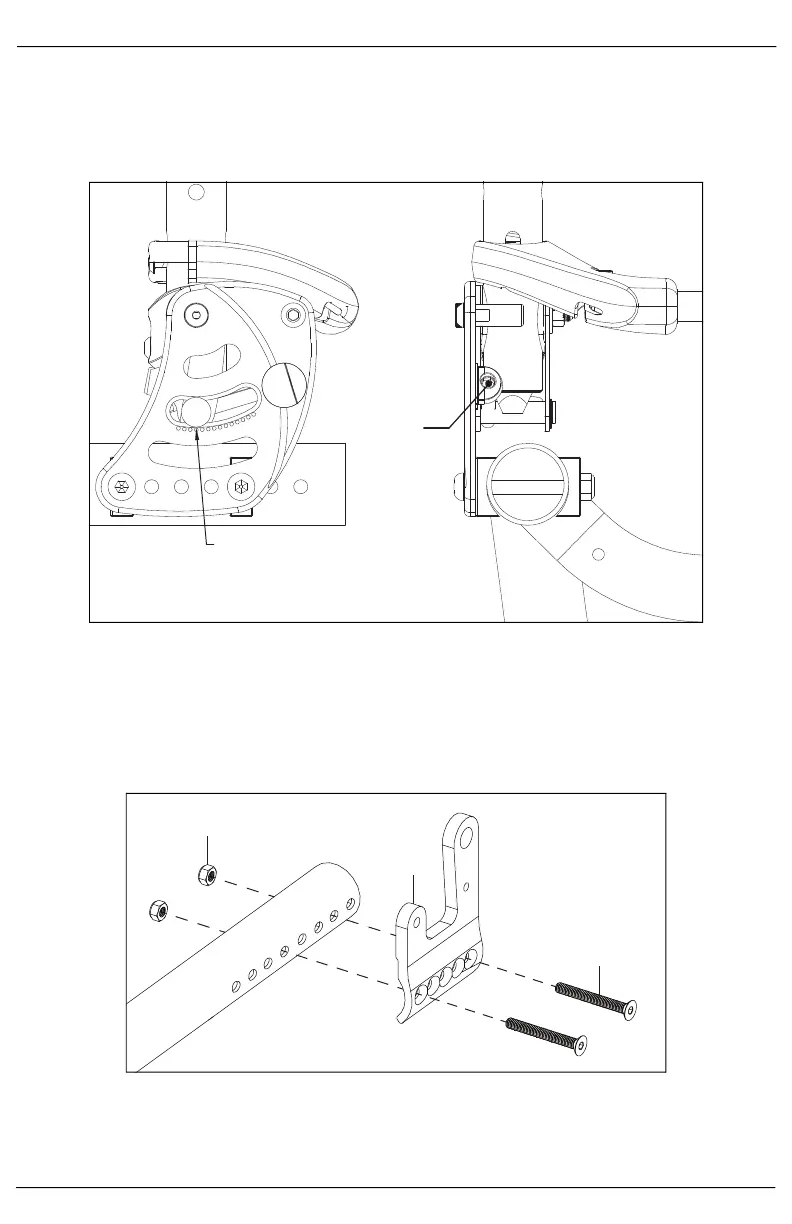
Adjusting Backrest Angle
1. The backrest angle can be adjusted by using a 5mm Hex drive, as shown below. Turning the hex drive
clockwise decreases the backrest angle and turning it counterclockwise increases the angle. Each
angle indicator mark on the back plate is 3° and 3° of angle change takes roughly 2.5 turns.
NOTE: Ensure both sides of the backrest are set in the same position. Use the angle indicator marks
as a guide.
Backrest Assembly - Rogue XP
1. Remove any cushion or seating components that may be in the way of the current backrest removal.
2. Install the back mount (B) onto the chair frame with two bolts (C) and two nuts (A) using a 4mm Allen
wrench and a 10mm wrench.
NOTE: The holes used for mounting are determined by the user’s desired seat depth and CG.
3. Secure the backrest plate (I) to the back mount with bolt (J), nylon washer (G), large nylon washer (H),
washer (G) and nut (F) using a 4mm Allen wrench and a 10mm wrench.
4. Install the release cable (A), pin receiver (B), spring (C), lockout pin (D) and spacer into the back mount
and the backrest plate (I).
Use angle indicator marks to align
both sides of the backrest. Indica-
tor marks are separated by 3°.
Use 5mm Hex
drive to
adjust back-
rest angle to
desired
position.