KINOVA
®
Gen3 Ultra lightweight robot User Guide 24
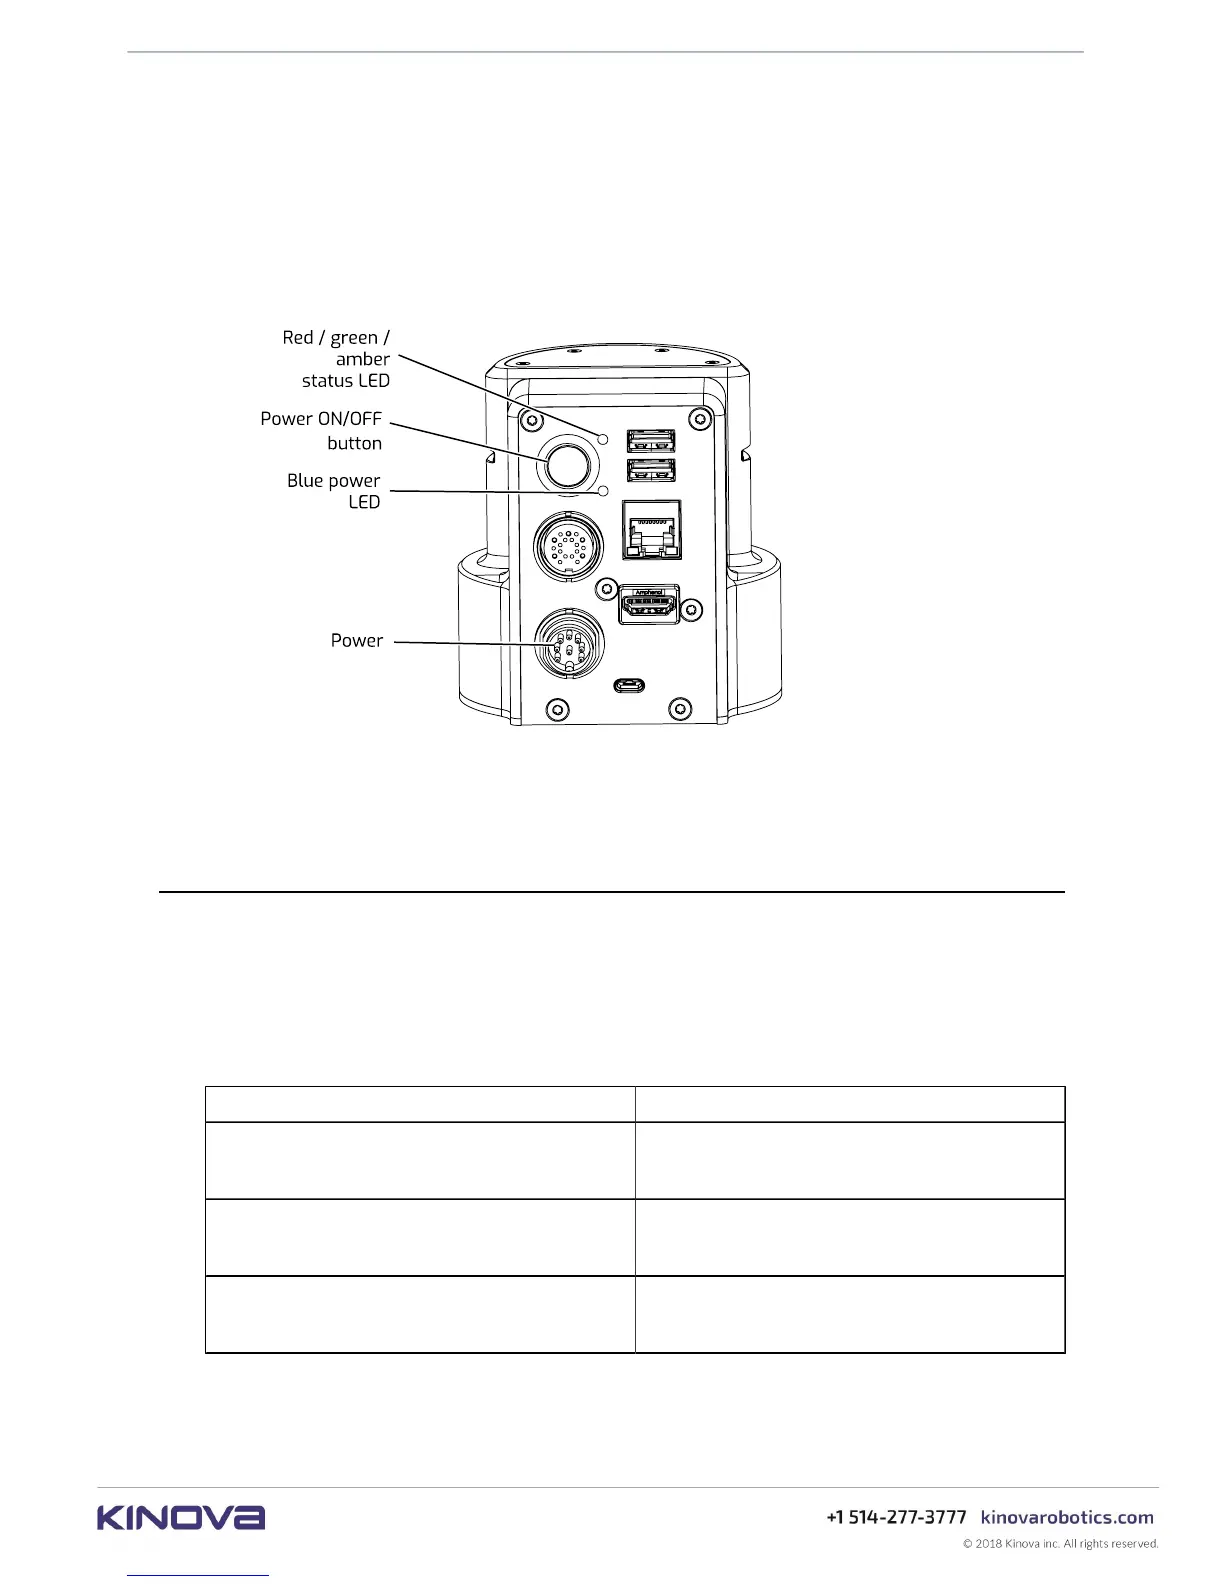
To power up the robot:
1. Connect the captive cable from the power supply to the circular Lumberg connector on the
rear connector panel in the controller of the robot, rotating the outer cylindrical locking shell
of the connector until it is just tight enough to secure the connector.
2. Plug the power supply into a wall outlet.
3. Push the power button and hold in for 3 seconds to power up the robot. This will initiate the
power up sequence.
Note: When the robot is properly powered on, the blue power LED will be illuminated green.
Note: Do NOT hold the power button down for too long. Holding the button for 10 seconds
will result in a factory reset.
Power-up, booting, and initialization sequence
This section describes the LED indications during the power-up sequence.
When the power button is held in to initiate a power-up, the robot will go through a regular boot
up and initialization sequence.
The base LEDs will provide visual feedback as to the progress through the sequence, as follows:
Table 4: Power-up sequence LEDs indications
Sequence step LEDs indications
System booting
• Blue power LED, blinking
• Status LED, off
System initializing
• Blue power LED, solid
• Status LED, amber, solid
System operating normally
• Blue power LED, off
• Status LED, green, solid
From start to finish, the process should take no more than 30 seconds, except during a firmware
update.
 Loading...