4-6
REMOVING THE CONTROL & COOLING FAN THERMAL
SWITCHES, AND THE DOOR LATCH ASSEMBLY
Electrical Shock Hazard
Disconnect power before servicing.
Replace all parts and panels before
operating.
Failure to do so can result in death or
electrical shock.
WARNING
Control Or Cooling Fan Thermal Switch
1. Unplug range or disconnect power.
2. Remove the control panel and rotate it
forward (see page 4-2, steps 2a through
2d for the procedure).
3 . To remove a thermal switch:
a) Remove the wires from the terminals.
b) Remove the mounting screws.
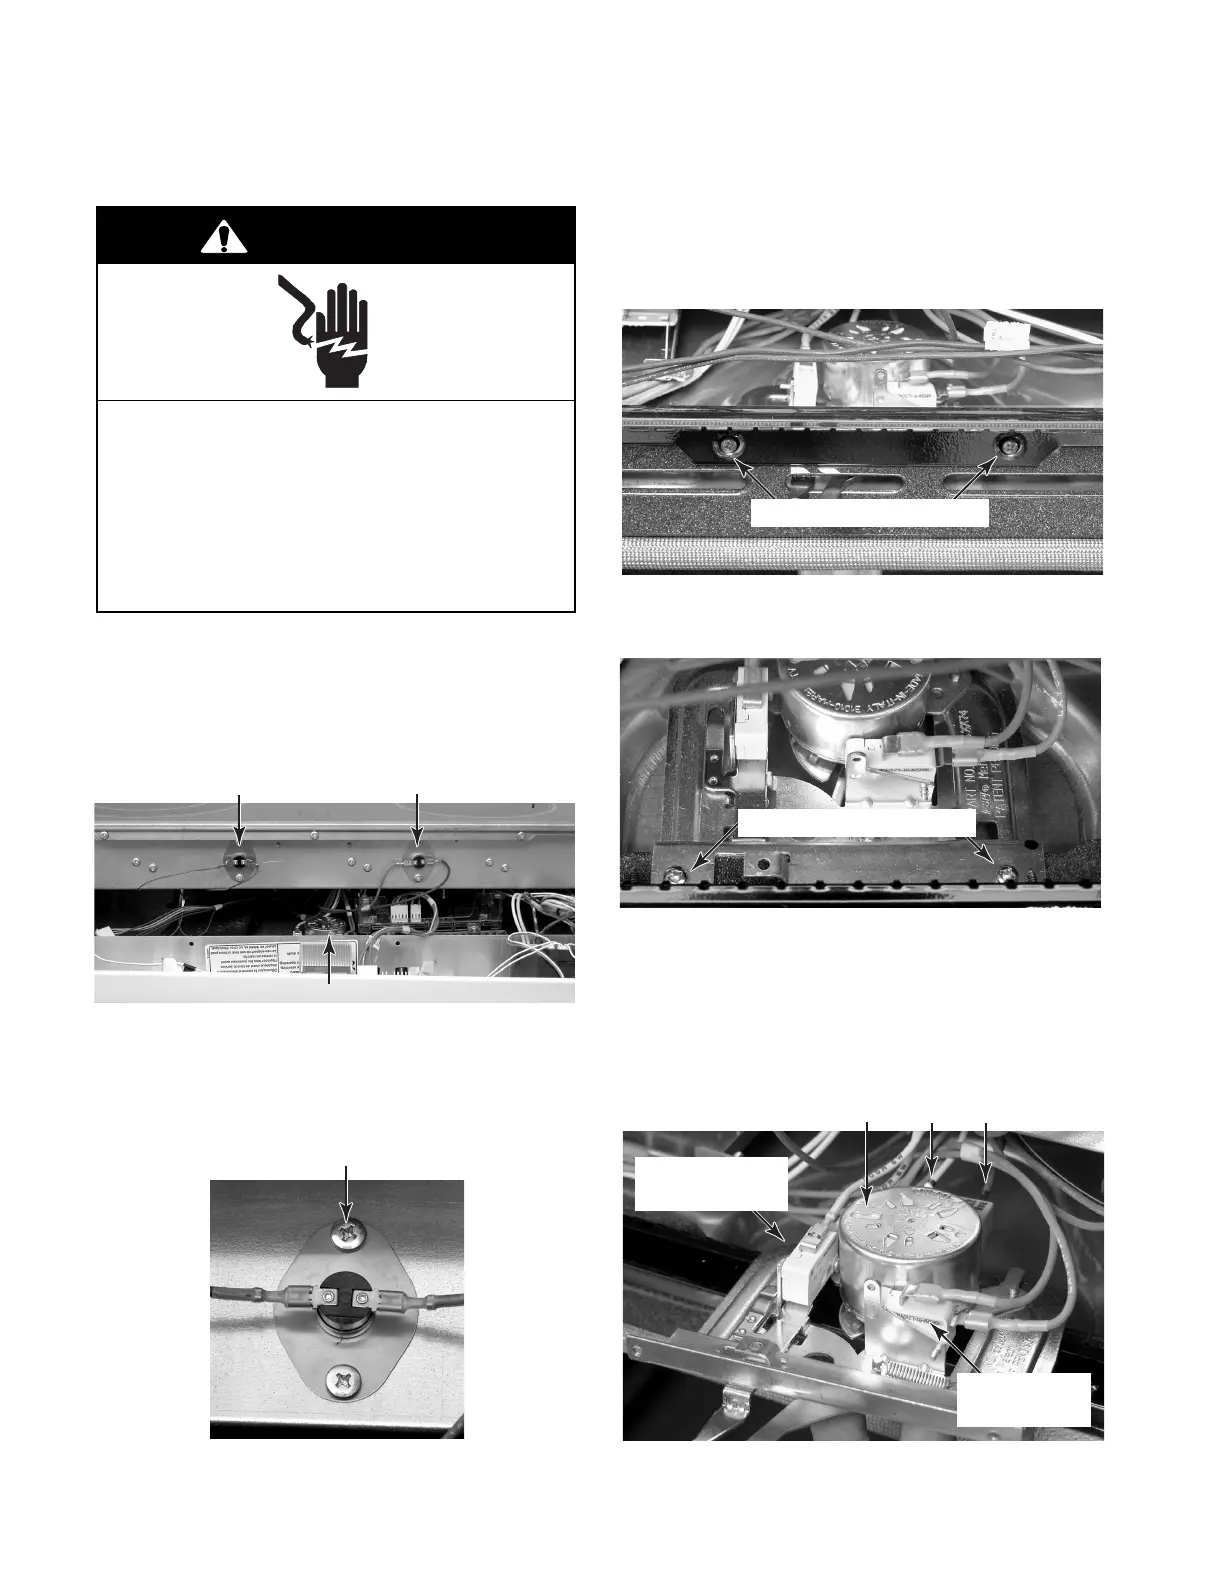
Control Thermal Switch
Door Latch Assembly
4. To remove the door latch assembly:
a) Open the oven door and remove the two
front mounting screws from the air vent.
Front Door Latch Screws
b) Remove the two top screws from the
door latch assembly bracket.
c) Pull the door latch assembly forward as
far as it will go, and disconnect the
wires from the terminals of the two
switches and the motor.
d) Remove the door latch assembly from
the unit.
Top Door Latch Screws
Door Switch
(Gray & Yellow)
Latch Switch
(Gray & Blue)
Motor White Brown
Cooling Fan Thermal Switch