Section 9
High Pressure Water System
20412997
8-2012/Rev 12
9-20
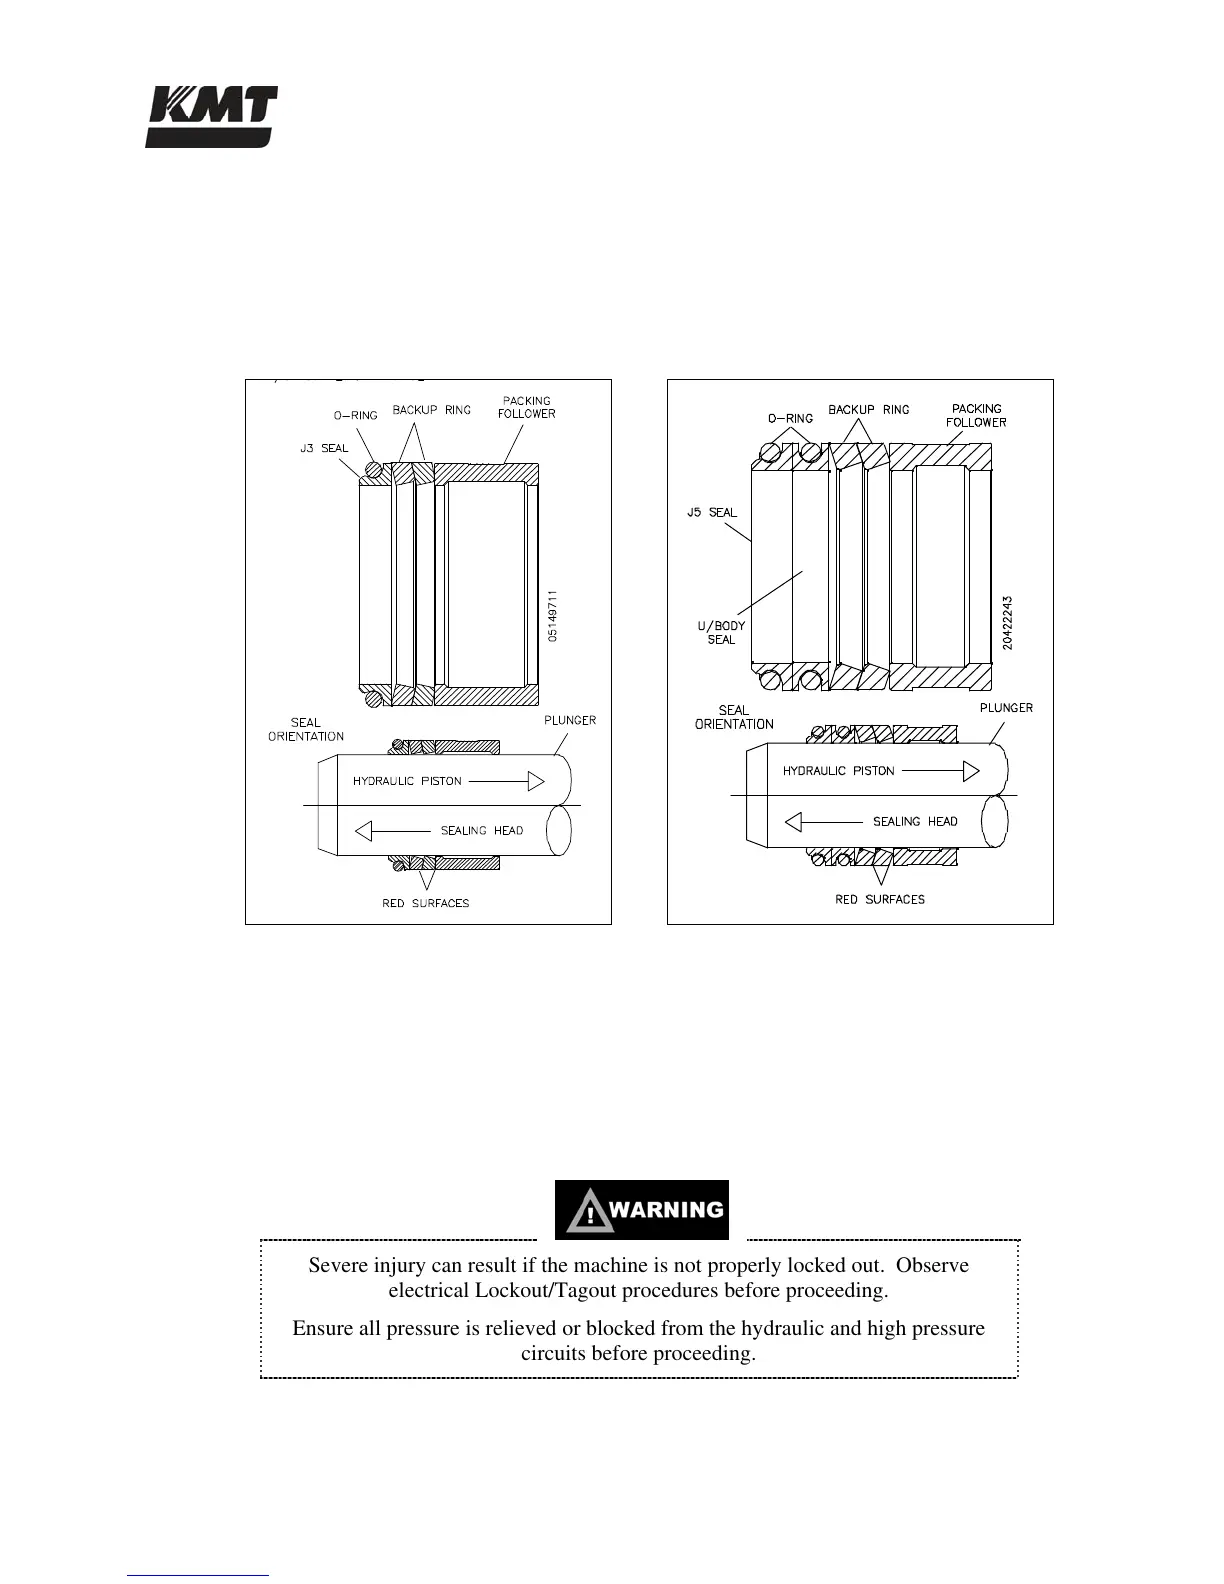
9.10 High Pressure Seal Assembly
The following procedure should be used to replace the high pressure seal assembly. Seal
components differ slightly, depending on the plunger diameter. See Figure 9-13, High Pressure
Seal Assembly.
Figure 9-13: High Pressure Seal Assembly
7/8” Plunger 1-1/8” Plunger
Prior to removing electrical power or any high or low pressure piping, start the machine from the
Maintenance Screen on the control panel. The machine will start in recirculation mode; the dump valve
will open and relieve the high pressure in the system.
Press the
RIGHT or LEFT arrow to extend the plunger on the end to be serviced. The plunger will extend in
the selected direction, allowing full exposure when the unit is disassembled.
1. Turn the machine off and observe the appropriate Lockout/Tagout procedures.
Severe injury can result if the machine is not properly locked out. Observe
electrical Lockout/Tagout procedures before proceeding.
Ensure all pressure is relieved or blocked from the hydraulic and high pressure
circuits before proceeding.
 Loading...