113
Save Destination Setting
This instrument can be configured to select the destination to save measurement data automatically or manually.
* Factory setting: AUTO
Operating Procedure
1
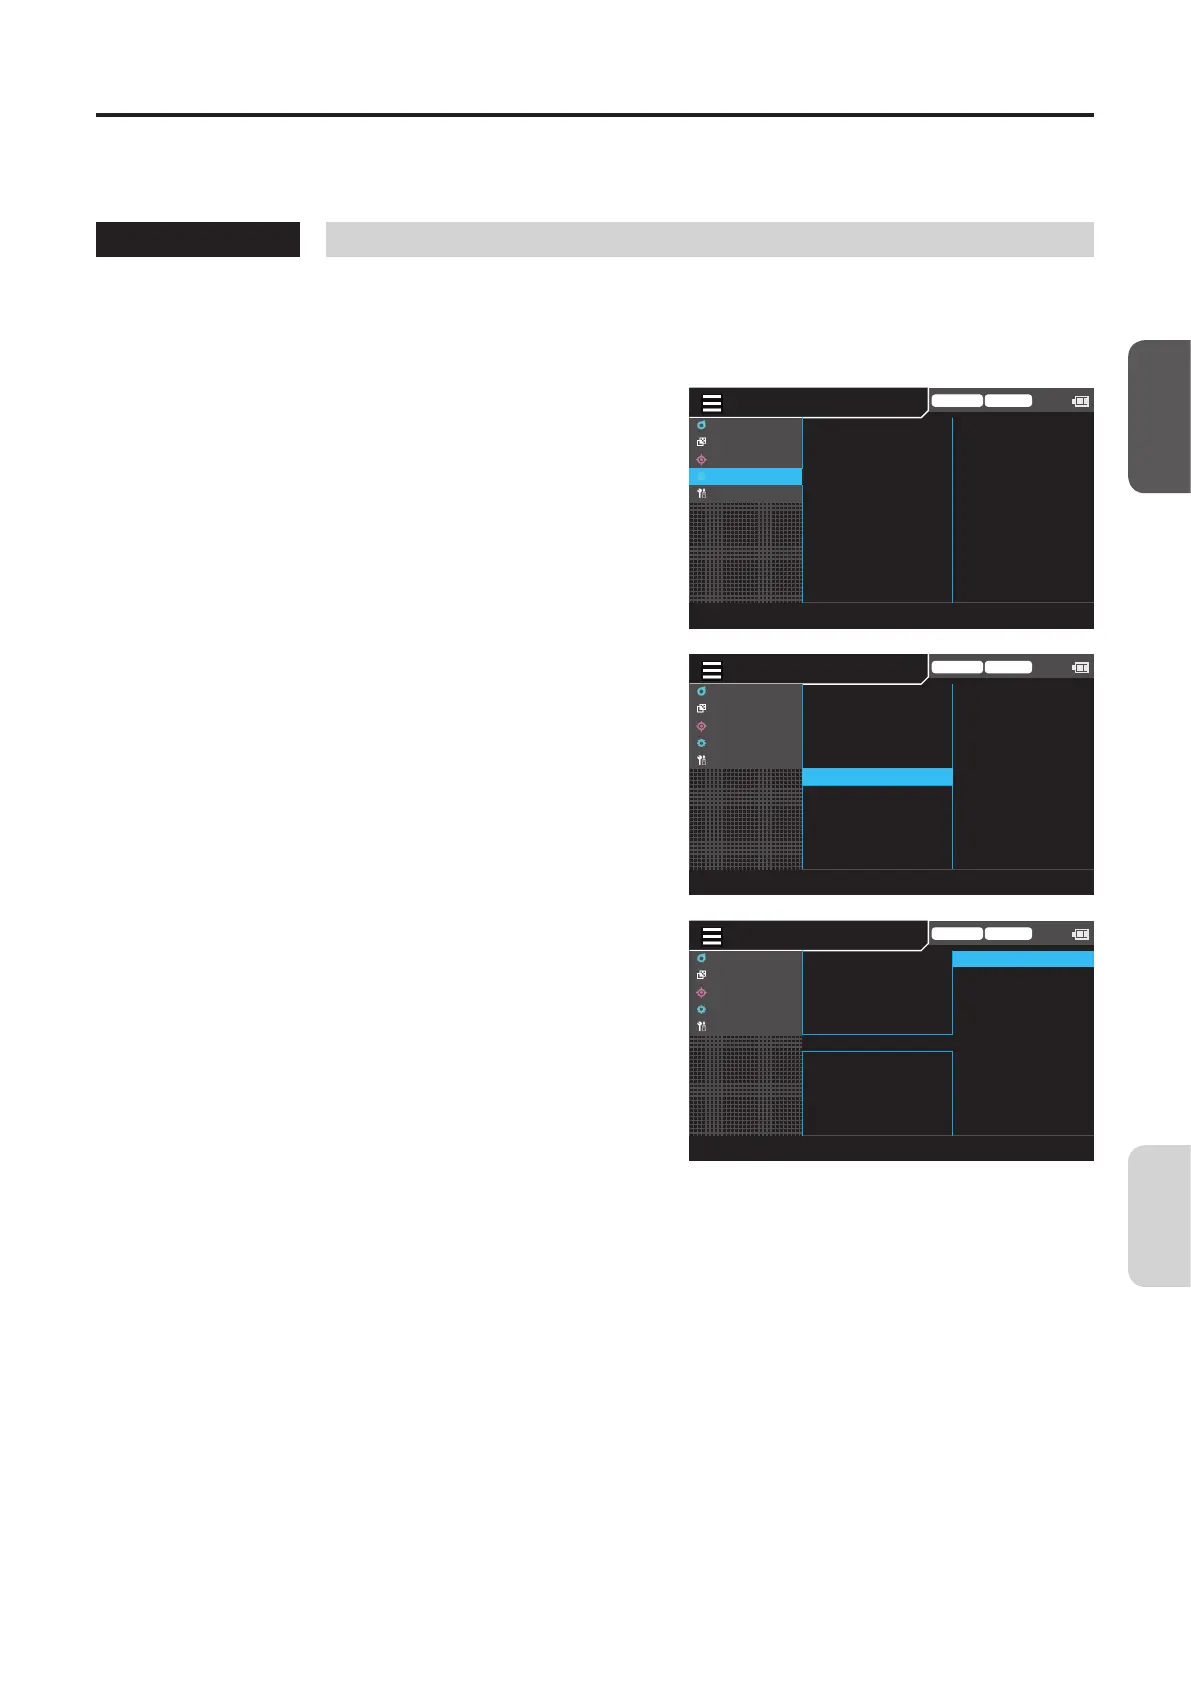
While the measurement screen is
displayed, press the [MENU] key.
The setting screen is displayed on the LCD screen.
2
Press the [UP] or [DOWN] key to select
[Option], and then press the [RIGHT] or
[ENTER] key.
MENU
Trigger mode 0-cal AUTO
MeasCond
UserCalib
Target
Option
System
Absolute
3 (Normal)
ON
ON
AUTO
cd/
㎡
ColorSpace
Absolute/difference
Brightness
Buzzer
Auto0-cal
SaveDestination
LuminanceUnits
3
Press the [UP] or [DOWN] key to select
[Save Destination], and then press the
[ENTER] key.
Trigger mode 0-cal AUTO
MeasCond
UserCalib
Target
Option
System
Absolute
3 (Normal)
ON
ON
AUTO
cd/
㎡
ColorSpace
Absolute/difference
Brightness
Buzzer
Auto0-cal
SaveDestination
LuminanceUnits
4
The screen for selecting [AUTO] or
[MANUAL] is displayed. Press the [UP] or
[DOWN] key to make a selection.
Trigger mode 0-cal AUTO
MeasCond
UserCalib
Target
Option
System
◉
AUTO
○
MANUAL
ColorSpace
Absolute/difference
Brightness
Buzzer
Auto0-cal
SaveDestination
LuminanceUnits
5
Press the [ESC] key.
The measurement screen is displayed on the LCD
screen.
The Save Destination setting will be kept even if the
POWER switch is set to OFF ().
CA-DP40Settings





 To Next Page