70
Setting the Measurement Speed
Set the speed for measurement.
* Selectable measurement speeds: FAST/ SLOW / AUTO / LTD.AUTO
* Factory setting: AUTO
Operating Procedure
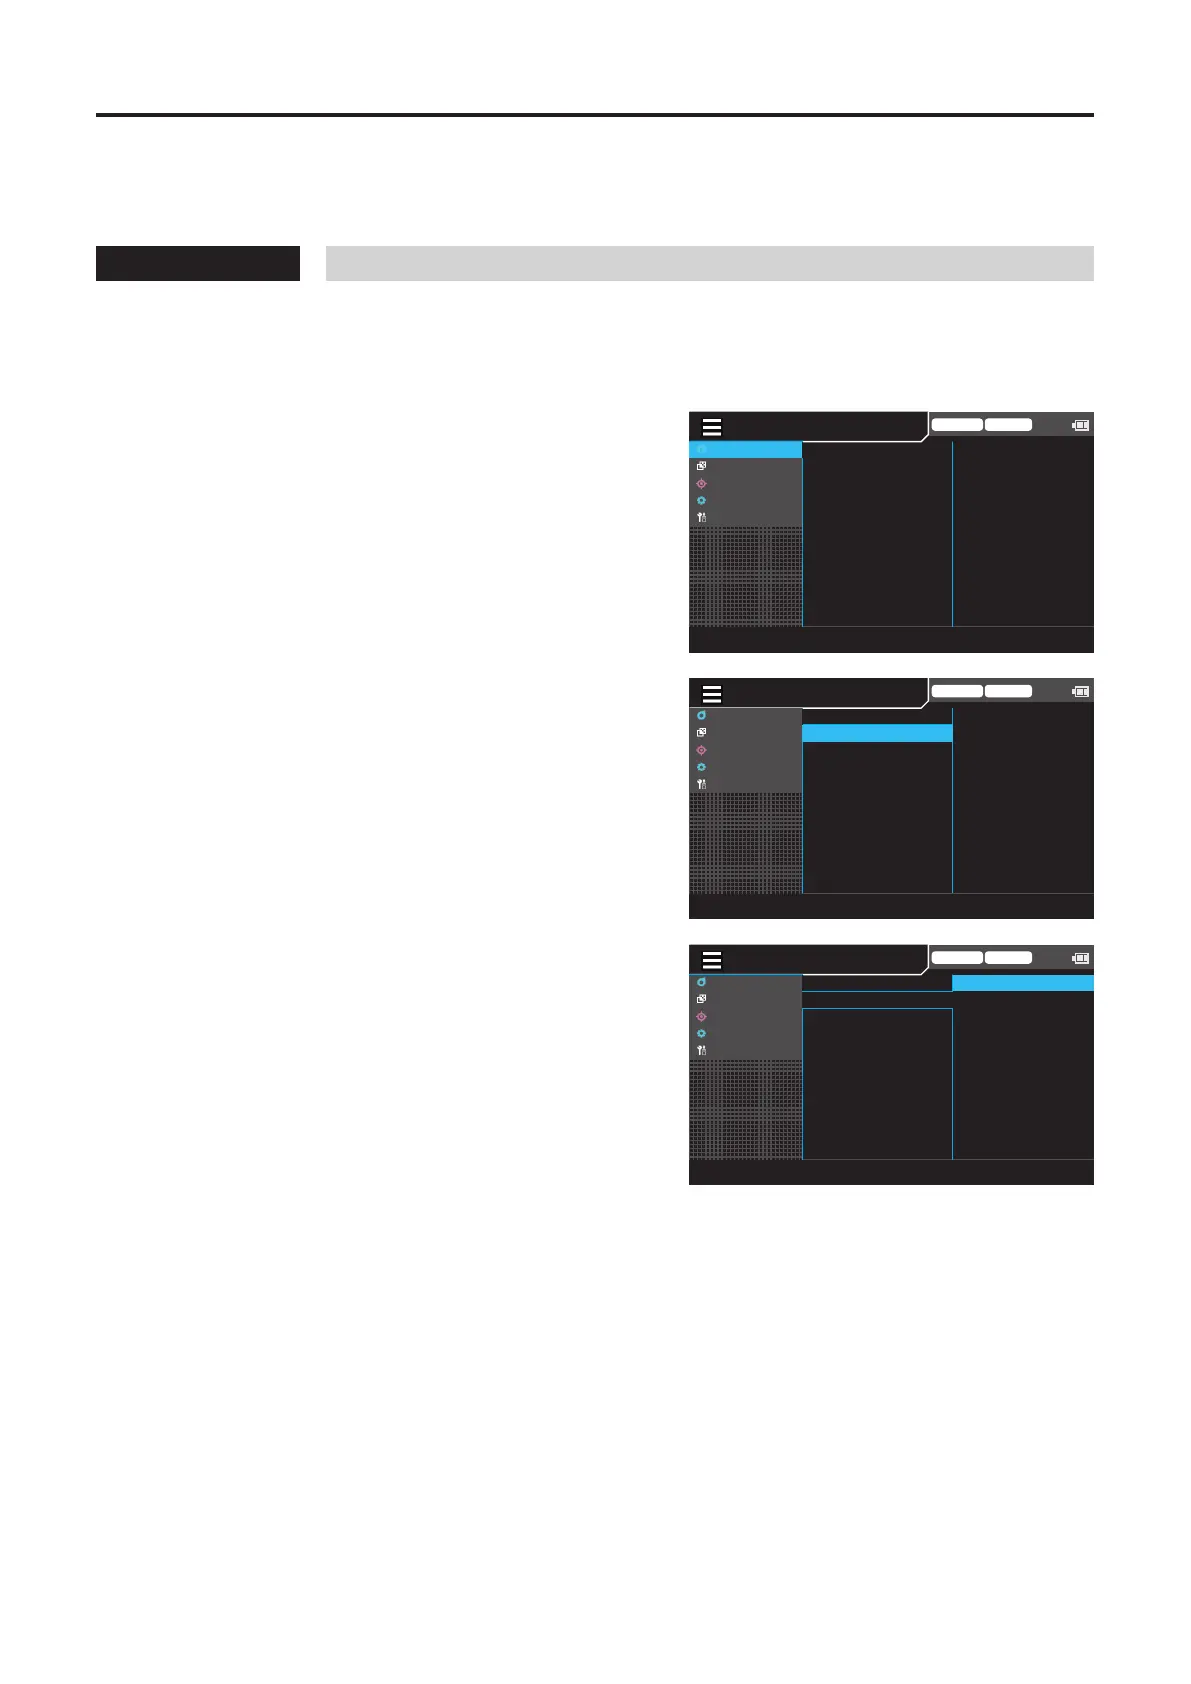
1
While the measurement screen is
displayed, press the [MENU] key.
The setting screen is displayed on the LCD screen.
2
Press the [UP] or [DOWN] key to select
[Meas Cond], and then press the [RIGHT]
or [ENTER] key.
Trigger mode 0-cal AUTO
MeasCond
UserCalib
Target
Option
System
NTSC
AUTO
OFF
OFF
OFF
0.07 Hz
SyncMode
MeasSpeed
TriggerMode
IntervalMeas
IntervalAlert
JEITAfreqresolution
3
Press the [UP] or [DOWN] key to select
[Meas Speed], and then press the
[ENTER] key.
Trigger mode 0-cal AUTO
MeasCond
UserCalib
Target
Option
System
NTSC
AUTO
OFF
OFF
OFF
0.07 Hz
SyncMode
MeasSpeed
TriggerMode
IntervalMeas
IntervalAlert
JEITAfreqresolution
4
The screen for selecting a measurement
speed is displayed. Press the [UP] or
[DOWN] key to select a measurement
speed.
• Selecting FAST can shorten measurement time,
but may compromise measurement repeatability
for low-luminance measurements.
• Selecting SLOW repeats FAST measurements
several times to ensure enhanced accuracy. Use
this mode when you want to perform
measurement with high repeatability.
• When AUTO is selected, the setting automatically
switches between “FAST”, “SLOW”, and “Longer
Integration Time” depending on the luminance
level.
• When LTD.AUTO is selected, measurements are
automatically selected between FAST and SLOW
settings depending on the luminance level.
Trigger mode 0-cal AUTO
MeasCond
UserCalib
Target
Option
System
◉
AUTO
○
LTD. AUTO
○
FAST
○
SLOW
SyncMode
MeasSpeed
TriggerMode
IntervalMeas
IntervalAlert
JEITAfreqresolution
5
Press the [ESC] key twice.
The measurement screen is displayed on the LCD
screen.
The measurement speed setting will be kept even if
the POWER switch is set to OFF ().
[Meas Cond] - [Meas Speed]