67
5. Measuring Light Sources [Measurement Screen]
4.
Conrm the light measuring range.
When you return to the Measurement screen,
select Range L ( ) or Range H ( )
depending on the brightness of the ash.
NOTE
●
Range L ( ) Select when measuring small and low power ash units
lower than 0ls), ver will appear if ash power is too high. Select
Range H.
●
Range H ( ) Select when measuring powerful ash units brighter
than 0ls) nder will appear if ash power is too low. Select Range L.
5.
Press the Measuring Button 5.
The meter will enter measurement standby mode.
While the icon is blinking, manually trigger the ash.
The [Measuring Mode] icon will blink for 90 seconds when measuring.
The display panel illumination will dim when the Measuring utton is pressed as the
display illumination can affect the reading. This is normal.
When the ash light is red, the measured value will be displayed for seconds, and
the display will return to measurement standby mode.
To cancel standby mode, touch the screen or press the Menu utton
6
.
NOTE
When the icon stops blining before triggering the ash, or when you want to
restart the 0-second delay cycle again, press Measuring utton
5
again.
Measurement in Cordless Flash Mode is complete.
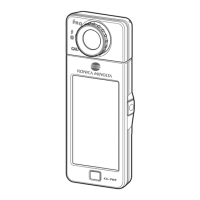
Light Selection Ring
2
Measuring utton
5
Range L
Range H
 Loading...