Commissioning
34
Pos: 45.21 /Übersc hriften/Überschri ften 3/U-Z/Verriegel ungsbleche einstelle n @ 178\mod_137404654324 9_78.docx @ 1524723 @ 3 @ 1
5.5.1 Adjusting the locking plates
Pos: 45.22 /BA/Inbetr iebnahme/Vorsätze/ Adapterrahmen/Hin weis Einstellungen an d en Verriegelungsbl echen rechts und links glei ch ausführen @ 163\mod_13 66032305295_78.doc x @ 1423790 @ @ 1
Note
Set the locking plates the same on the right and on the left.
Pos: 45.23 /BA/Inbetr iebnahme/Vorsätze/ Adapterrahmen/V erriegelungsbleche ei nstellen T1 Bild X-Di sc 620 @ 336\mod_143012222419 0_78.docx @ 2557601 @ @ 1
EFL000046_2
1
2
3
Fig. 7
Pos: 45.24 /BA/Inbetr iebnahme/Vorsätze/ Adapterrahmen/V erriegelungsbleche ei nstellen Einführsa tz BiG X 480/580 @ 163\mod_136 6111950543_78.doc x @ 1426040 @ @ 1
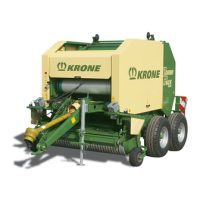
To set the locking plates (4):
Pos: 45.25 /BA/Inbetr iebnahme/Vorsätze/ Pendelrahmen/Verr iegelungsbleche ei nstellen BiG X 480/580 Text @ 261\mod_139938384655 8_78.docx @ 1991292 @ @ 1
• Lower the feed drive (1) of the forage harvester all the way.
• Align the pendulum tube (2) horizontally on the feed drive.
Pos: 45.26 /BA/Inbetr iebnahme/Vorsätze/ Pendelrahmen/Verr iegelungsbleche ei nstelle:n Schraube n lösen EasyFlow 300 S @ 262\mod_ 1399963851761_78. docx @ 2001947 @ @ 1
• Loosen the screw connections (5, 6) on the front attachment.
Pos: 45.27 /Layout Module /----------------Leerzeile-------------------- @ 240\mod_1395147357027_0.doc x @ 1890988 @ @ 1
Pos: 45.28 /BA/Inbetr iebnahme/Vorsätze/ Adapterrahmen/V erriegelungsbleche ei nstellen T2 Bild X-Di sc 620 @ 336\mod_143011963025 6_78.docx @ 2557377 @ @ 1
GPS00045
1
2
GPS00046
4
3
7
5
6
Fig. 8
Pos: 45.29 /BA/Inbetr iebnahme/Vorsätze/ Ankuppeln/Ankuppe ln BiG X 480/580 EasyFlo w 300 S Text @ 275\mod_140472047664 2_78.docx @ 2070587 @ @ 1
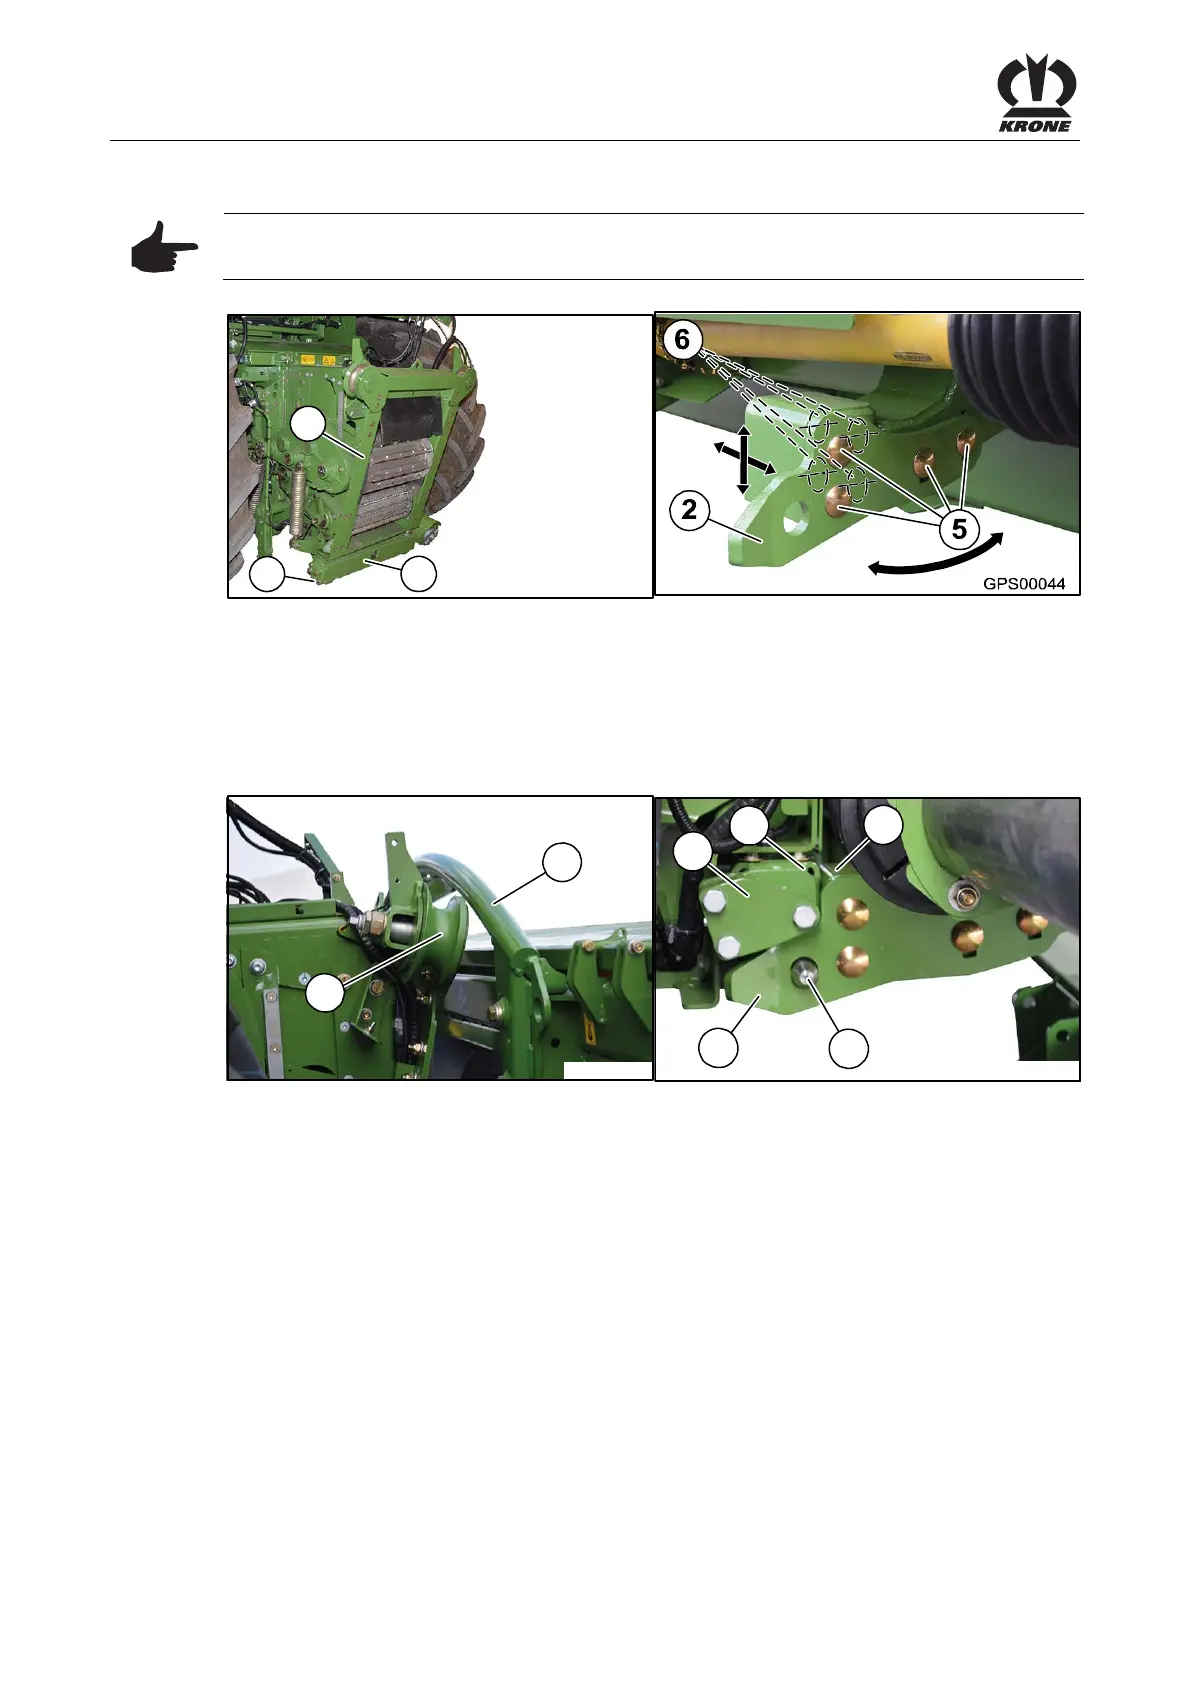
• Drive the forage harvester up to the machine until the roll guides (1) are under the support
chute (2).
• Release the locking pins (3), see the operating instructions for the forage harvester.
• Raise the adapter frame using the lifting hydraulics until the roll guides raise the front
attachment with the support chute.
Pos: 45.30 /BA/Inbetr iebnahme/Vorsätze/ Adapterrahmen/V erriegelungsbleche ei nstellen T1 X-Disc 620 @ 338\mod_1430733718292_ 78.docx @ 2564289 @ @ 1
• Ensure that the pendulum tube (6) of the forage harvester rests against the contact area (7)
of the header.
Pos: 45.31 /Layout Module /---------------Seitenumbruch---------------- @ 0\mod_1196175311226_0. docx @ 4165 @ @ 1