69Expert(t) 2000
TM
Maintenance Manual
17. Connect the packer cylinders
(refer to “Packer Removal
Procedure” on page 61);
18. Slowly retract the packer under
the rails until the end of the
packer stroke. Keep the packer
centered with the hopper,
re-install the side rails then tack
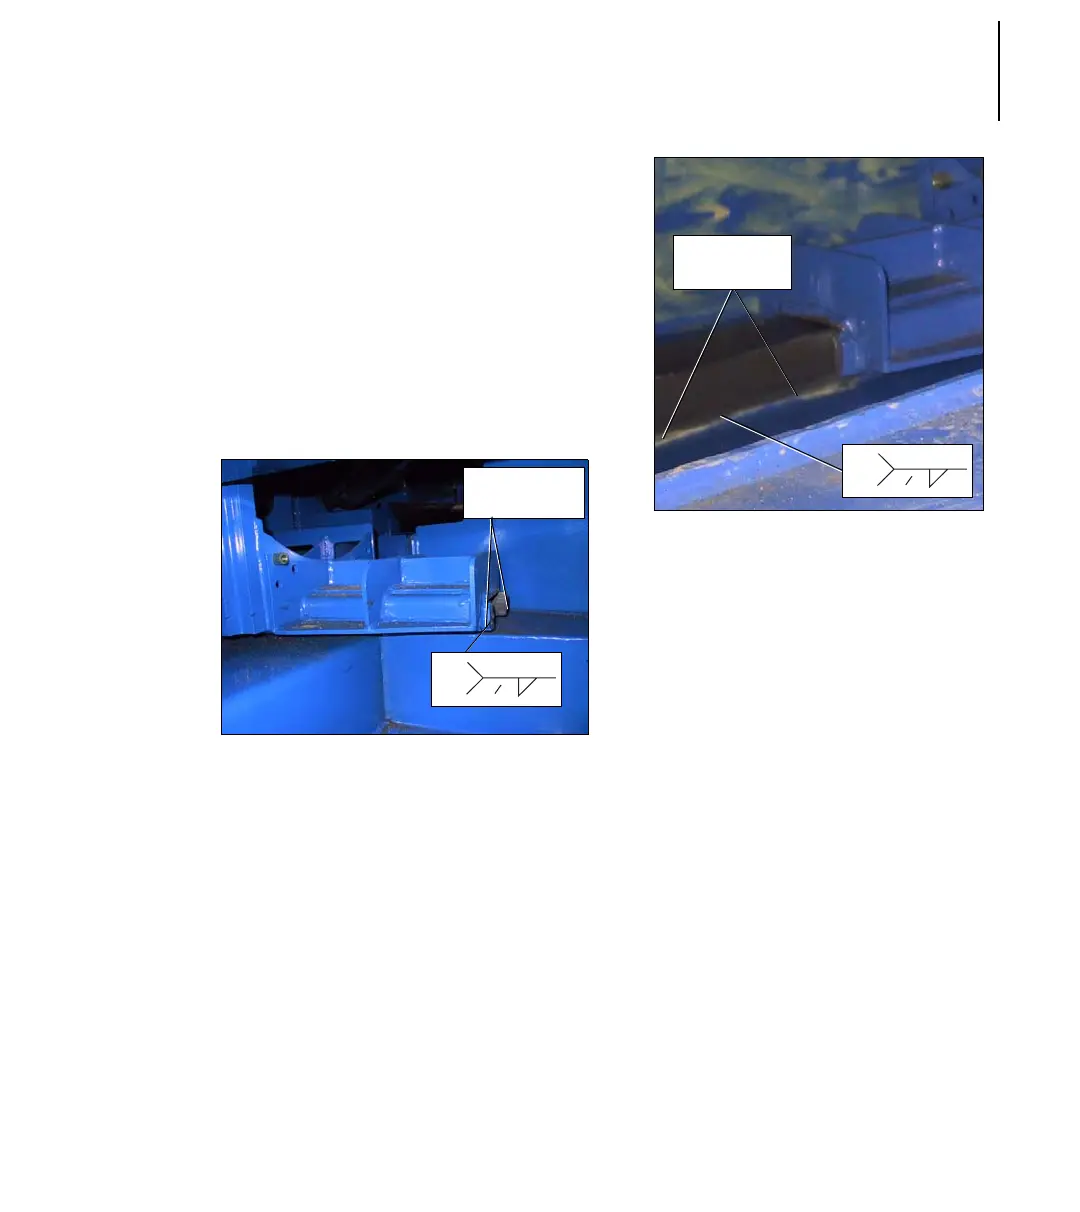
the floor guides to the hopper
floor (see Figure 110. “Floor
guide end-view”);
Figure 110. Floor guide end-view
19. Extend the packer to the middle
of the hopper; verify the
alignment with the hopper side
rails;
20. Stitch weld the floor guides going
towards the back of the vehicle;
21. Fully extend the packer to finish
welding under the packer;
22. Check for proper operation.
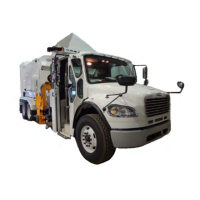
Figure 111. Floor guide end-view
Weld Here on
Both Sides of
the Floor Guide
FCAW
3-12
”
3
8
FCAW
3-12
”
3
8
Weld Here on
Both Sides of
the Floor Guide