14
Dispenser Setup
1. Turn on water source.
2. Open the pressure relief valve located on the remote
carbonator, by ipping up on the valve cap lever. Hold open
until water ows from the relief valve then close (ip down)
the relief valve.
3. Verify all Bag-In-Box contains syrup and check all
connections for leaks.
4. Place enough ice in the ice bin to ll approximately 1/2 of
the bin before plugging in the unit.
5. Connect unit power cord to grounded electical outlet.
1. Remove Bin Lids.
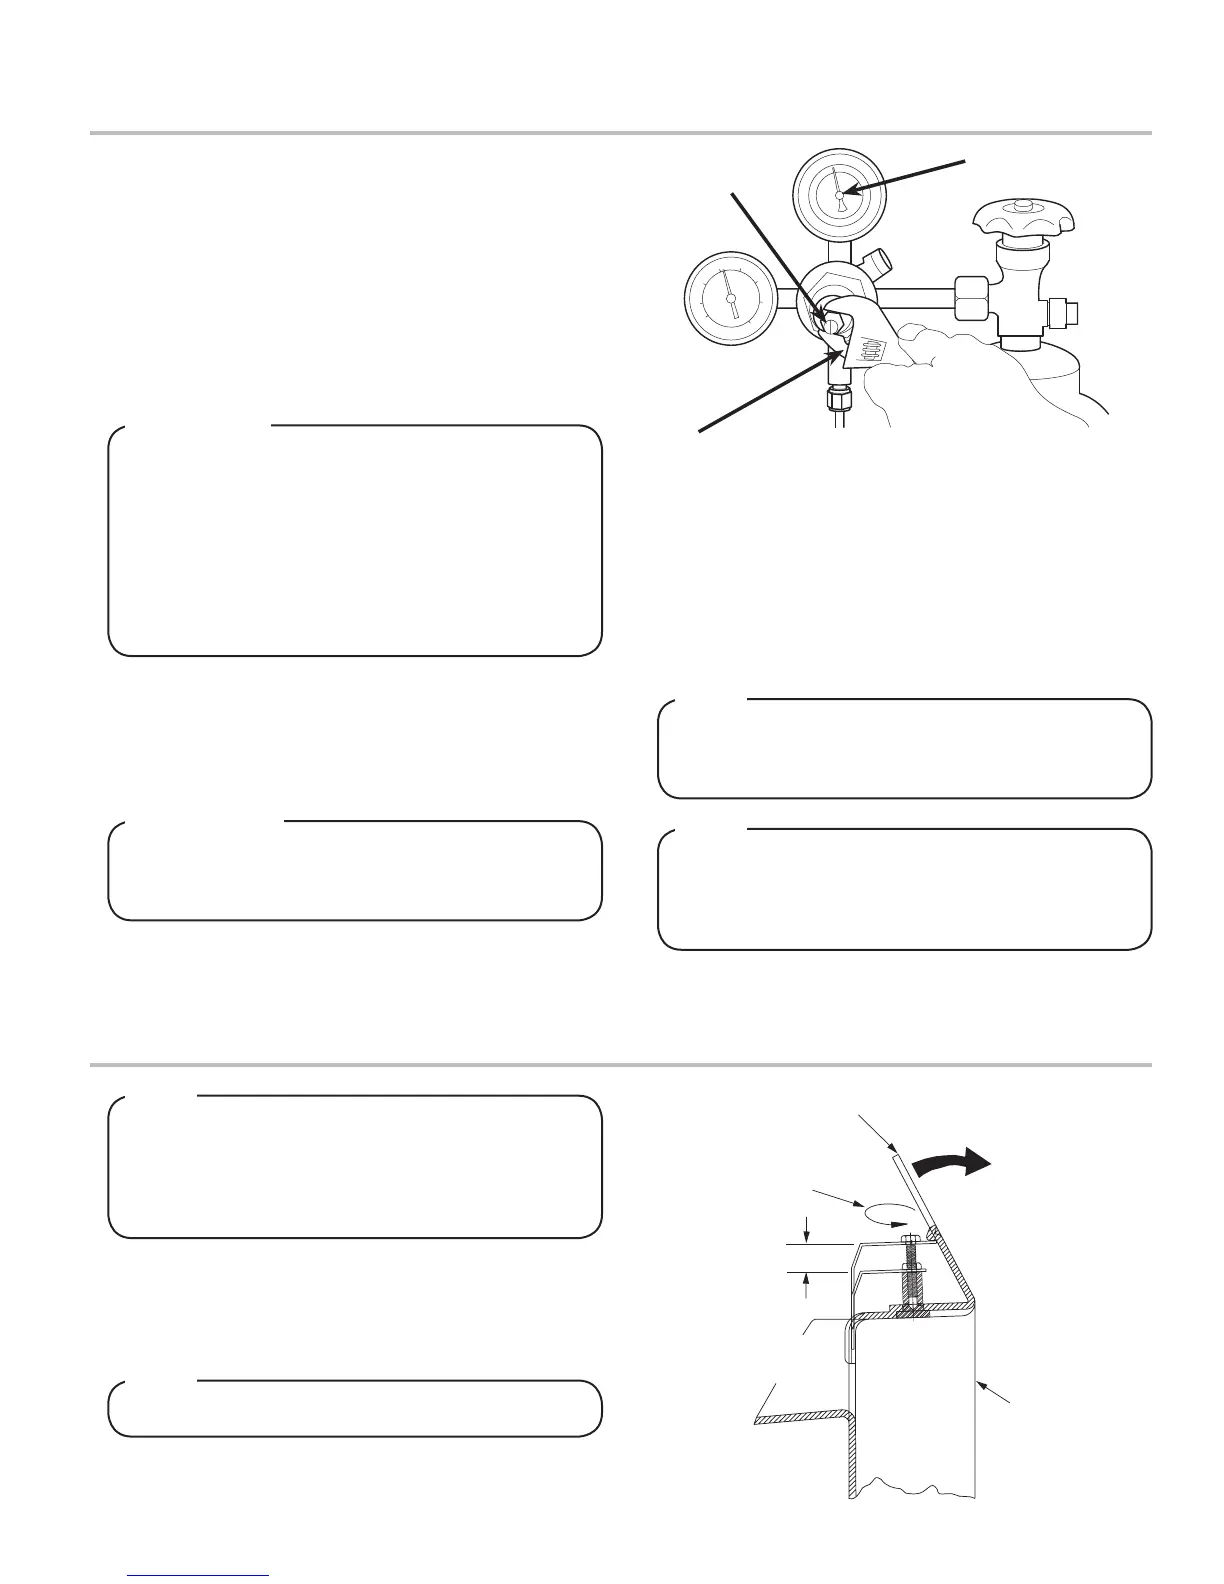
2. Adjust Ice Regulator to desired position by turning the
nut screw clockwise to close, or counter clockwise to
open, with the use of a nut driver or a socket wrench.
The dispenser must be properly electrically grounded
toavoidseriousinjuryorfatalelectricalshock.The
power cord has a three-prong grounded plug. If a
three-hole grounded electrical outlet is not available,
use an approved method to ground the unit. Follow
alllocalelectricalcodeswhenmakingconnections.
Each dispenser must have a separate electrical circuit.
Do not use extension cords. Do not connect multiple
electrical devices on the same outlet.
! WARNING
6. Test the motor operation by pushing the ice chute lever until
agitator motor begins to turn.
7. Activate each valve to ensure a good ow of water is
achieved.
8. Ensure pump deck is turned OFF before turning on CO
2
.
Thepumpdeckhasa3minutetimeoutfeature.Ifthe
timeoutoccurs,turnthedeckOFFthenONbyipping
the switch on the control box.
The total adjustment is 1/2 inch.
The Regulator Door Assembly (PN 82-2904) can
regulatethedispensediceow.Installationofan
Ice Flow Regulator is NOT necessary for the
dispensing of ice. This IBD unit will dispense ice
unrestricted.
TocheckforCO
2
leaks,closethevalveontheCO
2
cylinder and observe if the pressure to the system
dropswiththecylindervalveclosedforveminutes.
Openthecylindervalveaftercheck.
NOTE
NOTE
NOTE
NOTE
13. Activate each valve to purge air from the syrup lines.
10. Activate each valve until gas-out.
11. Plug in the remote carbonator pump deck, if not already
done so, and turn the switch to the ON position.
12. Activate each valve until the carbonator pump comes on.
Release the button, allow carbonator to ll and stop.
Repeat this process until a steady ow of carbonated water
is achieved.
Adjusting The Ice Flow Regulator (230 Volt Units Only)
Failure to disconnect the motor power supply will
damage the carbonator motor, the pump and void the
warranty
F ATTENTION
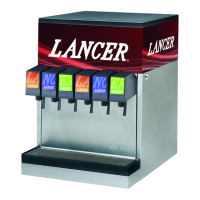
9. Turn on CO
2
at the source then, using a screwdriver, adjust
the high pressure regulator at the source to 75 PSI (0.517
MPA) then tighten locknut with wrench.
3. Reinstall bin lids.
Turn Screw to Adjust
Adjustment
To Ice
ICE
CUT AWAY VIEW
Access Slot in
If necessary, bend
Wheel
Clockwise to Close
Counter Clockwise to Open
Plastic Wheel Shroud
slightly forward for
easier installation.
for adjustment
Use the access slot
Shroud
Dispensing Chute
SIDE
A. Regulator Adjustment Screw
B. Adjust to 110 PSI (0.758 MPA)
C. Wrench
A
B
C