EasyManuals Logo

LEGRAND tynetec Advent XT User Manual

LEGRAND tynetec Advent XT
63 pages
To Next Page IconTo Next Page
To Previous Page IconTo Previous Page
Page #23 background imageLoading...
Page #23 background image
Doc No. FM0410 issue N Page 23
BASE FIXED TO WALL
LOCATE TOP TWO CLIPS FIRST
NOTE
ENSURE THE PULLCORD
IS LOCATED IN THESE
SLOTS
SWING
DOWNWARD
AND CLIP
TOGETHER
INSERT THE TRIANGLE PEGS
INTO THE BASE CLIPS.
APPLY MORE FORCE TO
ONE PEG, WHILE GENTLY
LIFTING THAT SIDE OF THE LID.
THEN APPLY FORCE TO THE
OTHER CLIP, SIMULTANEOUSLY
LIFTING THE LID.
LIFT LID
OUTWARDS
FROM
LOWER EDGE
17. FITTING & REMOVING THE INTERCOM FRONT
Before fitting the intercom front; set the Address and Options DIL switches and check links LK1-3 are fitted in the correct
positions. Ensure all cables are properly terminated and secure spare wires in the clips provided.
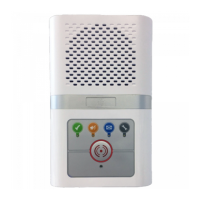
FITTING THE INTERCOM FRONT
Locate the 2 top corners of the intercom front over the 2 top corners of the intercom back, swing downwards and clip
together ensuring the pullcord is located in its slots.
REMOVING THE INTERCOM FRONT
Use the pegs on the orange triangle to push the clips one at a time on the lower face whilst pulling the front outwards
from the bottom edge.
ALWAYS CHECK THE PULLCORD
OPERATES AFTER THE FRONT IS FITTED

Table of Contents

Questions and Answers:

Question and Answer IconNeed help?

Do you have a question about the LEGRAND tynetec Advent XT and is the answer not in the manual?

LEGRAND tynetec Advent XT Specifications

General IconGeneral
BrandLEGRAND
Modeltynetec Advent XT
CategorySecurity System
LanguageEnglish

Related product manuals