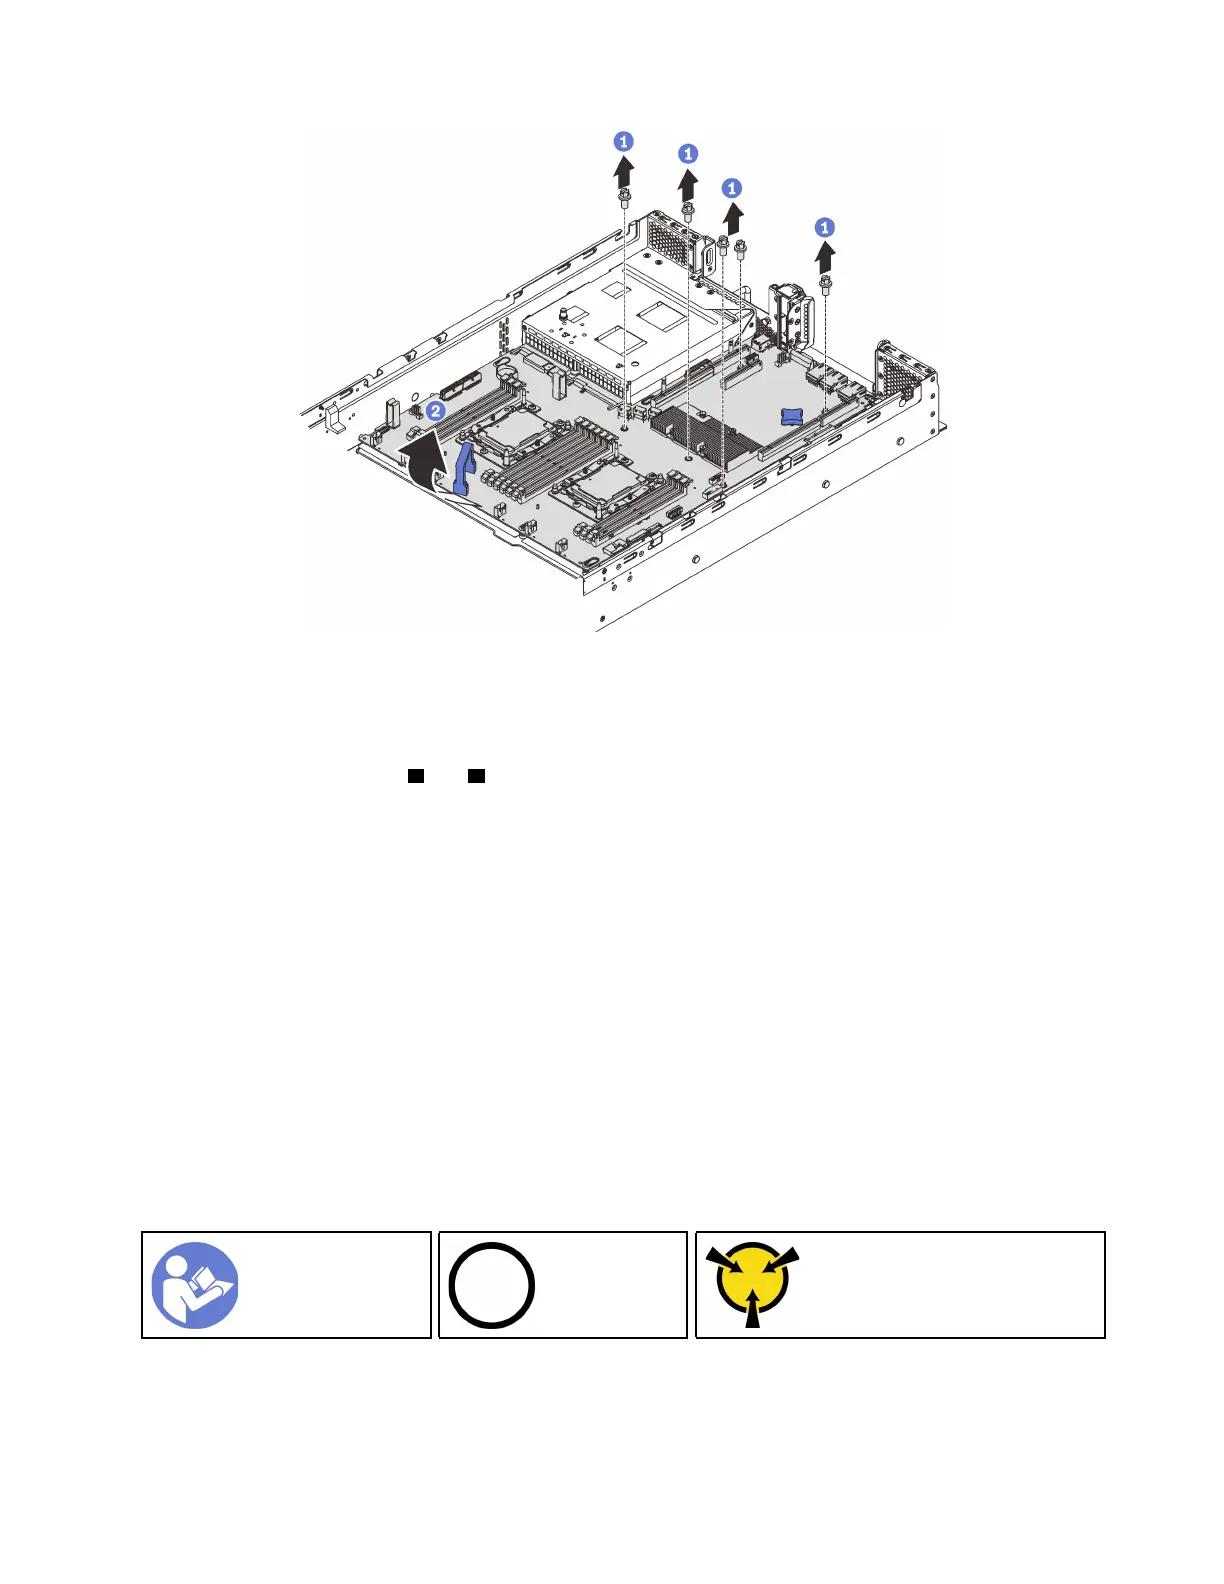
Figure 123. System board removal
Step 1. Remove the four screws that secure the system board to the chassis, and put the screws in a safe
place.
Step 2. Hold the lift handles
1 and 2 on the system board, slightly pull the system board towards the front
of the server, and lift the system board upwards. Then, remove the system board from the server
carefully.
If you are instructed to return the old system board, follow all packaging instructions and use any packaging
materials that are provided.
Important: Before you return the system board, make sure that you install the CPU socket dust covers from
the new system board. To replace a CPU socket dust cover:
1. Take a dust cover from the CPU socket assembly on the new system board and orient it correctly above
the CPU socket assembly on the removed system board.
2. Gently press down the dust cover legs to the CPU socket assembly, pressing on the edges to avoid
damage to the socket pins. You might hear a click on the dust cover is securely attached.
3. Make sure that the dust cover is securely attached to the CPU socket assembly.
Install the system board
Use this information to install the system board.
“Read the
installation
Guidelines” on
page 53
“Power off
the server
for this task”
on page 13
“ATTENTION:
Static Sensitive Device
Ground package before opening”
on page 56
Attention: Disconnect all power cords for this task.
To install the system board, complete the following steps:
Chapter 3. Hardware replacement procedures 157

 Loading...


