Step 3. Insert the retainer into the keyhole that matches the size of your M.2 drive; then, and slide it back
until the retainer locking nubs are in the holes.
M.2 drive replacement
M.2 drives are in the I/O tray that is accessed from the rear of the server.
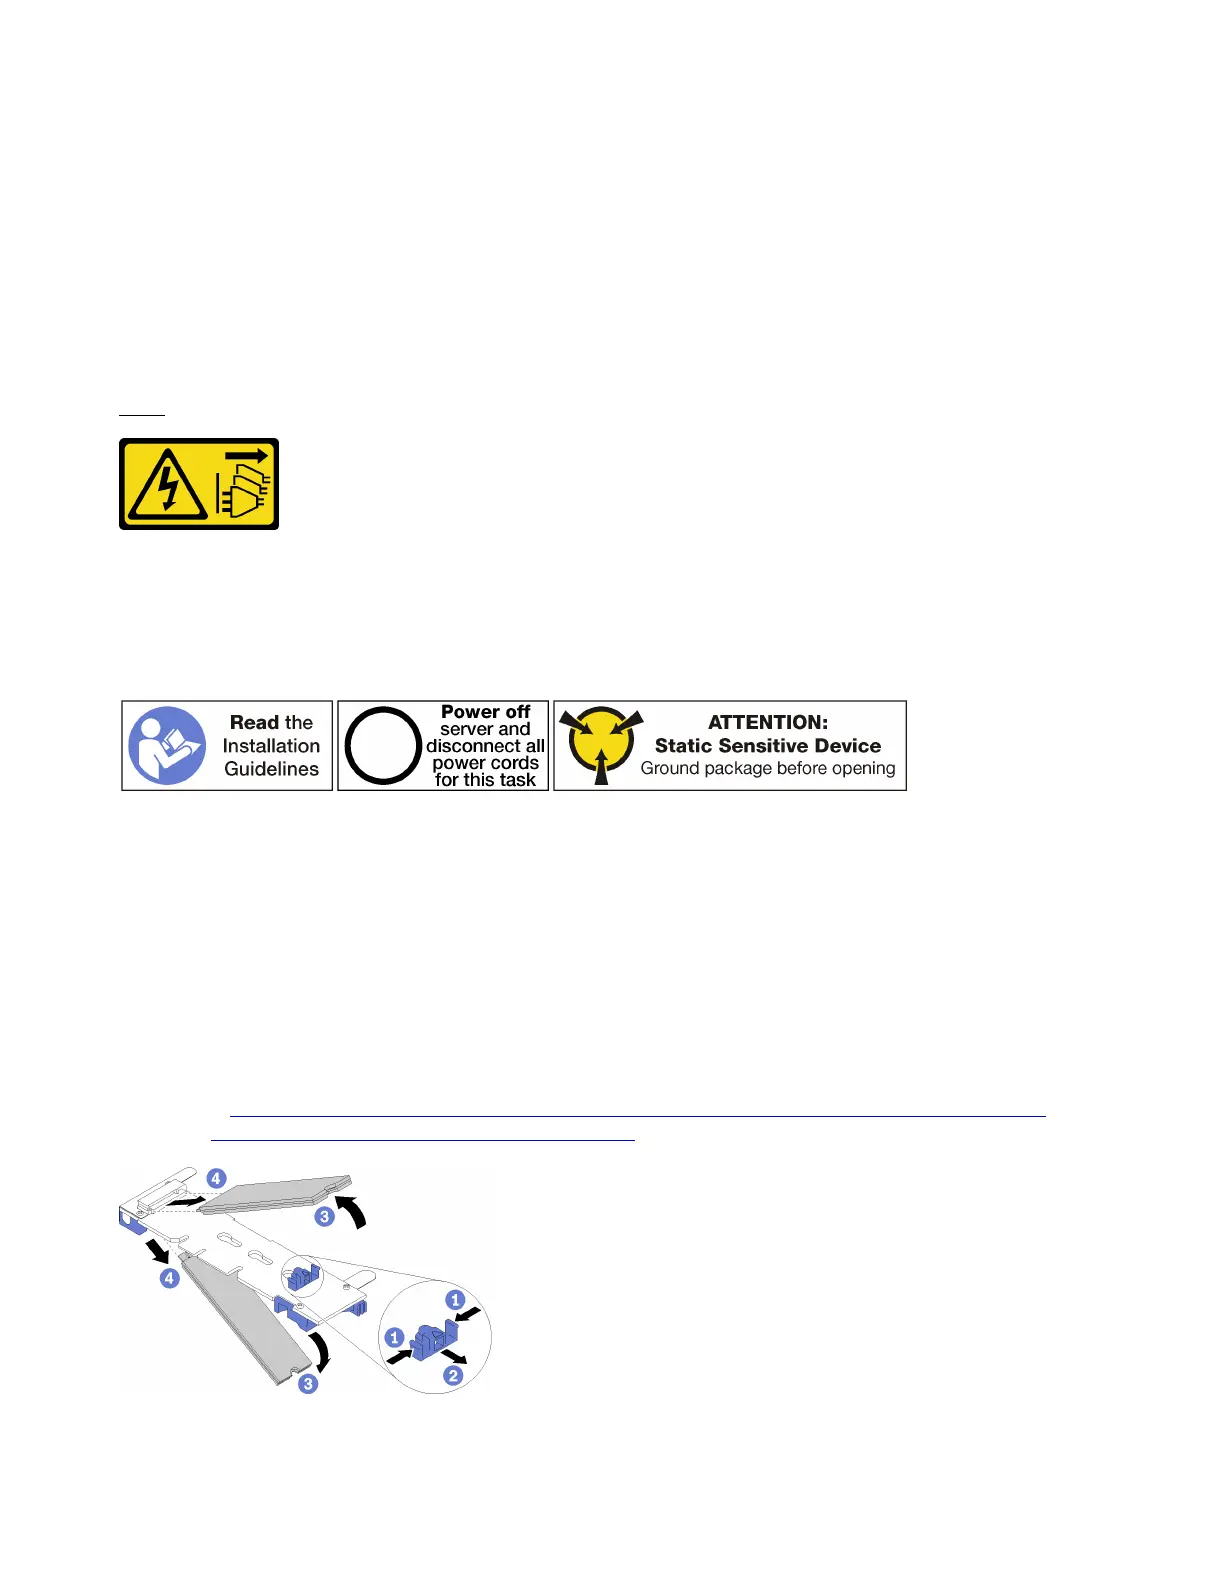
Remove an M.2 drive
The M.2 drive is in the I/O tray that is accessed from the rear of the server. After removing the I/O tray and the
M.2 backplane, slide open the drive retainer and rotate the M.2 drive from the backplane.
S002
CAUTION:
The power control button on the device and the power switch on the power supply do not turn off the
electrical current that is supplied to the device. The device also might have more than one power
cord. To remove all electrical current from the device, ensure that all power cords are disconnected
from the power source.
Before you remove an M.2 drive:
1. Disconnect and label all cables connected to adapters in the I/O tray; then, remove the I/O tray. See
“Remove the I/O tray” on page 152.
2. Remove the riser for slots 10 through 15 (right riser) or the riser for slots 16 and 17 to access the M.2
backplane. See “Remove the riser for slots 10 through 15 (right riser)” on page 171 or “Remove the riser
for slots 16 and 17” on page 174.
3. Remove the M.2 backplane from your system. See “Remove the M.2 backplane” on page 154.
Complete the following steps to remove an M.2 drive.
Watch the procedure. A video of the installation process is available:
• Youtube:
https://www.youtube.com/playlist?list=PLYV5R7hVcs-DbSYJFY74PoKmph7vgrkKH&playnext=1
• Youku: http://list.youku.com/albumlist/show/id_50952215
Figure 95. M.2 drive removal
158 ThinkSystem SR950 Setup Guide

 Loading...


