Make sure that all server power cords are disconnected from their power sources before performing
this procedure.
Before you install the compute tray:
1. Make sure that all cables, adapters, and other components are installed and seated correctly and that
you have not left loose tools or parts inside the server.
2. Make sure that all internal cables are correctly routed. See “Internal cable routing” on page 24.
Complete the following steps to install the compute tray when it is fully removed from the chassis:
Watch the procedure. A video of the replacement process is available:
• Youtube:
https://www.youtube.com/playlist?list=PLYV5R7hVcs-DbSYJFY74PoKmph7vgrkKH&playnext=1
• Youku: http://list.youku.com/albumlist/show/id_50952215
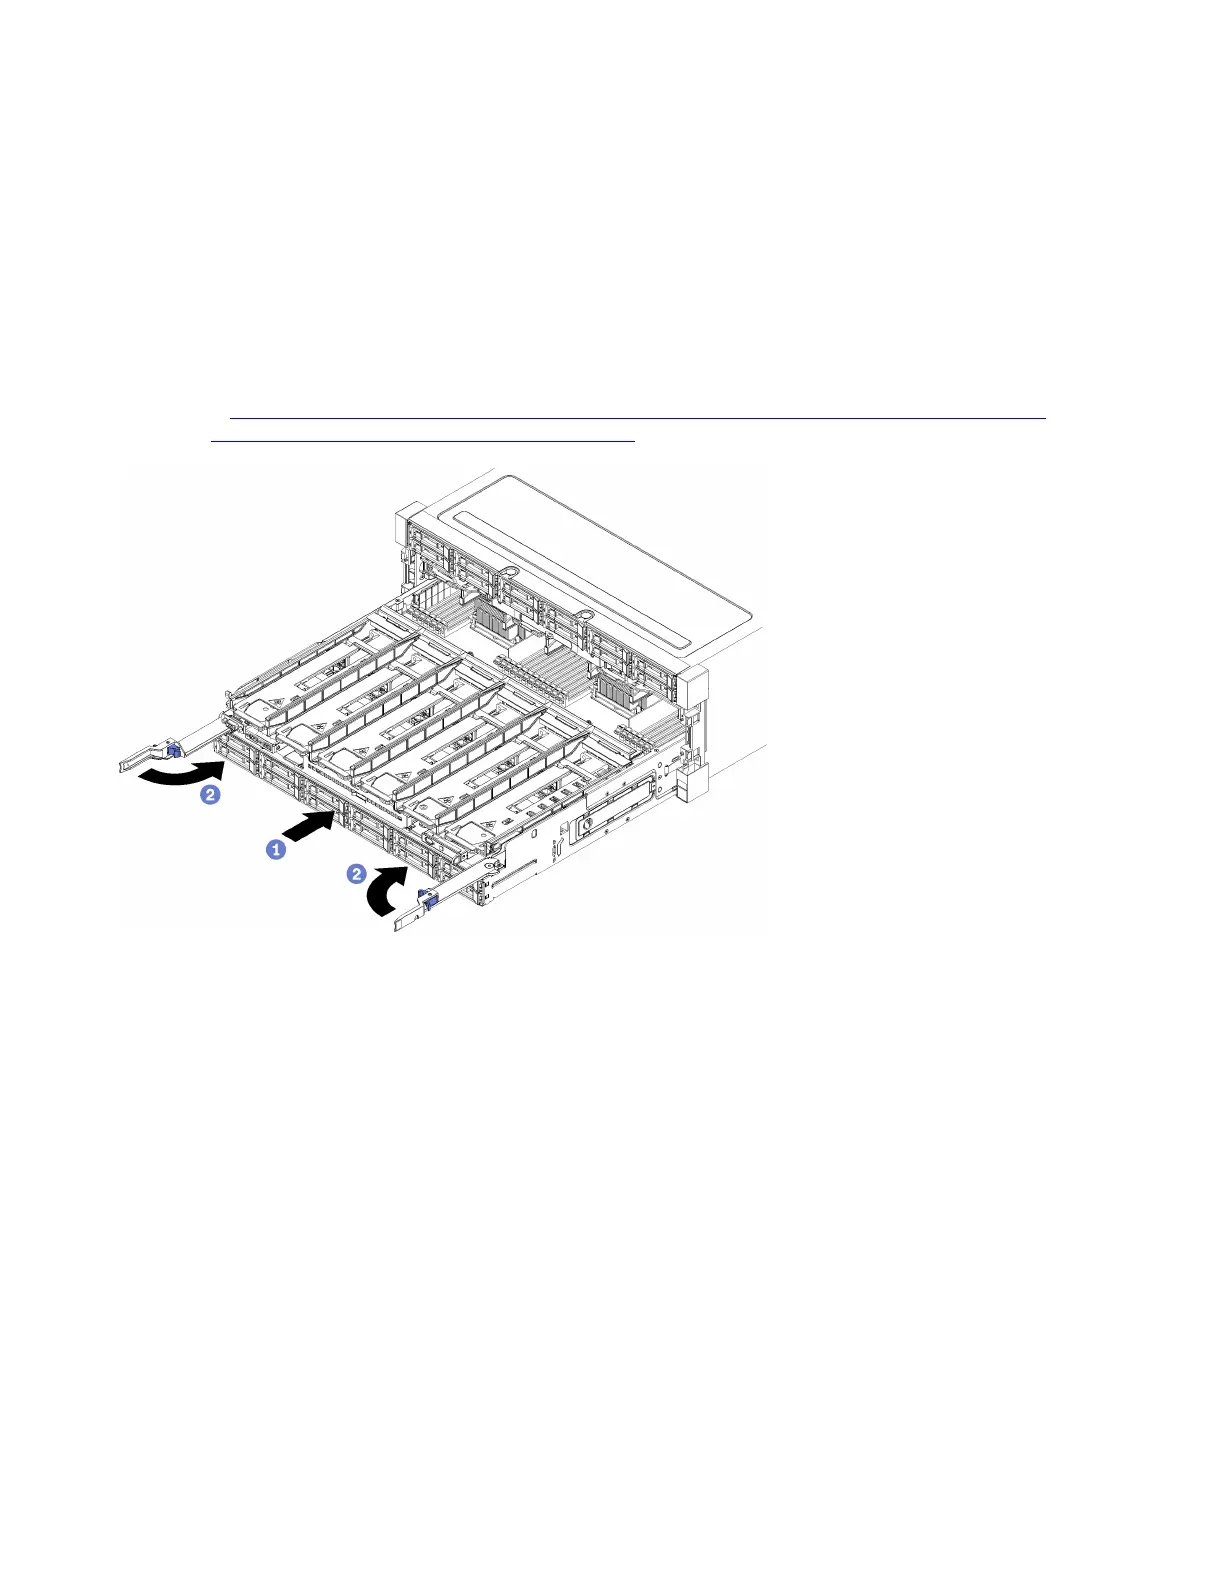
Figure 71. Compute tray installation (fully removed)
Important: Compute trays must inserted in the chassis with the processors and memory visible from the
top.
Step 1. Align the compute tray with its opening in the front of the chassis and insert.
Step 2. Fully open the compute tray release levers and push the compute tray into the chassis until it stops.
Step 3. Rotate the compute tray release levers until they lock, fully closed.
If you are done performing installation or maintenance procedures at the front of the chassis, install the front
cover. See “Install the front cover” on page 139.
Compute system board replacement
Compute system boards are in the upper or lower compute tray that is accessed from the front of the server.
Remove a compute system board
Remove a compute system board by disconnecting the cables inside the compute tray, pressing the release
clips on the compute system board, and sliding it out of the compute tray.
126
ThinkSystem SR950 Setup Guide

 Loading...


