Step6.Opentheretainingclips1oneachendoftheDIMMslot.Then,installtheDIMMintotheslot.
Attention:ToavoidbreakingtheretainingclipsordamagingtheDIMMslots,openandclose
theclipsgently.
Figure27.DIMMinstallation
Step7.FirmlypresstheDIMMstraightdownintotheconnectorbyapplyingpressureonbothendsofthe
DIMMsimultaneously.TheretainingclipssnapintothelockedpositionwhentheDIMMisfirmly
seatedintheconnector.
Note:IfthereisagapbetweentheDIMMandtheretainingclips,theDIMMhasnotbeencorrectly
inserted;opentheretainingclips,removetheDIMM,andthenreinsertit.
Step8.Completethepartsreplacement.See“Completingthepartsreplacement”onpage172.
Removingahot-swapharddiskdrive
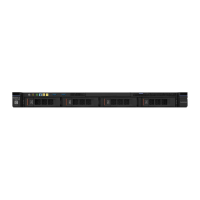
ThedriveIDthatisassignedtoeachdriveisprintedonthefrontoftheserver.TheIDnumbersandthedrive
baynumbersarethesame.Fordetailedinformation,see“Frontview”onpage15
.
Attention:
•Toavoiddamagetotheharddiskdriveconnectors,makesurethattheservercoverisinplaceandfully
closedwheneveryouinstallorremoveaharddiskdrive.
•Toensureadequatesystemcooling,donotoperatetheserverformorethantwominuteswithouteither
aharddiskdriveorafillerinstalledineachbay.
•Beforeyouchangeharddiskdrives,HDDcontrollers(includingcontrollersthatareintegratedonthe
systemboard),HDDbackplanes,orHDDcables,backupallimportantdatathatisstoredonthehard
diskdrives.
•BeforeyouremoveanycomponentofaRAIDarray,backupallRAIDconfigurationinformationand
dataonyourdrive.
Toremoveahot-swapharddiskdrive,dothefollowing:
100LenovoSystemx3250M6InstallationandServiceGuide

 Loading...


