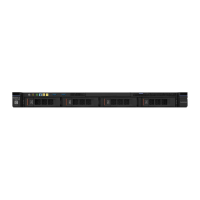
Step6.Reinstallthesecuritybezel.See“Installingthesecuritybezel”onpage92.
Installingasimple-swapharddiskdrive
ThedriveIDthatisassignedtoeachdriveisprintedonthefrontoftheserver.TheIDnumbersandthedrive
baynumbersarethesame.Fordetailedinformation,referto“Frontview”onpage15
.
Beforeyouinstallasimple-swapSASorSATAharddiskdrive,readthefollowinginformation.Foralistof
supportedharddiskdrives,gotohttp://www.lenovo.com/serverproven/.
•Locatethedocumentationthatcomeswiththeharddiskdriveandfollowthoseinstructionsinadditionto
theinstructionsinthistopic.
•Makesurethatyouhaveallthecablesandotherequipmentspecifiedinthedocumentationthatcomes
withthedrive.
•Selectthebayinwhichyouwanttoinstallthedrive.
•Checktheinstructionsthatcomewiththedrivetodeterminewhetheryouhavetosetanyswitchesor
jumpersonthedrive.IfyouareinstallingaSASorSATAdevice,besuretosettheSASorSATAID
forthatdevice.
•Youcaninstalluptoeight2.5-inchorfour3.5-inchsimple-swapSASorSATAharddiskdrivesintheserver.
•Theelectromagneticinterference(EMI)integrityandcoolingoftheserverareprotectedbyhavingallbays
andPCIandPCIExpressslotscoveredoroccupied.Whenyouinstalladrive,savetheEMCshieldand
fillerfromthebayincaseyoulaterremovethedevice.
•Foracompletelistofsupportedoptionaldevicesfortheserver,goto:
http://www.lenovo.com/serverproven/
Toinstallasimple-swapharddiskdrive,dothefollowing:
Step1.Turnofftheserver.Then,disconnectallexternalcablesandremoveallperipheraldevices.
Step2.Removethesecuritybezel.See“Removingthesecuritybezel”onpage91.
Step3.Removethefillerfromtheemptydrivebay.
Step4.Touchthestatic-protectivepackagethatcontainsthedrivetoanyunpaintedmetalsurfaceonthe
server.Then,removethedrivefromthepackageandplaceitonastatic-protectivesurface.
Chapter7.Removingandinstallingservercomponents105

 Loading...


