EasyManuals Logo

Lexmark C950 Series User Manual

Lexmark C950 Series
275 pages
To Next Page IconTo Next Page
To Previous Page IconTo Previous Page
Page #204 background imageLoading...
Page #204 background image
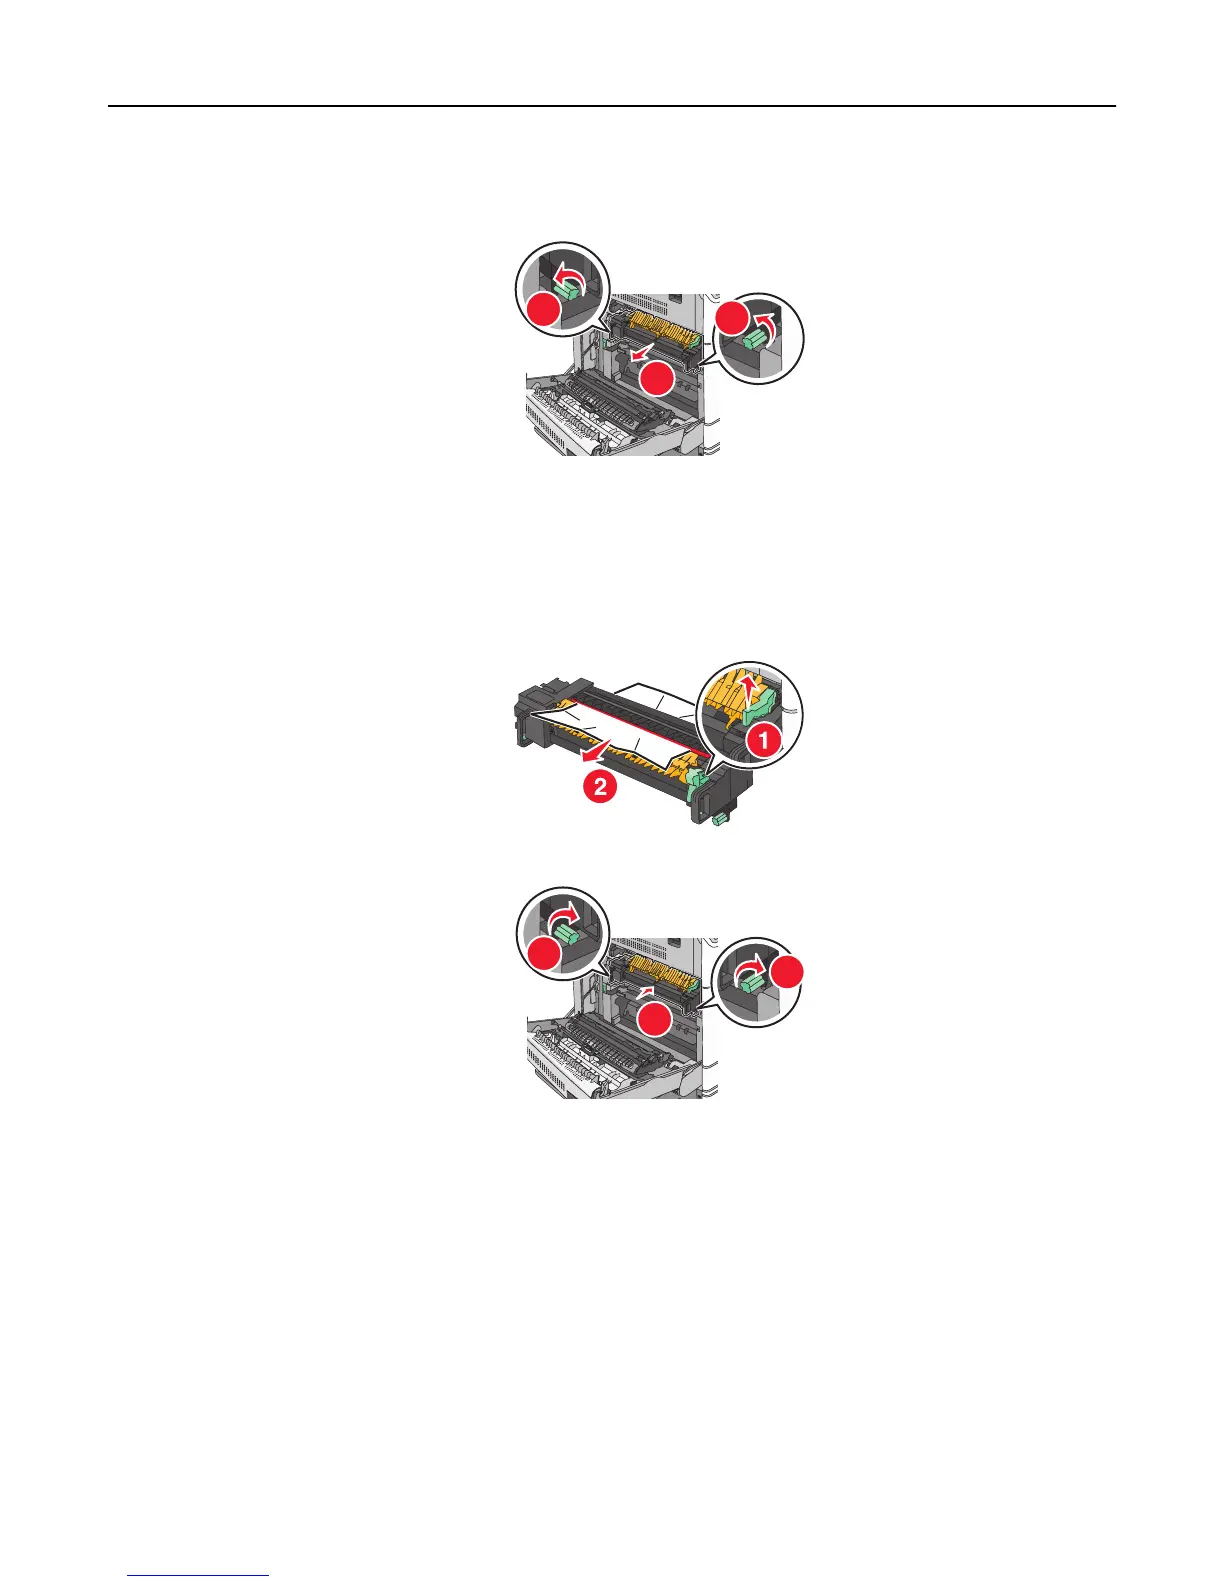
1 Remove the thumbscrew from each side of the fuser unit by rotating them counterclockwise.
2 Lift the handles on each side of the fuser, and then pull to remove the fuser unit.
2
1
1
3 Lift the green lever, firmly grasp the paper on each side, and then gently pull it out.
Notes:
Make sure all paper fragments are removed.
If the paper is in the fuser, then lower the fuser nip release lever and switch it to envelope mode.
After removing the jammed paper, return the lever to the proper position.
4 Align the fuser unit using the handles on each side, and then place it back into the printer.
1
2
2
3 Close door A.
4 If necessary, touch Continue from the printer control panel.
Clearing jams 204

Table of Contents

Questions and Answers:

Question and Answer IconNeed help?

Do you have a question about the Lexmark C950 Series and is the answer not in the manual?

Lexmark C950 Series Specifications

General IconGeneral
Print TechnologyColor Laser
Print Resolution1200 x 1200 dpi
Monthly Duty CycleUp to 300, 000 pages
Standard Output Capacity500 sheets
Duplex PrintingYes
Processor Speed1.2 GHz
Operating System CompatibilityWindows, Mac OS, Linux
Print SpeedUp to 50 ppm
Memory1024 MB (Upgradable to 2048 MB)
ConnectivityUSB, Ethernet
Media Sizes SupportedA3, A4, A5, Executive, Folio, Legal, Letter, Statement, Universal
Standard Input Capacity620 sheets
Max Paper Capacity5, 140 sheets

Related product manuals