Before start-up
- 38 - 10.13
12 Before start-up
12.1 Connecting the torch
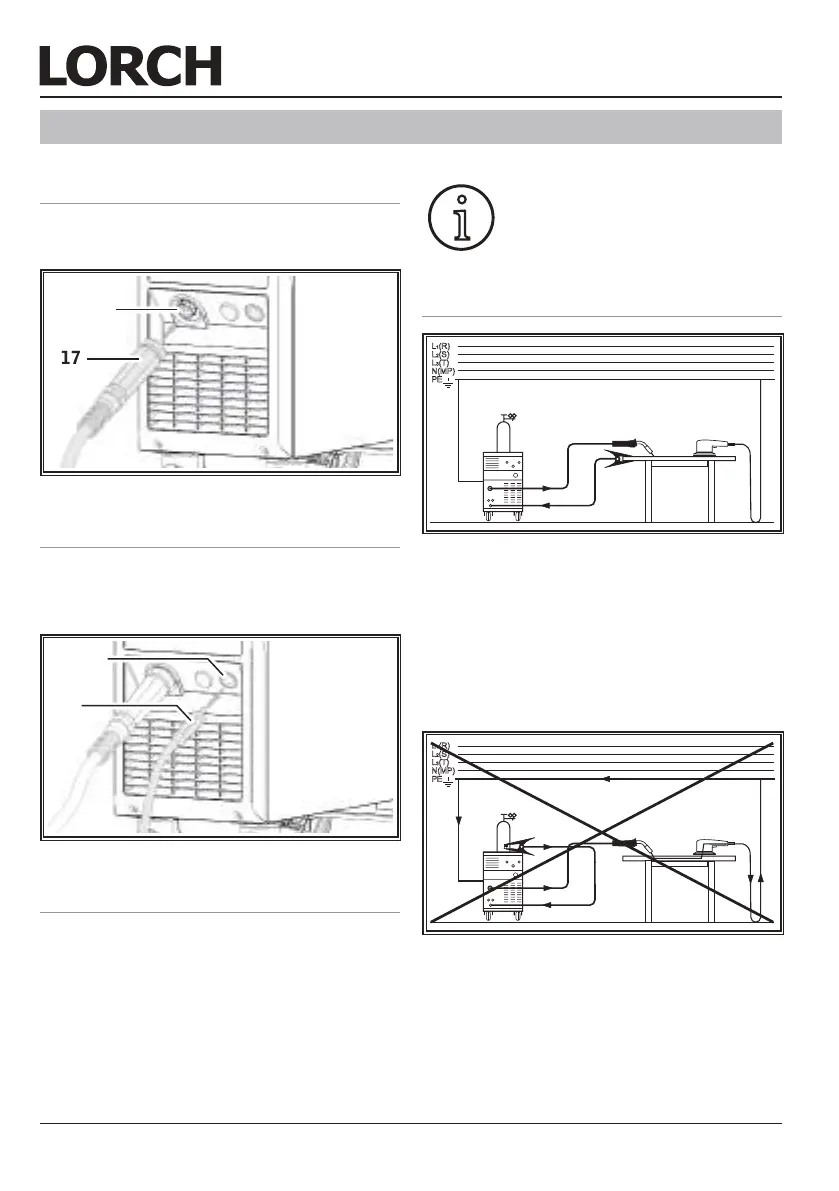
 Connect the central connector 17 of the
torch to the central socket 11.
17
11
Abb. 2: Connecting the torch
12.2 Connecting the ground cable
 Connect welding return cable 18 to con-
nector 10 and secure it by turning it clock-
wise.
10
18
Abb. 3: Connecting the ground cable
12.3 Select mains voltage
(Only for machines with mains voltage
switch-over, refer to technical data )
 Set the required voltage by using mains
voltage switch 4.
For 230 V operation, the adapter CEE 16
on shock proof plug (incl. in delivery) may
be used.
Performance values are limited
in 230 V mode, i.e. max welding
power is limited to 2/3 of the values
stated in technical data.
12.4 Fastening the ground clamp
Abb. 4: Correct
 Attach the ground clamp immediately be-
side the welding point so that the welding
current will not try to nd its own return
path through machine parts, ball bearings
or electric circuits.
 Connect the ground clamp rmly to the
welding bench or the workpiece.
Abb. 5: Incorrect
Do not place the ground clamp on the
welding machine or the gas cylinder; oth-
erwise the welding current will be carried
via the protective conductors and it will
destroy these.

 Loading...