2
Camera Overview
• / Status: Glows when camera is connected to the Internet. Flashes when there is
a connection problem.
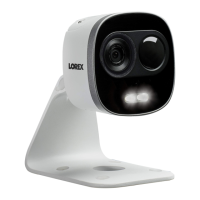
7. PIR Motion Sensor: Allows the camera to detect motion by tracking body heat.
8. In
frared LED: Allows the camera to see in the dark.
9. DC/IN: Connect the included pow
er adapter.
10.CamID Label: Shows the c
amera’s CamID number and a QR code for easy setup
using mobile devices.
11.NET: Connect an Ethernet c
able and connect the other end to your router (not
included).
12.Micr
oSD Card Slot: Insert a microSD card (not included) to enable recording on the
camera. Camera supports microSD or microSDHC cards up to a maximum size of
32GB.
13.Audio Out: Connect t
o an external speaker (not included) using a 3.5mm headphone
jack.
14.Mounting Stand: F
or mounting instructions, see “Wall or Ceiling Mounting” on
page 199.
15.Reset But
ton: While the camera is powered on, press with a pin or small object for at
least 4 seconds to reset the camera to factory defaults. This is useful if you have
forgotten the password for the camera.