LUMIPro 2017
6
Quick Start Tutorial—Part VI
Now that you’ve taken the perfect picture, it’s time for some chores. e rst thing you might want to do is save this scene so that you can recreate all or parts of it later, either with your
current model, or with another. is is great if you do portrait work in SL and have a set of stock setups you like to use, or if you own a store in SL and like to display your outts the same
way every time. You might also save the setup of your favorite shots just in case your model wants another shoot with a dierent wardrobe. e possibilities are endless.
at’s it! Be kind, and release your model from their pose and eye position by clicking on the red X button at the bottom of the HUD. ey can jump o the Sit Ball by standing, and walk
about freely with all the sass and class of their on AO again. Oh...Remember that reference shot at the beginning? Let’s take a look and see what the dierence might be:
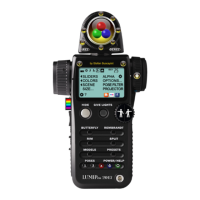
Step 22. In the LCD area of the LUMIPro HUD, locate and click on the Scene
button. A panel will pop out. Click on the Lights, Camera, and Pose buttons, and
on Preset button number 1. ey will all turn red, as shown below, indicating that
you’ve saved all three settings. Note that you can chose to save (or restore) just the
lights, the camera, or any combination you desire.
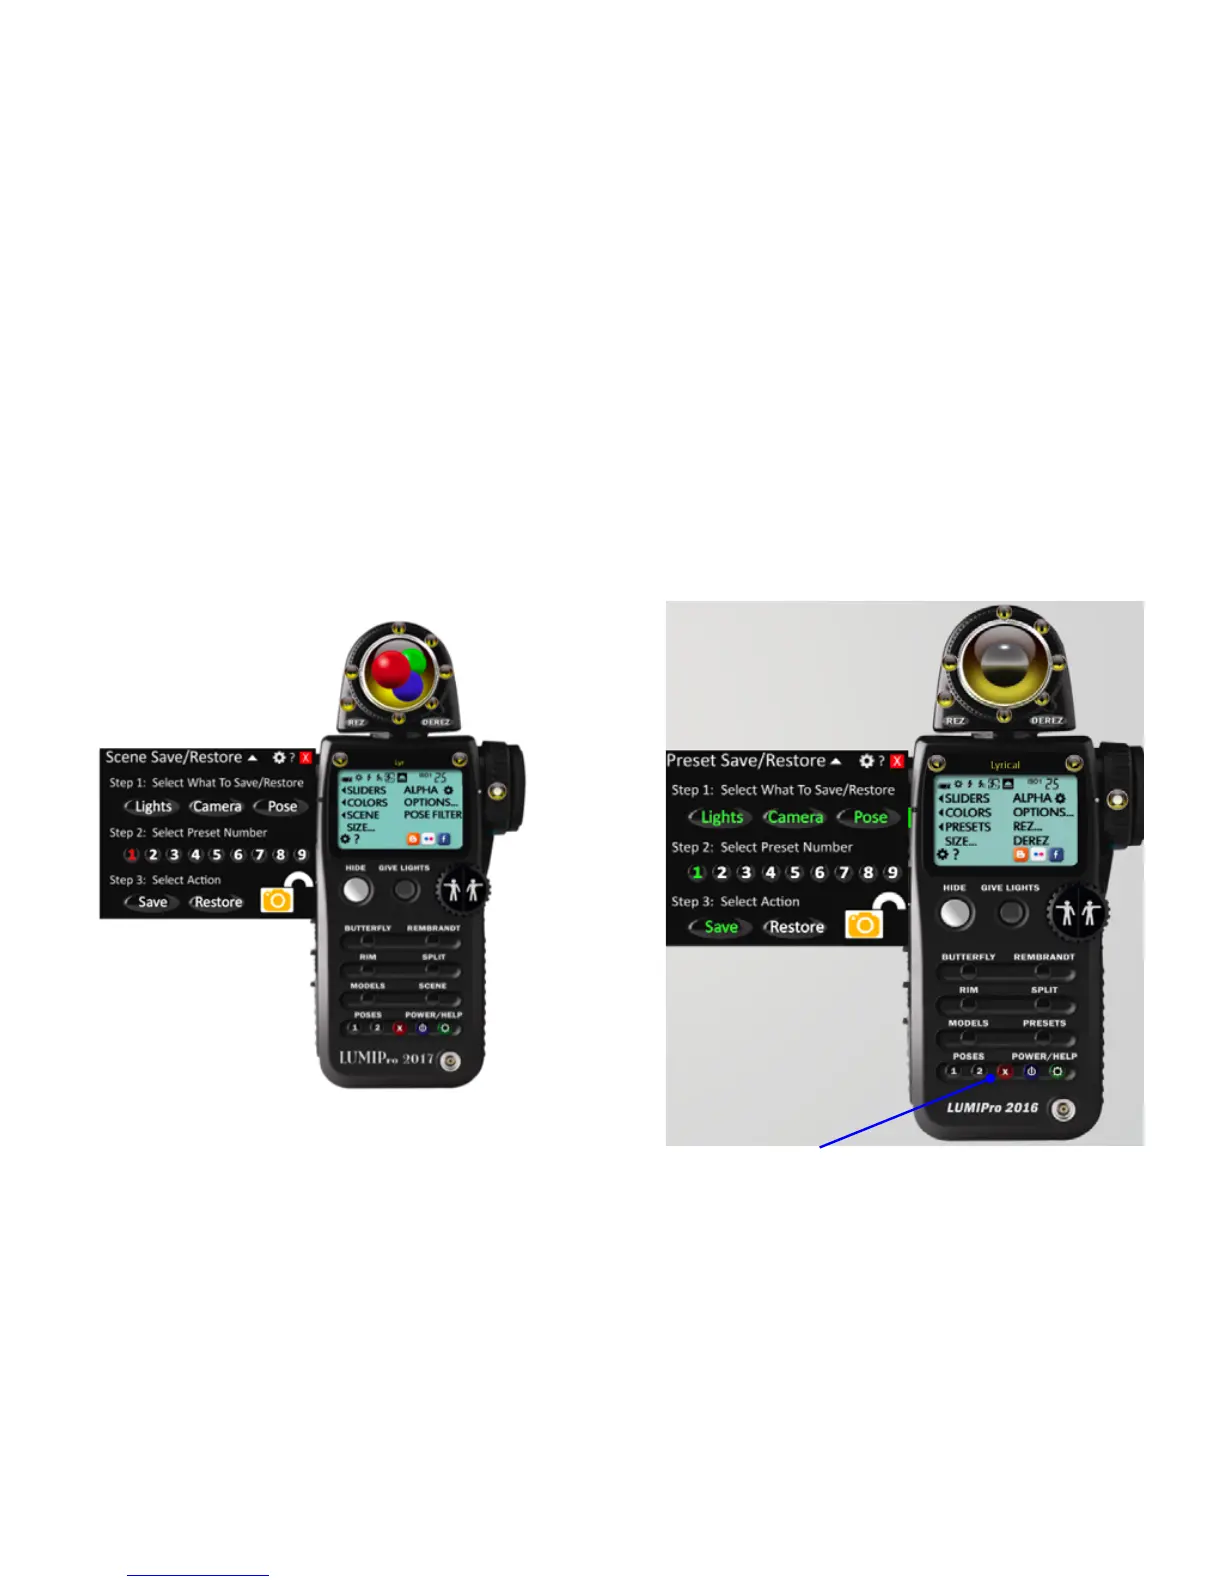
Step 23. When saved, the buttons will turn green. Congratulations, you’ve saved
your scene for later use. To recall it, open the Scene panel, click the desired button,
and then click the restore button. Your lighting adjustments, camera position, and
selected pose will all be recalled in an instant! Click the red X button to close the
Scene Save/Restore panel.