Manitowoc Published 11-20-19, Control # 234-19 4-11
MLC300 OPERATOR MANUAL SETUP AND INSTALLATION
4. Check for leaks after the crane has been operated and
the hydraulic oil is at operating temperature. Retighten
the couplers if necessary.
5. All plugs, regardless of location, must be fully screwed
together into their corresponding caps until there is
metal to metal contact during crane assembly.
Examples of locations of caps and plugs:
• hanging lanyards
• storage brackets
• job box
6. All Quick Disconnects must be fully screwed together
with their corresponding cap and plug until there is metal
to metal contact during crane disassembly.
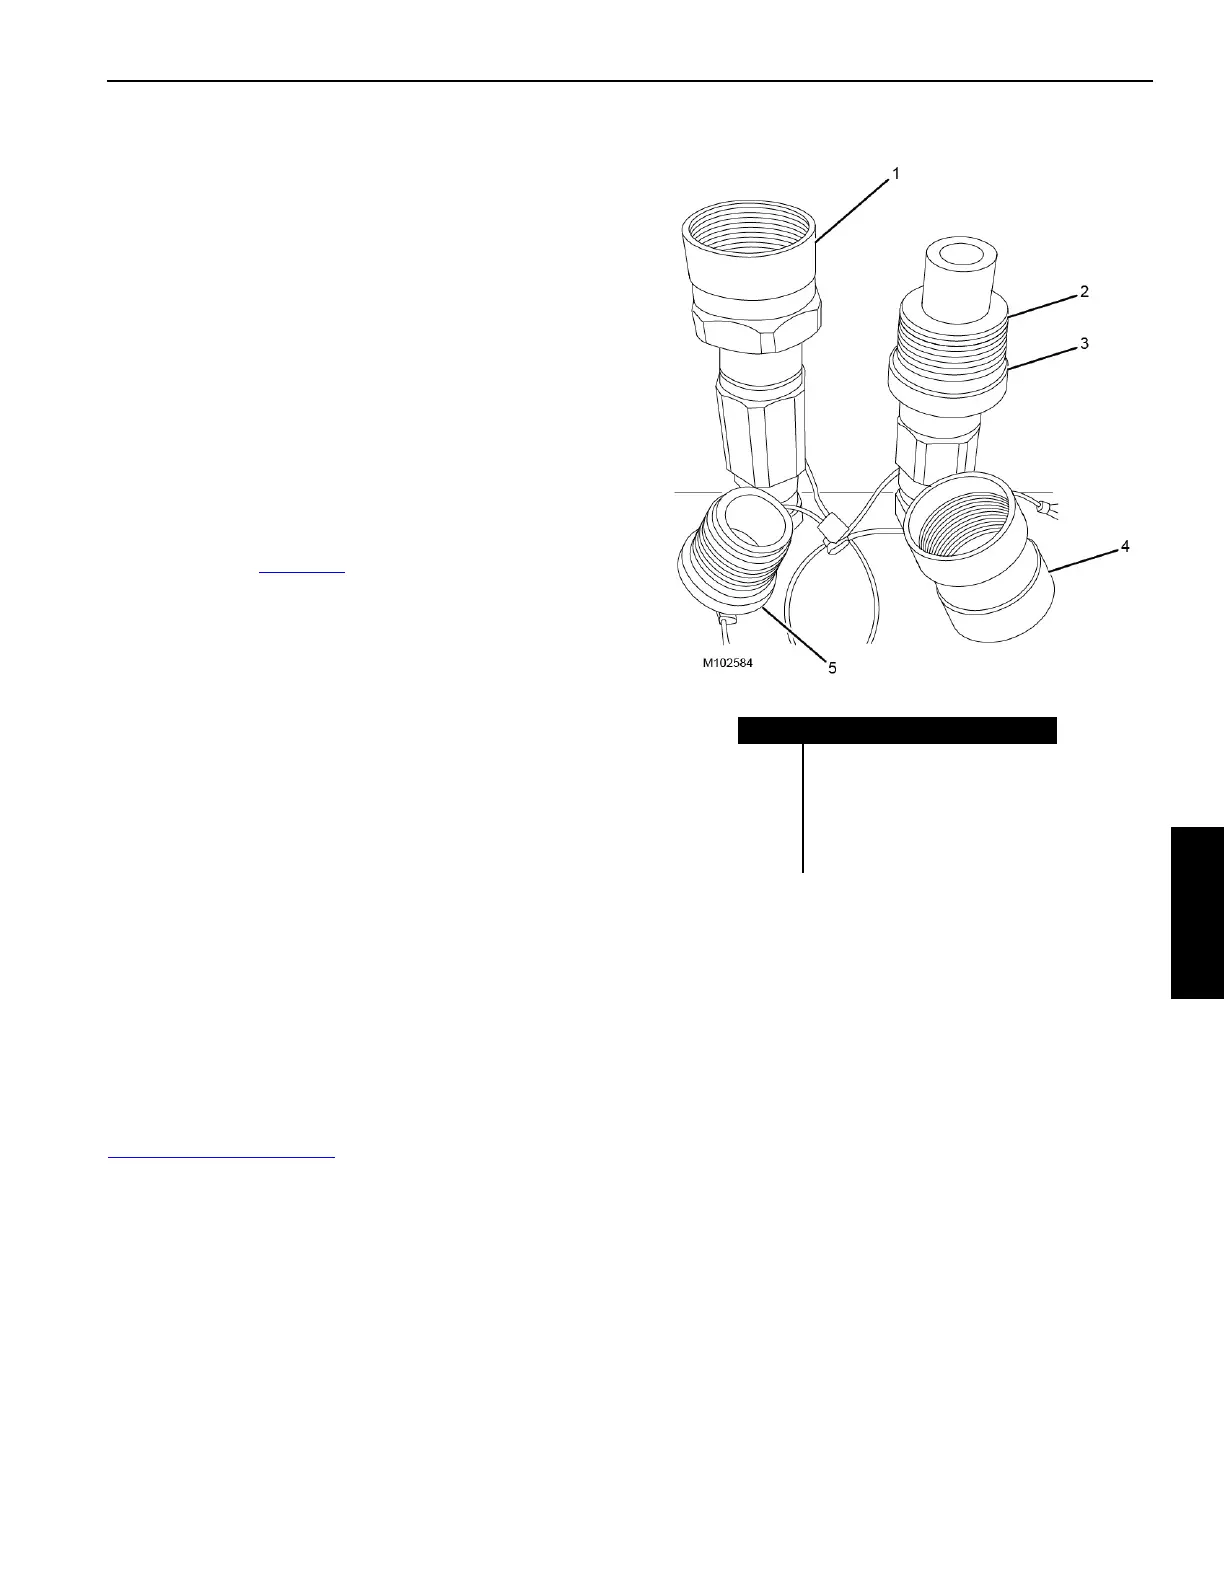
The following threaded areas of the quick disconnects, caps,
and plugs must be lubricated during crane assembly and
disassembly (see Figure 4-9
):
• threaded surface of male quick disconnect
• threaded surface of female quick disconnect
• threaded surface of aluminum caps and plugs
• o-rings
NOTE If the crane is stored without operating for long
duration, the hydraulic quick disconnects, caps, and
plugs must be lubricated every 6 months.
PRE-START CHECKS
Make the following checks before starting the engine upon
arrival at the assembly site. See Section 3 for starting
instructions.
Electric System
Check that all shorting plugs are attached as shown in
Figure 4-10 on page 4-12
. The engine may not start and
faults will be activated if the plugs are not connected.
Engine
1. Check for leaks.
2. Check fuel, oil, and coolant levels.
3. Repair or refill as required.
Gear Boxes
1. Check for leaks.
2. Check levels.
3. Repair or refill as required.
Hydraulic System
1. Check for leaks.
2. Check level.
3. Repair or refill as required.
4. Make sure hydraulic tank shut-off valves are open.
Item Description
1 Female Quick Disconnect
2 Male Quick Disconnect
3 O-ring
4 Aluminum Cap
5 Aluminum Plug
Figure 4-9