Manitowoc Published 11-20-19, Control # 234-19 4-137
MLC300 OPERATOR MANUAL SETUP AND INSTALLATION
Remove Second Crawler
1. Using the remote control, extend the jacking cylinders
next to the second crawler (2, View A, Figure 4-91
) until
the first stage of each cylinder is fully extended.
Do not extend the cylinders to the point that the
small diameter rods (second stage) are exposed.
2. Swing the upperworks and boom up or down as required
so the self-erect cylinder (8, View A, Figure 4-91
) is
centered over the second crawler (2).
3. Repeat Remove First Crawler step 1
on page 4-135.
4. Connect three legs of the lifting slings (6, View A,
Figure 4-91
) to the lifting links (3) on the second crawler
with the shackles (7).
5. Repeat Remove First Crawler steps 6
– 13 on
page 4-135.
6. Position the trailer (15, View B, Figure 4-91) on the
same side of the crane that the second crawler was
removed from.
• Do not exceed specified radius.
• Do not exceed swing limits (Figure 4-92
).
7. Repeat Remove First Crawler steps 15
– 21 on
page 4-135.
Remove Lifting Slings from Self-Erect
Cylinder
Remove the lifting slings and shackles from the lifting link on
the self-erect cylinder (see Figure 4-32
).
Store the lifting slings and shackles in the parts box.
DANGER
Tipping Hazard!
Prevent the crane from tipping over:
• Make sure the crane is level. Adjust the carbody jacks
as required.
• Make sure the small diameter rods of the jacking
cylinders are fully retracted before handling the
crawler, otherwise the jacking cylinders will be
overloaded and possibly collapse.
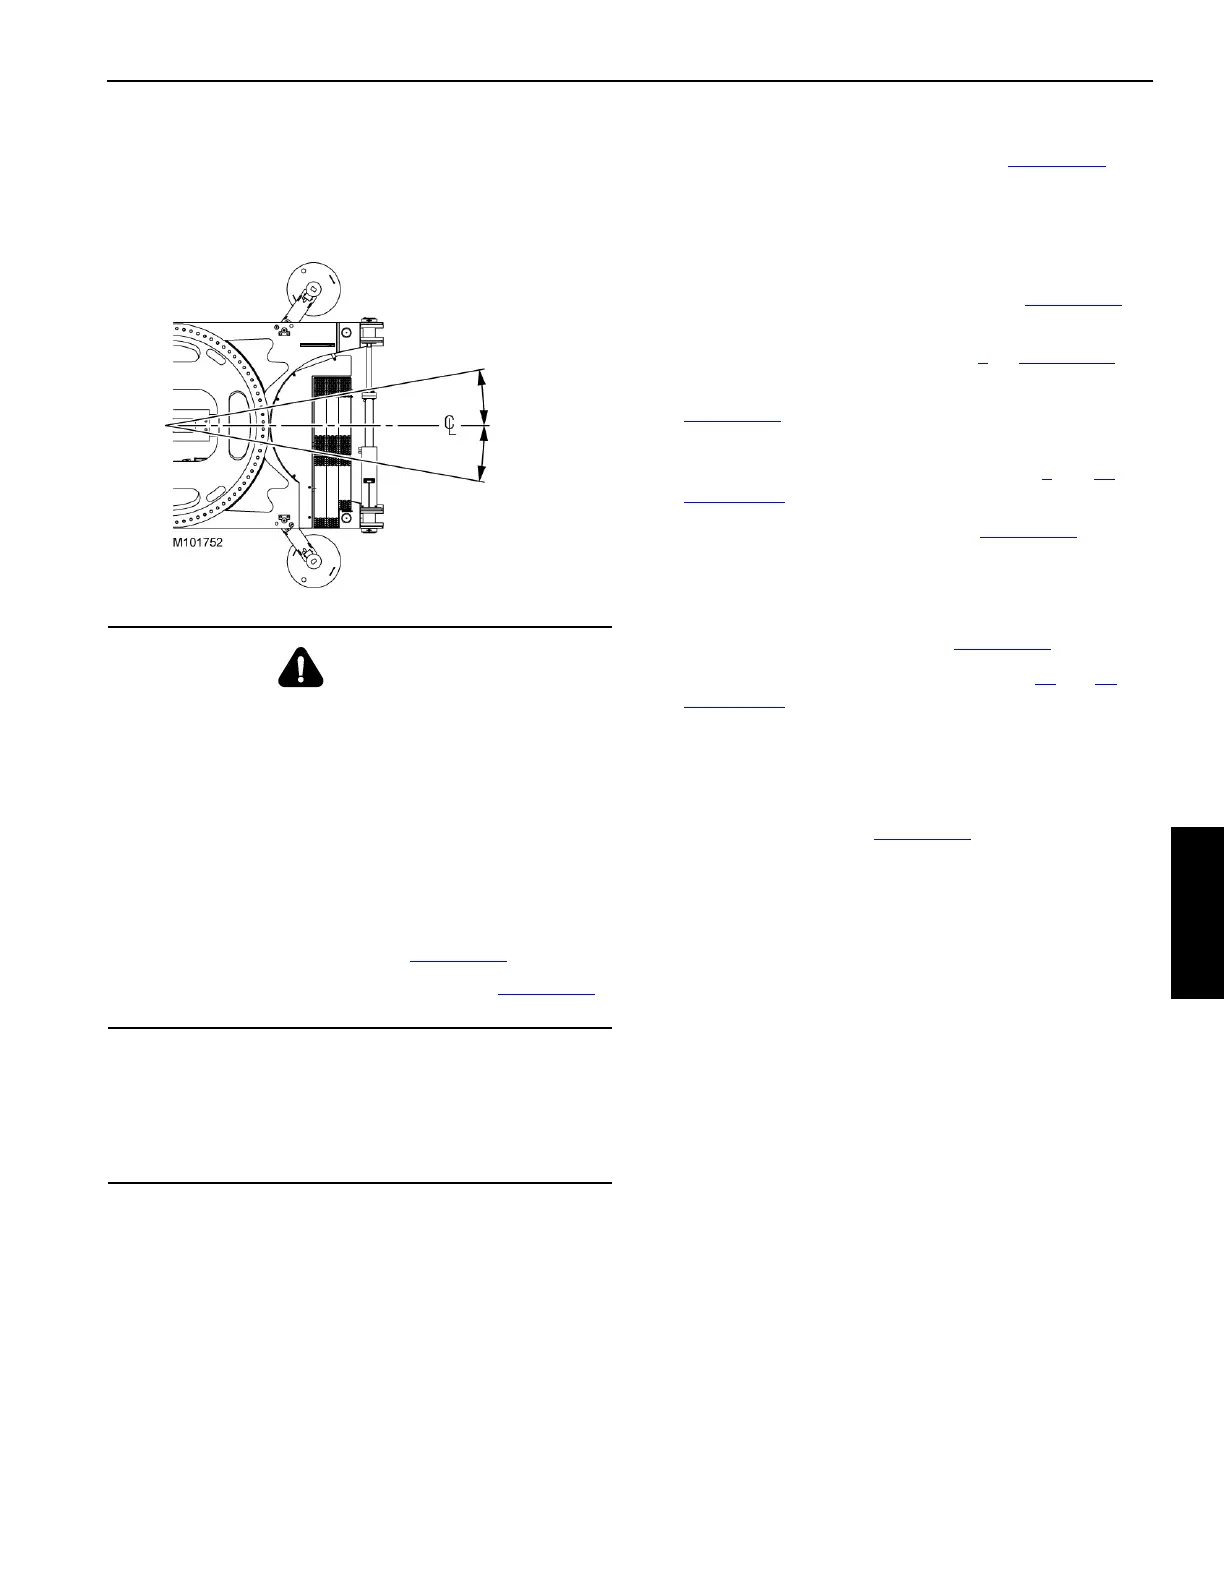
• Limit swing to 30° in either direction from center when
lifting the second crawler (see Figure 4-92
).
• Do not exceed the radius specified in Figure 4-91
,
View B when lifting the second crawler.
CAUTION
Parts Damage!
Do not attempt to lift the crawler off the crane by booming
up. Damage to the self-erect cylinder can occur.
Avoid hitting the carbody jacks with the crawler.
Swing Limit for Handling Second Crawler
Over Side of Carbody on Jacks
Figure 4-92
30°
30°