Manitowoc Published 11-20-19, Control # 234-19 4-53
MLC300 OPERATOR MANUAL SETUP AND INSTALLATION
Store Carbody Jacks
See Figure 4-39 for the following procedure.
1. Using the remote control, fully retract the carbody jack
(1, View B).
2. Store the jack pad (3) as shown in View C.
3. Remove the connecting pin (2, View B) from the working
hole (A).
4. Rotate the carbody jack (1, View B) inward to the
storage position.
5. Install the pin (2) in the storage hole (B).
6. Repeat the steps for each carbody jack.
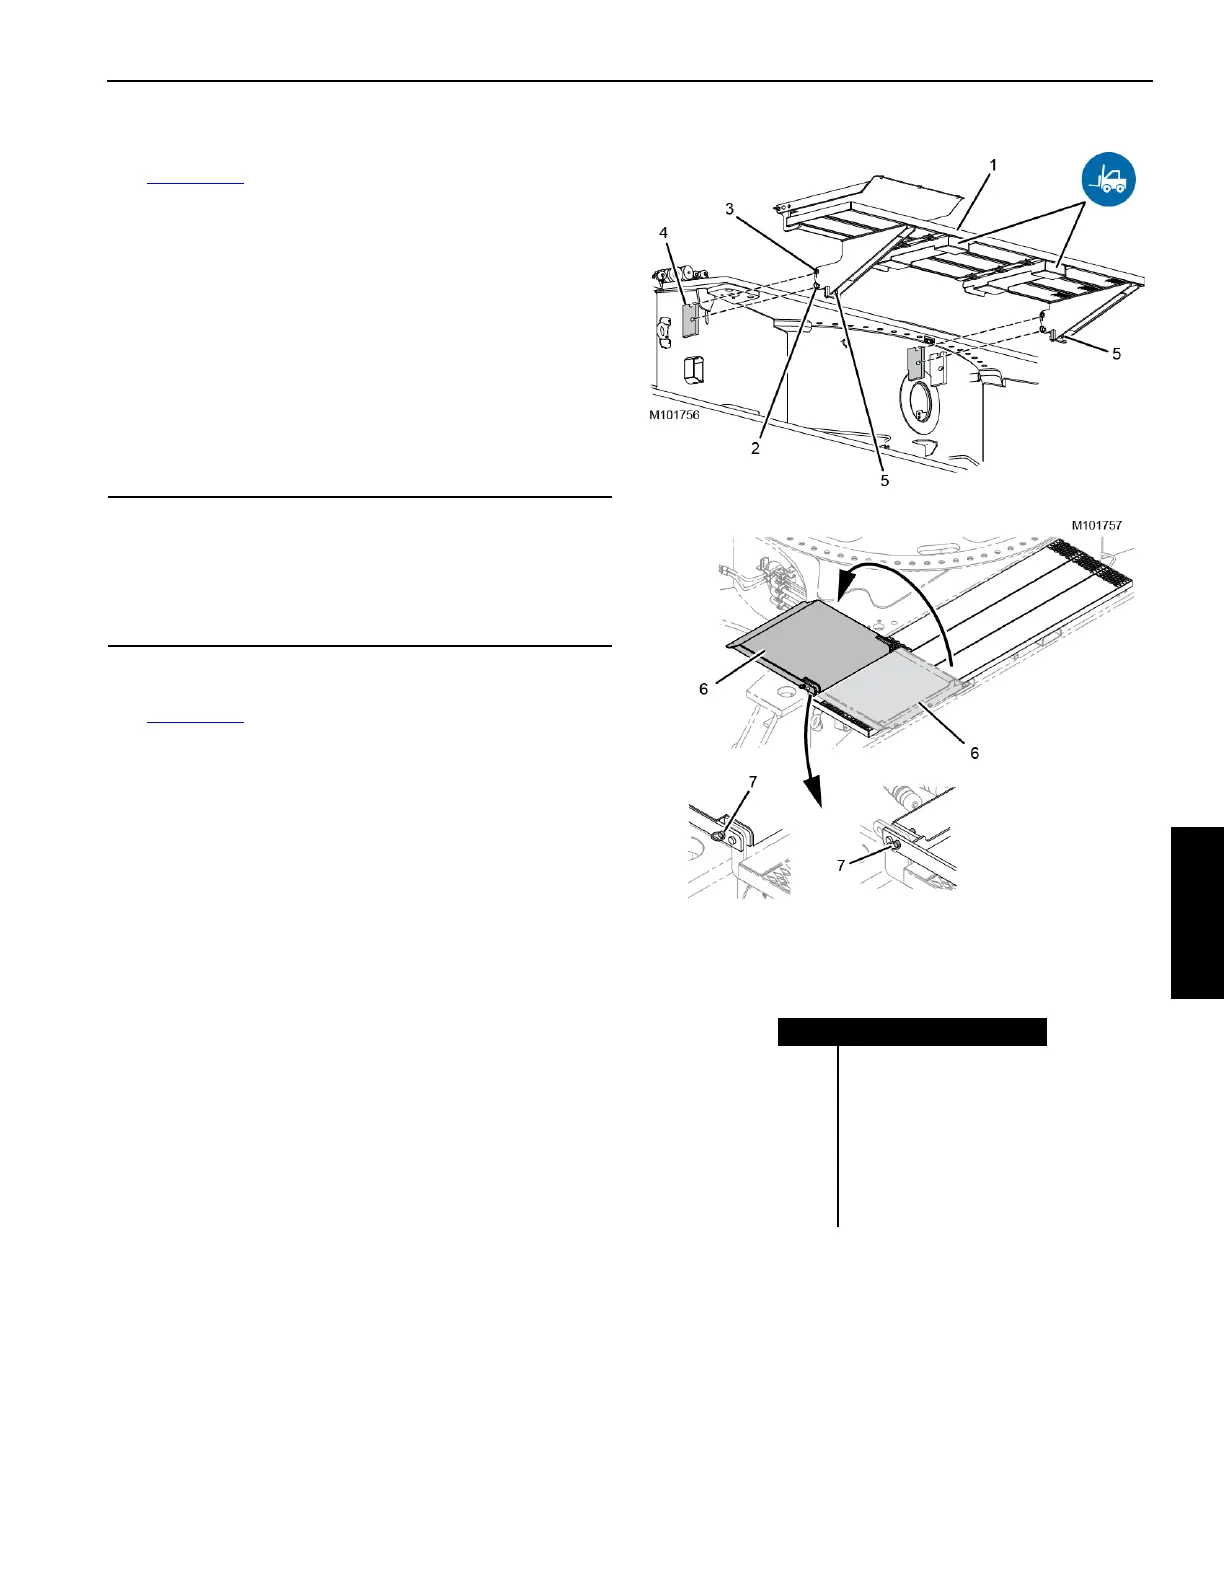
Install Carbody Front and Rear Platforms
See Figure 4-40 for the following procedure.
Two platforms are installed side-by-side on both ends of the
carbody. One of the platforms on each end has an access
cover. The access covers must be next to the crawlers.
Each platform has forklift pockets for handling with a forklift.
All four platforms are installed in the same manner.
1. Using a forklift, lift the platform (1, View A) into position
at the end of the carbody.
2. Remove the quick-release pins (2) from the platform (1).
3. Lower the platform so the fixed pins (3) engage the
saddles in the brackets (4).
4. Install the quick-release pins (2).
5. If necessary, adjust the bolts (5) to provide a snug fit.
6. Repeat the steps for the remaining platforms.
7. Remove the quick-release pin (7, View C) and rotate the
access cover (6, View B) to the working position (View
D).
8. Install the quick-release pin (7, View D)
CAUTION
Avoid Structural Damage
Do not extend the carbody jacks when they are stored.
Serious structural damage will occur to the carbody and
jacks.
Figure 4-40
View C
SHIPPING
View A
View D
WORKING
Item Description
1 Platform
2 Quick-Release Pin (2)
3 Fixed Pin (2)
4 Bracket
5 Bolts with Lock Nut (2)
6 Access Cover
7 Quick-Release Pin
View B