4. Click the OK button, and the new label is added to the database. The Name will appear in a
selectable listing of available Labels for use with objects that support text field labeling.
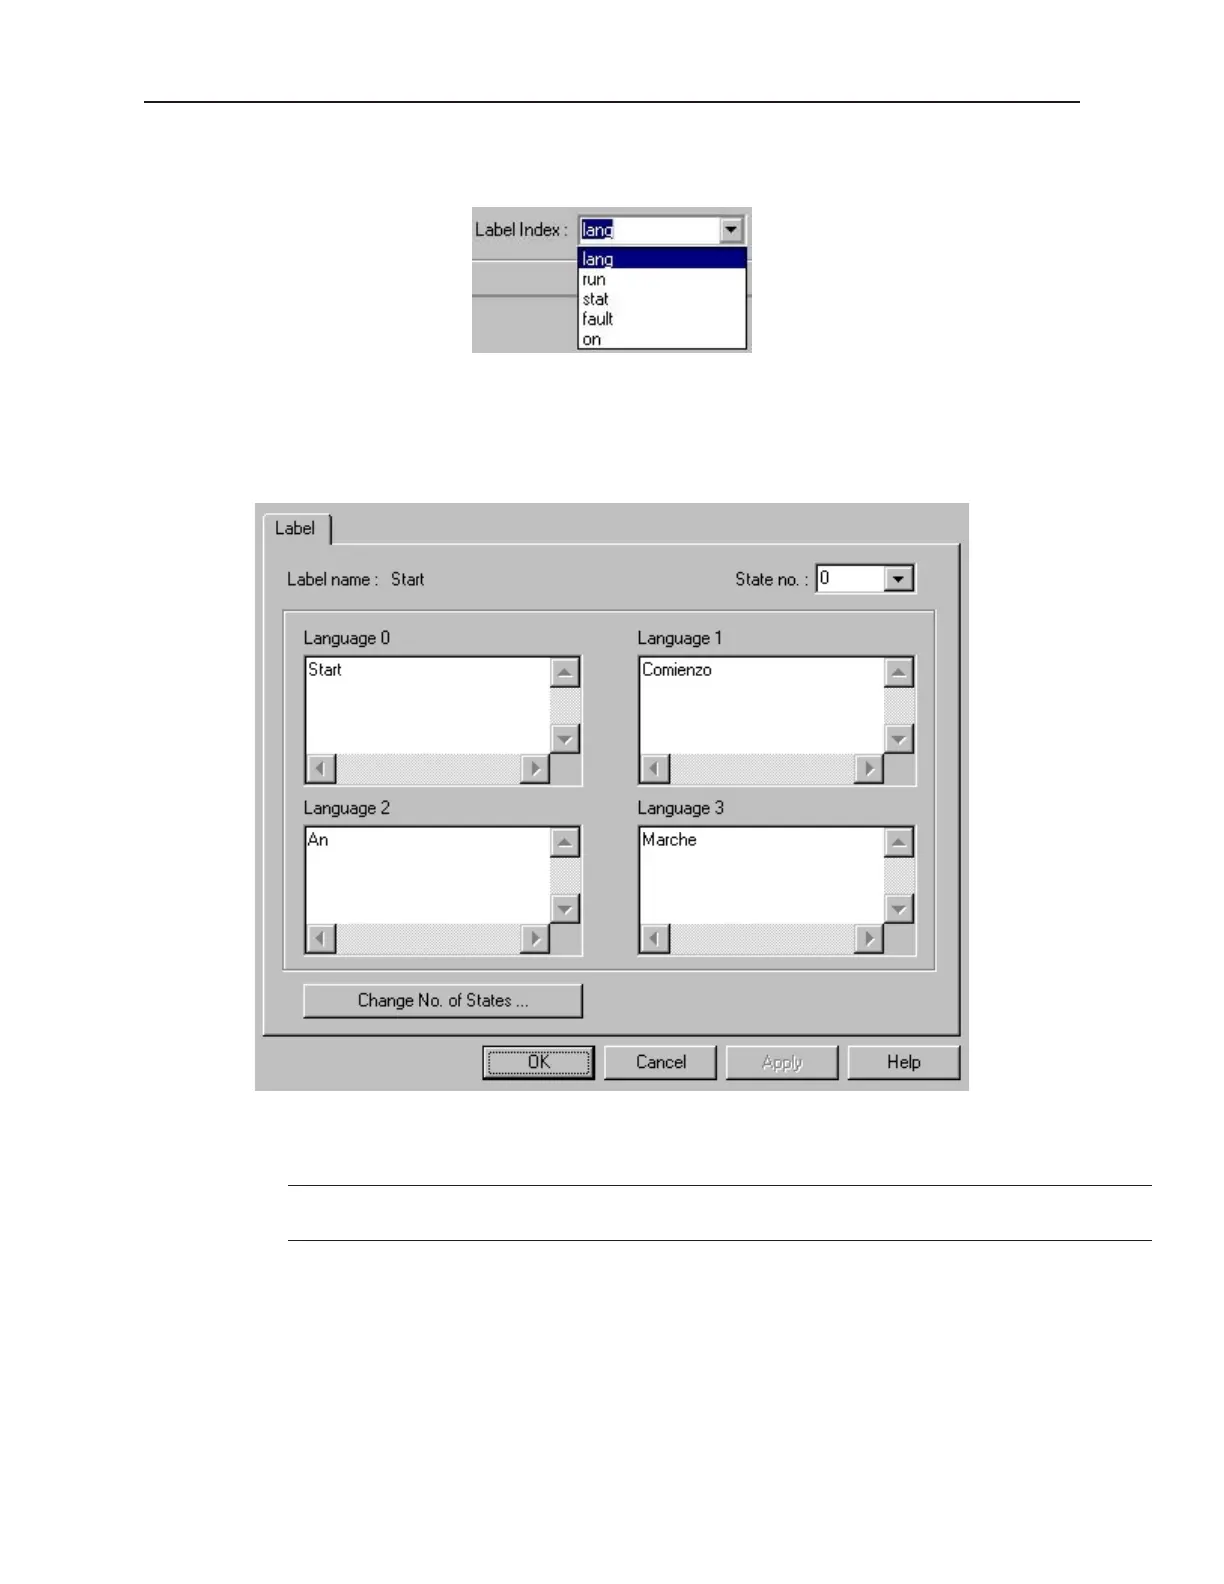
5. The new label is still selected. Click the Modify button to display the Label Content Setting
dialog. In the State No. list pulldown box, select the state that the text is representing.
6. In each Language box, as desired, enter the text representing that state in each language. For
example, “START” in Language 0 to represent English, and the appropriate equivalent
wording in all other languages configured.
7. If further text labeling is required to represent conditions or status in additional states, while
still in the Modify mode for Label Content Setting, select the state requiring text labeling.
Enter the text in the Language boxes as above.
There is no inter-language conversion or translation capability. Entries must be made
using the correct wording for the language designated, to display as entered.
8. Continue to add state descriptive text labeling as required.
9. When all text has been entered for all states desired, Click OK. The Label is now contained in
the Label Library and displayed when the Library is opened. View text labels for the various
states of each label in the Library by selecting the State to display in the pull down box.
10. Once a label text has been created and you wish to change the number of states, you may do
so by double clicking on the desired label text. On the Label Content Setting dialog box,
click the Change No of States...button, and then enter the No. of states desired for the label.
1010-1001a, Rev 02
Cre ating and Using Da ta bases and Lan guages 157