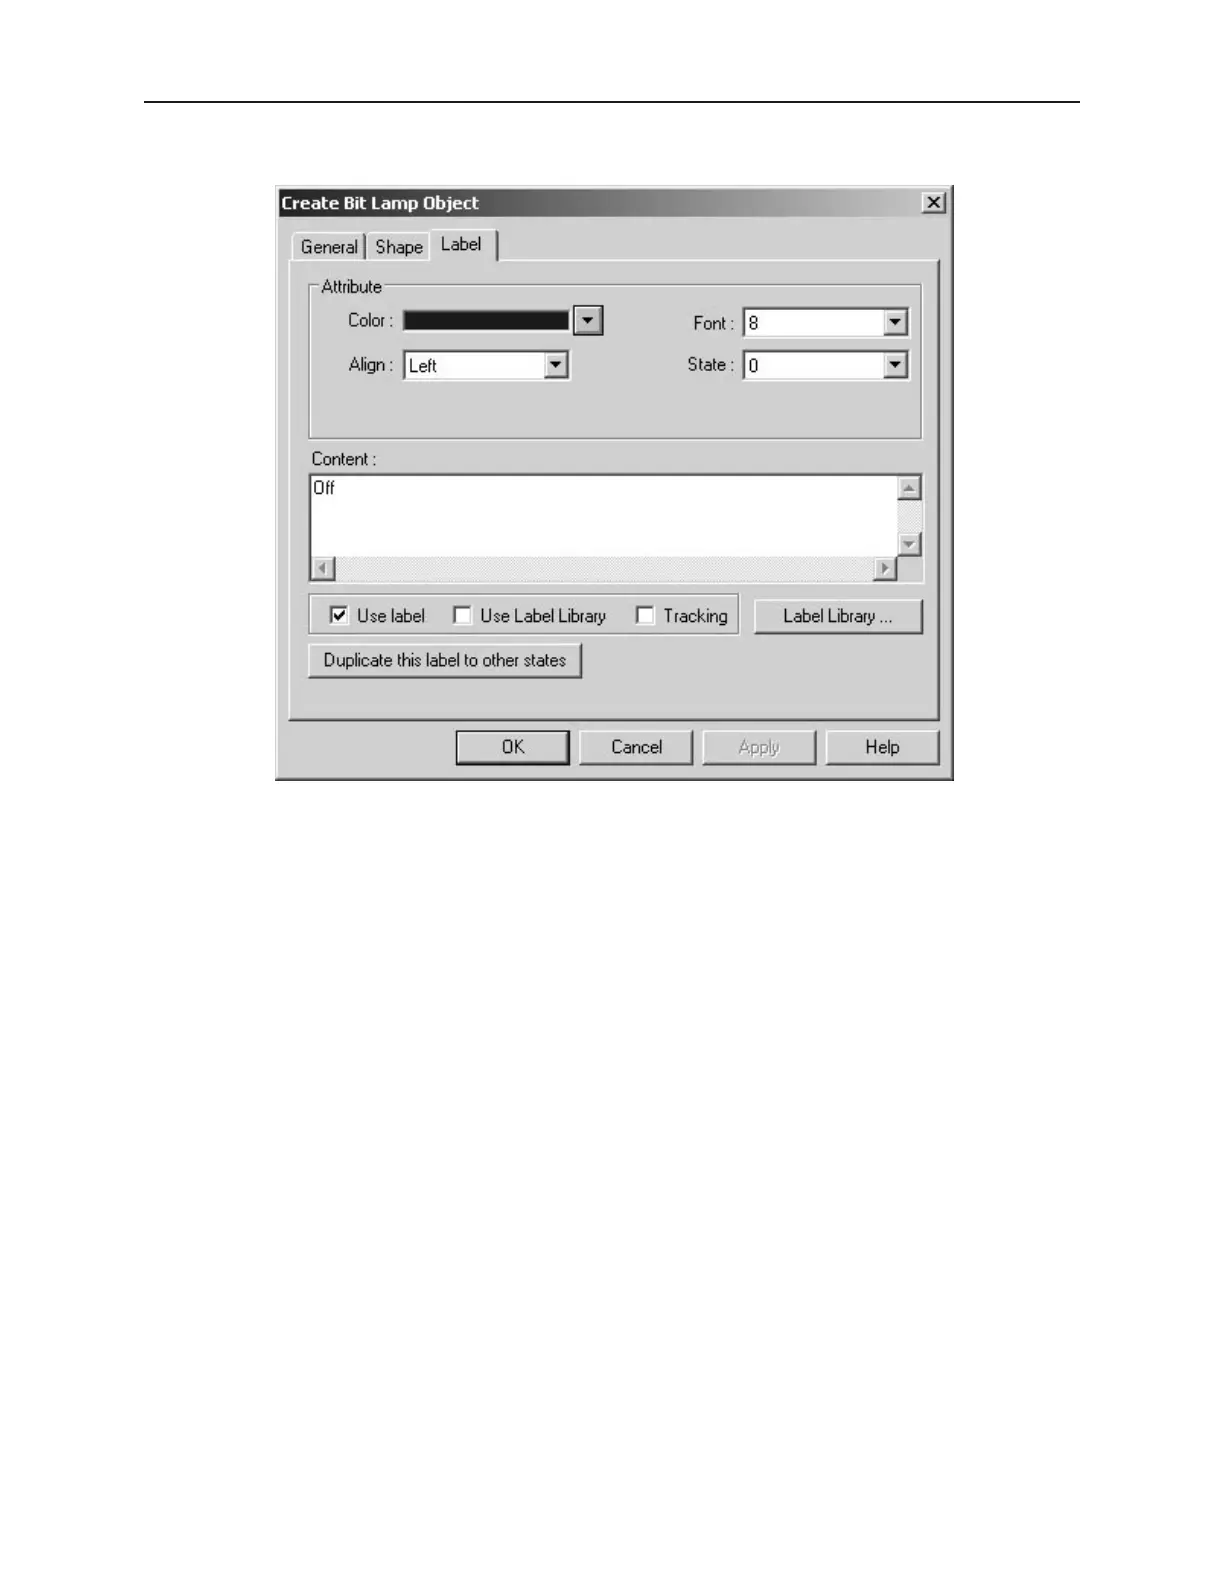
7. Click the Label tab to display the Label form.
8. Click the Use label checkbox if you want to use a label. Click the Duplicate this label to
other states button if you want to use the same label for all states.
9. You can have a different label for each state of the Bit Lamp. In the State: box, enter the
state that you wish to edit, then enter the label for that state in the Content: box. Do the same
for other states.
10. Enter the color that you want for the label in the Color: box. You can select a different color
for each label state.
11. Enter how you want the label to be positioned in the Align: box. You can select a different
position for each label state.
12. Enter the size of the label in the Font: box. You can select a different font for each label
state.
13. Click the Tracking checkbox if you want the labels for all states to follow or ‘track’ with the
movement of one label when it is moved after the Bit Lamp object is placed onto the window.
14. Click OK. The Create Bit Lamp Object form closes and the main screen of EasyBuilder
appears with the cursor tied to a rectangular outline of the part you just created at the upper
left corner of the screen. Move the part to the desired location of the window.
15. Once the part is placed onto the window, you can adjust the location of the label inside the
part by clicking once on the label. This will highlight the entire object. Now click on the
label again. Now only the label is highlighted, allowing you to move it without moving the
part. Note: if you double-click (click twice rapidly) then you will not highlight the label but
rather enter the Bit Lamp Object’s Attribute dialog box.
The Set Bit Ob ject
The Set Bit Object is used to write a value to a PLC coil. The touchscreen object displays the State 0 shape until
pressed. When pressed, it displays the State 1 shape and executes the function that was assigned to it.
1010-1001a, Rev 02
Rep re senting Data with Graph ics Ob jects 173