4To create a Toggle Switch Object
1. From the Parts menu, click Toggle Switch. Or click the Toggle Switch icon in the Part1
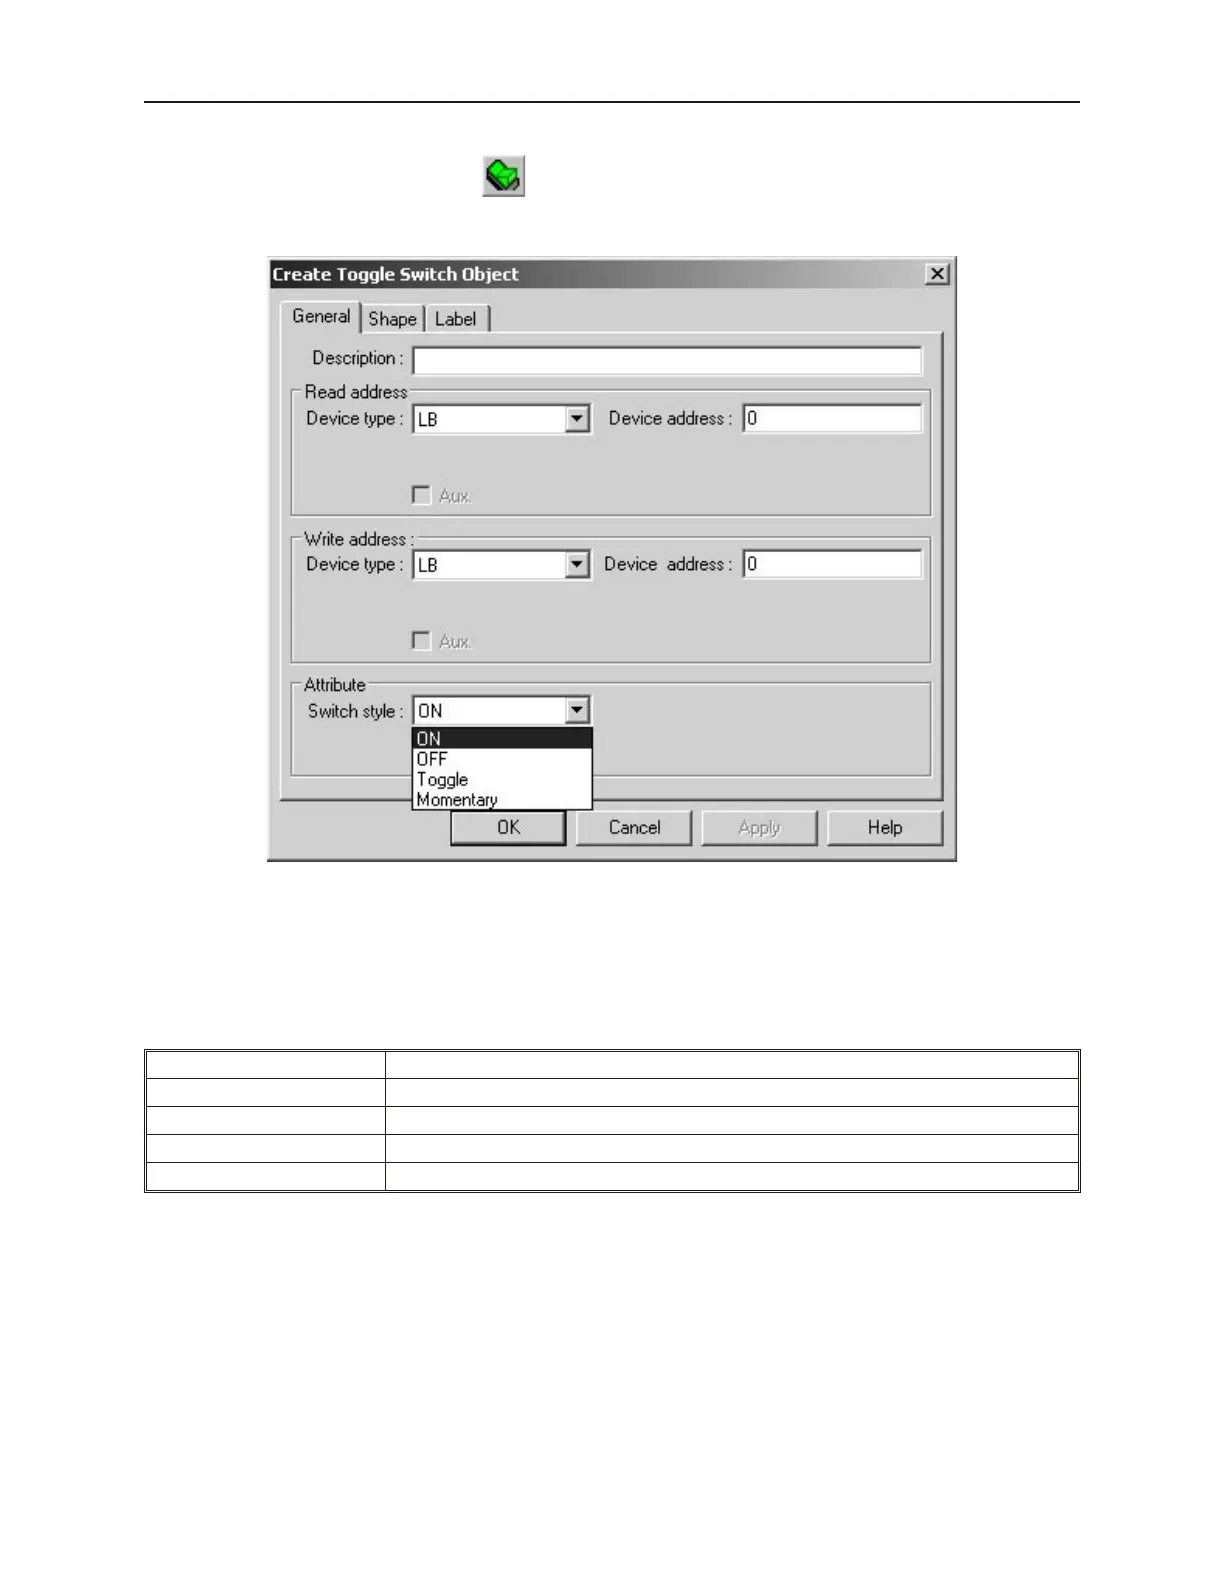
toolbar. The Create Toggle Switch Object dialog box appears.
2. Use the Description: box to enter a title for the Toggle Switch part. A description is not
necessary but does help you identify the purpose of the part.
3. In the Read address frame, select the PLC coil or OIT internal memory address that the part
continuously reads.
4. In the Write address frame, select the PLC coil or OIT internal memory address that the part
writes to when pressed.
5. In the Attribute frame, select how you want the Toggle Switch object to operate:
Switch Style Description
ON Sets a PLC coil when pressed.
OFF Clears a PLC coil when pressed.
Toggle Alternates between setting and clearing a PLC coil.
Momentary Sets a PLC coil when pressed; clears a PLC coil when released
6. Refer to the Bit Lamp Object section for information on using the Shape tab
7. Refer to the Bit Lamp Object section for information on using the Label tab.
8. Click OK. The Create Toggle Switch Object form closes and the main screen of EasyBuilder
appears with the cursor tied to a rectangular outline of the part you just created at the upper
left corner of the screen. Move the part to the desired location in the window.
9. Once the part is placed onto the window, you can adjust the location of the label inside the
part by clicking once on the label. This will highlight the entire object. Now click on the
label again. Now only the label is highlighted, allowing you to move it without moving the
1010-1001a, Rev 02
176 Sil ver Se ries In stal la tion & Op er a tion Man ual