2. Use the Description: box to enter a title for the Display Meter part. A description is not
necessary but does help you identify the purpose of the part.
3. In the Read address frame, select the PLC register or OIT internal memory address. You can
select BIN (binary) or BCD format. In the No. of words: box, the only option available is 1.
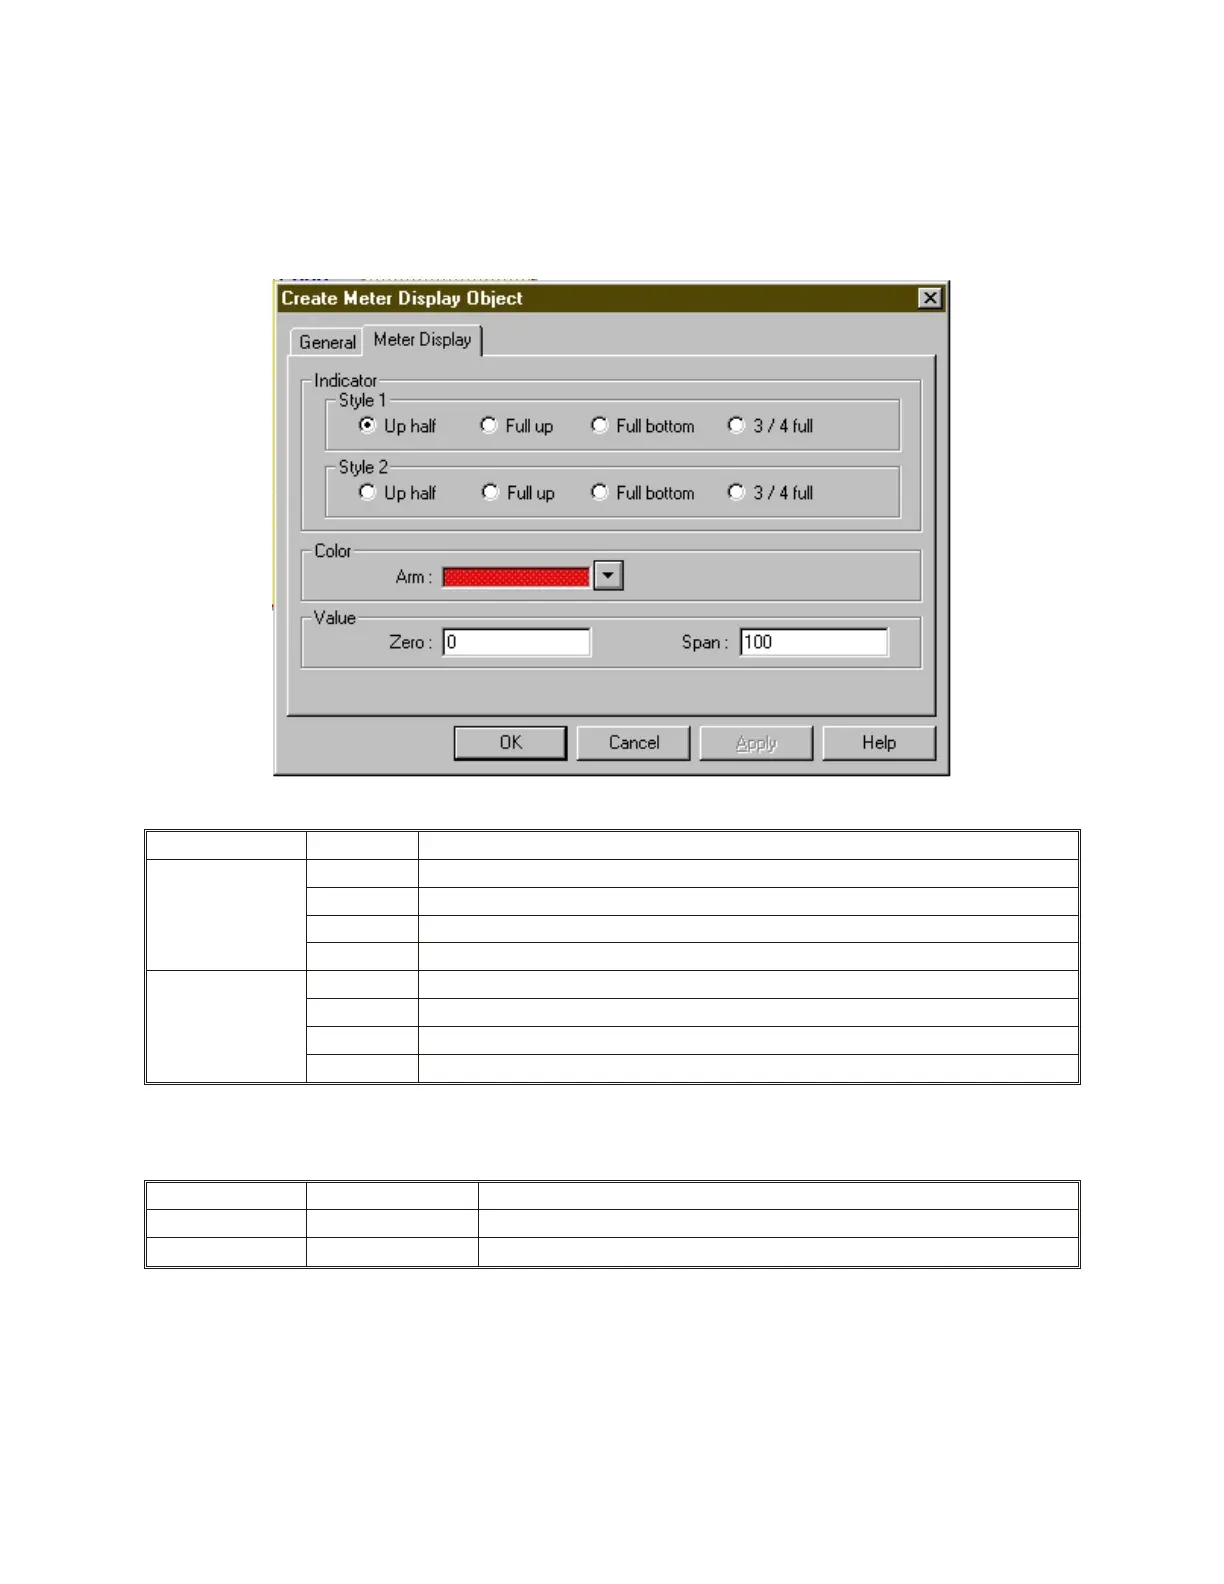
4. Click the Display Meter tab to display the Meter Display form.
5. In the Indicator frame, select what type of Meter Display to use:
Style Option Description
Style 1 (arm with
center mark)
Up half Select for a display meter that ranges from 0 to 180 starting at the 9 o’clock position.
Full Up Select for a display meter that ranges from 0 to 360 starting at the 12 o’clock position.
Full Bottom Select for a display meter that ranges from 0 to 360 starting at the 6 o’clock position.
¾ Full Select for a display meter that ranges from 0 to 270 starting at the 7.5 o’clock position.
Style 2 (straight
arm)
Up half Select for a display meter that ranges from 0 to 180 starting at the 9 o’clock position.
Full Up Select for a display meter that ranges from 0 to 360 starting at the 12 o’clock position.
Full Bottom Select for a display meter that ranges from 0 to 360 starting at the 6 o’clock position.
¾ Full Select for a display meter that ranges from 0 to 270 starting at the 7.5 o’clock position.
6. In the Color frame box, select the color used for the arm or indicator of the meter.
7. In the Value frame box, select the following:
Function Range Description
Zero: -32768 to 32766 Selects the number that represents the zero level for the meter display.
Span: -32767 to 32767 Selects the number that represents the total span of the meter display.
8. Click OK to close the Create Meter Display Object dialog box. The main screen of
EasyBuilder appears with the cursor tied to a rectangular outline of the part you just created at
the upper left corner of the screen. Move the part to the desired location on the window.
9. Once the part is placed onto the window, you can adjust the attributes of the Display Meter by
double-clicking on the part.
1010-1001a, Rev 02
Bar Graphs, Me ters, and Trends 217