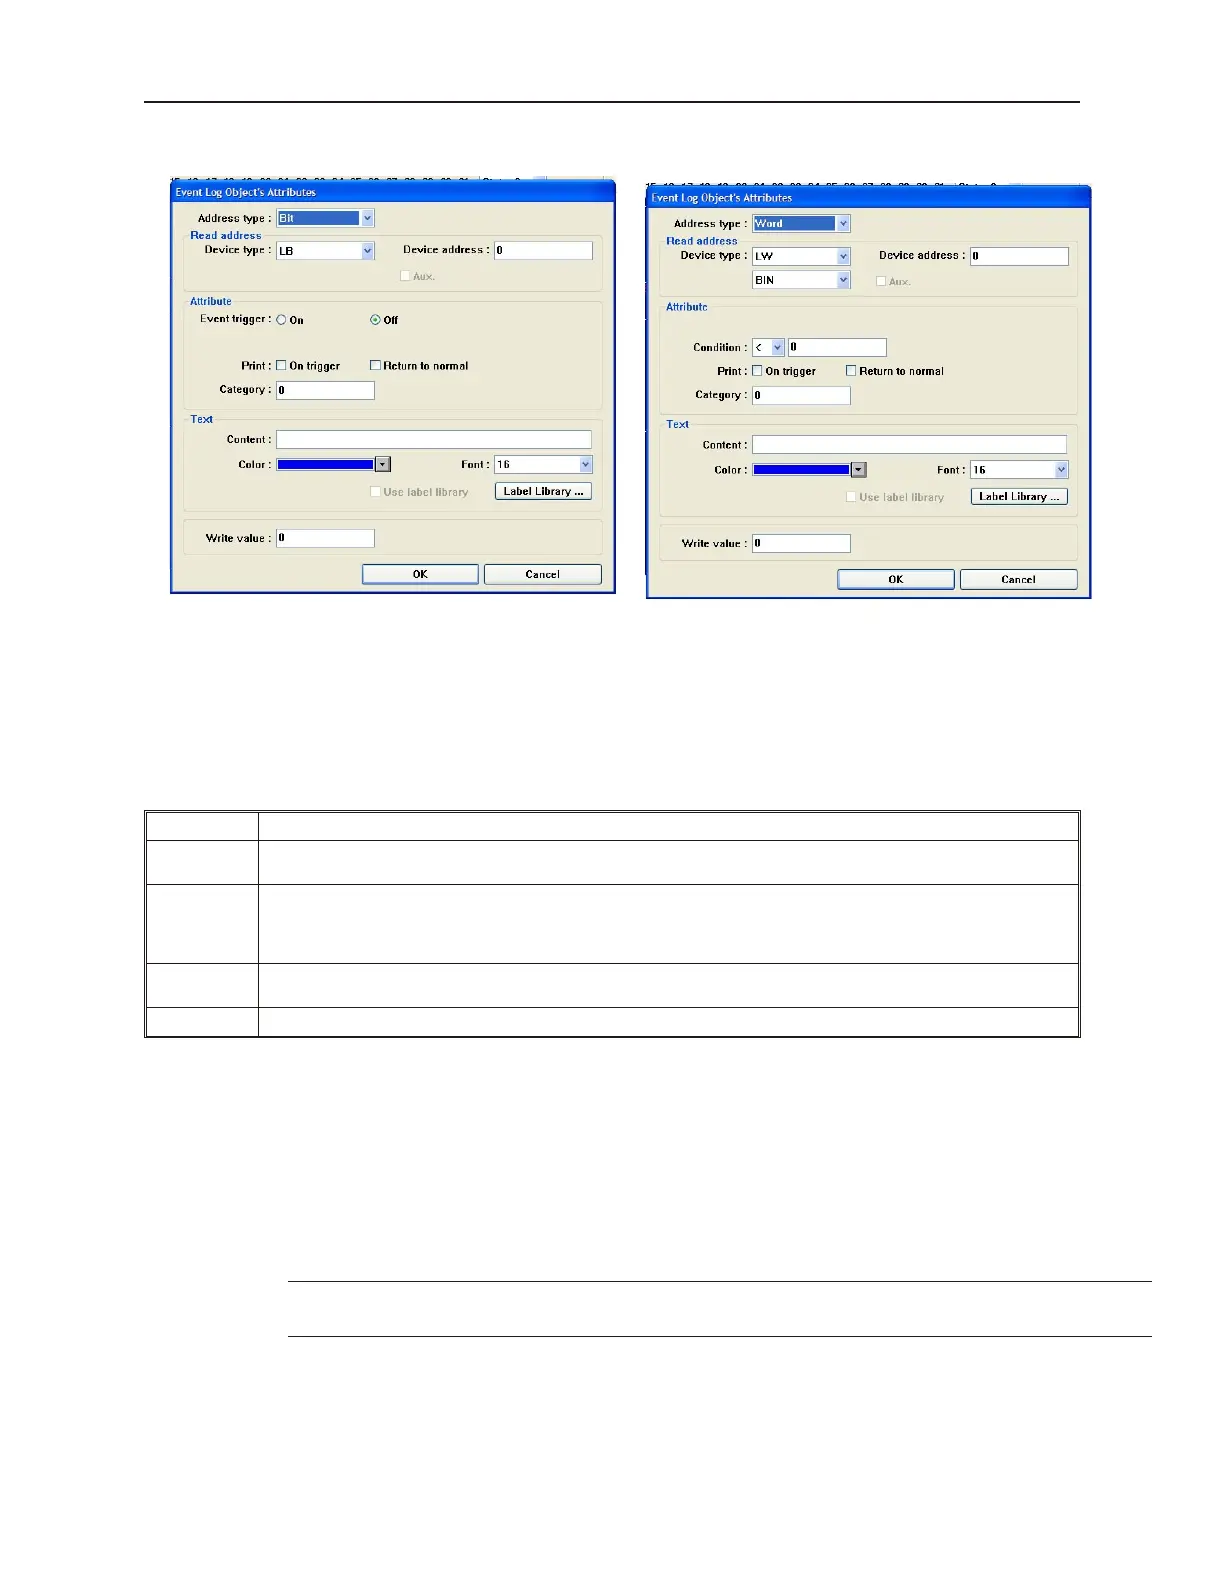
2. Click the Add... button. The Event Log Object’s Attributes dialog box appears.
Address type = Bit Address type - Word
3. In the Address type: box, select Bit to trigger on the value of a PLC coil. Select Word to
trigger on a value or range of values in a PLC 16-bit register.
4. In the Read address frame, select the PLC coil or register to monitor for the event. For word
addresses, select binary BIN or BCD format.
5. In the Attribute frame, select what will cause the event to be triggered:
Function Description
Event Trig:
For PLC coils only. Select On to trigger the event when the PLC coil is set. Select Off to trigger the event when
the PLC coil is clear.
Condition:
For PLC registers only. Select the less than sign (<) to trigger on any value that is less than the constant
entered. Select the greater than sign (>) to trigger on any value that is greater than the constant entered. Select
the equals (==) to trigger when the value is equal to the constant entered. Then enter a constant value between
-32767 and +32767
Print:
On the OIT550, causes the text in the Contents box to be printed when the event is triggered or returns to
normal.
Category: Not used. Reserved for later use.
6. In the Text frame, enter a text string in the Content: text box that is to be displayed when an
event is triggered.
7. Select the color of the text string in the Color: box.
8. Select the font size of the text string in the Font: box. Sizes 16 and 24 are available.
9. The Write Value: text box can be used to display a popup window on the HMI screen as a
result of acknowledging a triggered event. Enter the number of the window to be displayed.
If 0 is entered, this option is disabled.
10. Check the Use label library box if you would like to use the database of text labels. Click
the Label Library... box to create a new label if necessary.
4 For more information on how to use the label library, consult Chapter 7, Creating and
Using Databases and Languages
11. Click OK to close the Event Log Object’s Attributes dialog box. The Event Log Object
dialog box reappears with the new entry listed. You can edit the attributes of an existing
alarm by clicking on the Setting... button. Any entries can be deleted by clicking on the
Delete button.
1010-1001a, Rev 02
Cap turing Alarms and Events 231