94
Chapter 6, Setting Up Realtime Effects with Adobe Premiere
Applying a pre-created advanced DVE
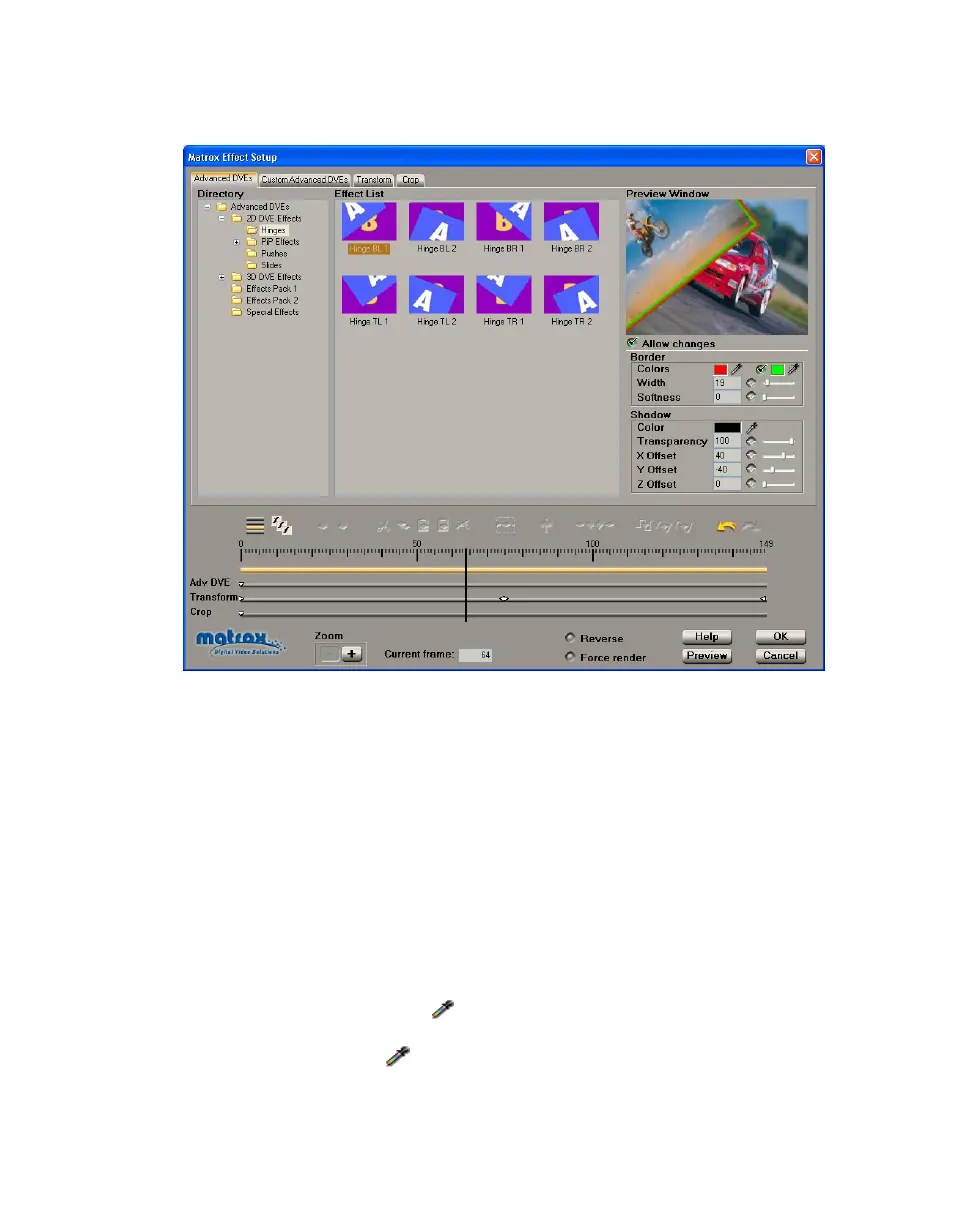
When you apply a Matrox advanced DVE, the Advanced DVEs page appears:
°To set up an advanced DVE:
1 Choose the type of effect you are looking for in the Directory. For example,
click the
PiP Effects folder under 3D DVE Effects to display a list of
available 3D picture-in-picture effects.
¥Tip Static 2D or 3D DVE effects are not suitable for use as transitions. For
example, the static effects listed in the 2D DVE Effects
PiP Effects folder do
not switch from one source to another. Such effects are designed to be
applied as video effects only, and should not be used as transitions.
2 Click the particular effect you want from the Effect List.
3 To see a preview of your effect at any time, click the Preview button.
4 To create a border or soft edge on your clip, select Allow changes, then use
the
Border modifiers as follows:
$ Colors Click the first button to select the border color you want. To
create a border consisting of a gradient between two colors, select the option
beside the second button, then click that button to select your other
color. For details on how to select colors, see “Selecting colors” on page 90.
$ Width Sets the width of the border, in pixels.