McHale Fusion 3 Baler & Wrapper
44
Knife installation/removal should be carried out in the following way:
1. Ensure the knives are in the UP/ON position, before beginning
2. Lower chopper unit floor half way (control box must be in manual mode).
Press “floor-down” button for one to two seconds approximately.
3. Open the chamber door to the fully up position
4. Set the pick-up-reel wheels to working position to make access under the
machine easier
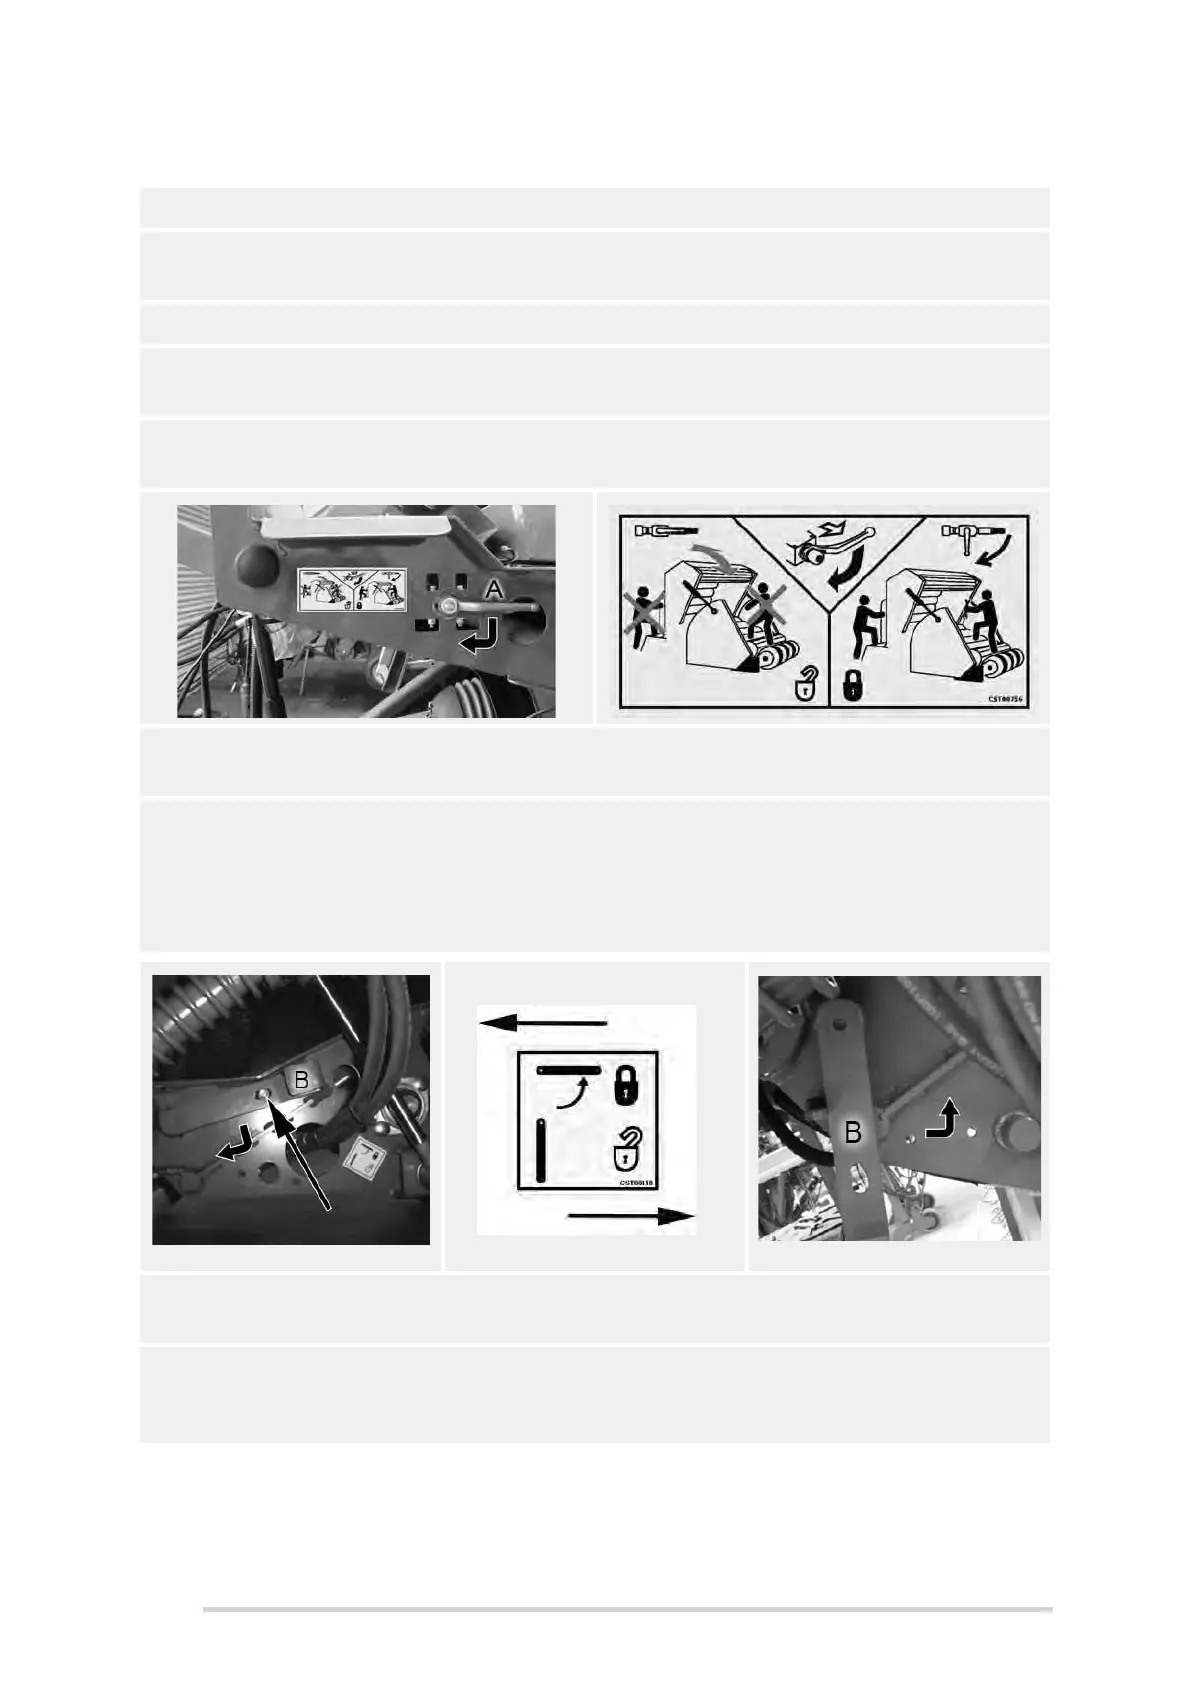
5. Using the lever valve (A), lock the chamber doors in position, by rotating it 90°
to the left vertical position, as shown
6. Shut down tractor, remove key, apply parking brake and prevent any
machine movement with wheel chocks.
7. The knife lock/unlock lever (B) is located on the left-hand side of the chopper
unit, just behind the pick-up reel. It must be pulled outwards at first, to
disengage from the lock-pin, then turned 90° downwards, to the unlock
position, as shown below. Reverse this procedure to return to the locked
position.
8. Removal of knives/blanks is the reverse of the following installation
procedure. Pay particular attention to all decal warnings and safety advice.
9. Rotating lever “B” exposes “flats, on the lock-shaft which allows either knives
or knife-blanks to be added or removed. Remove old knives with a pair of
pliers.
Locked ‘Closed’ Position
Unlocked ‘Open’ Position