McHale Fusion 3 Baler & Wrapper
45
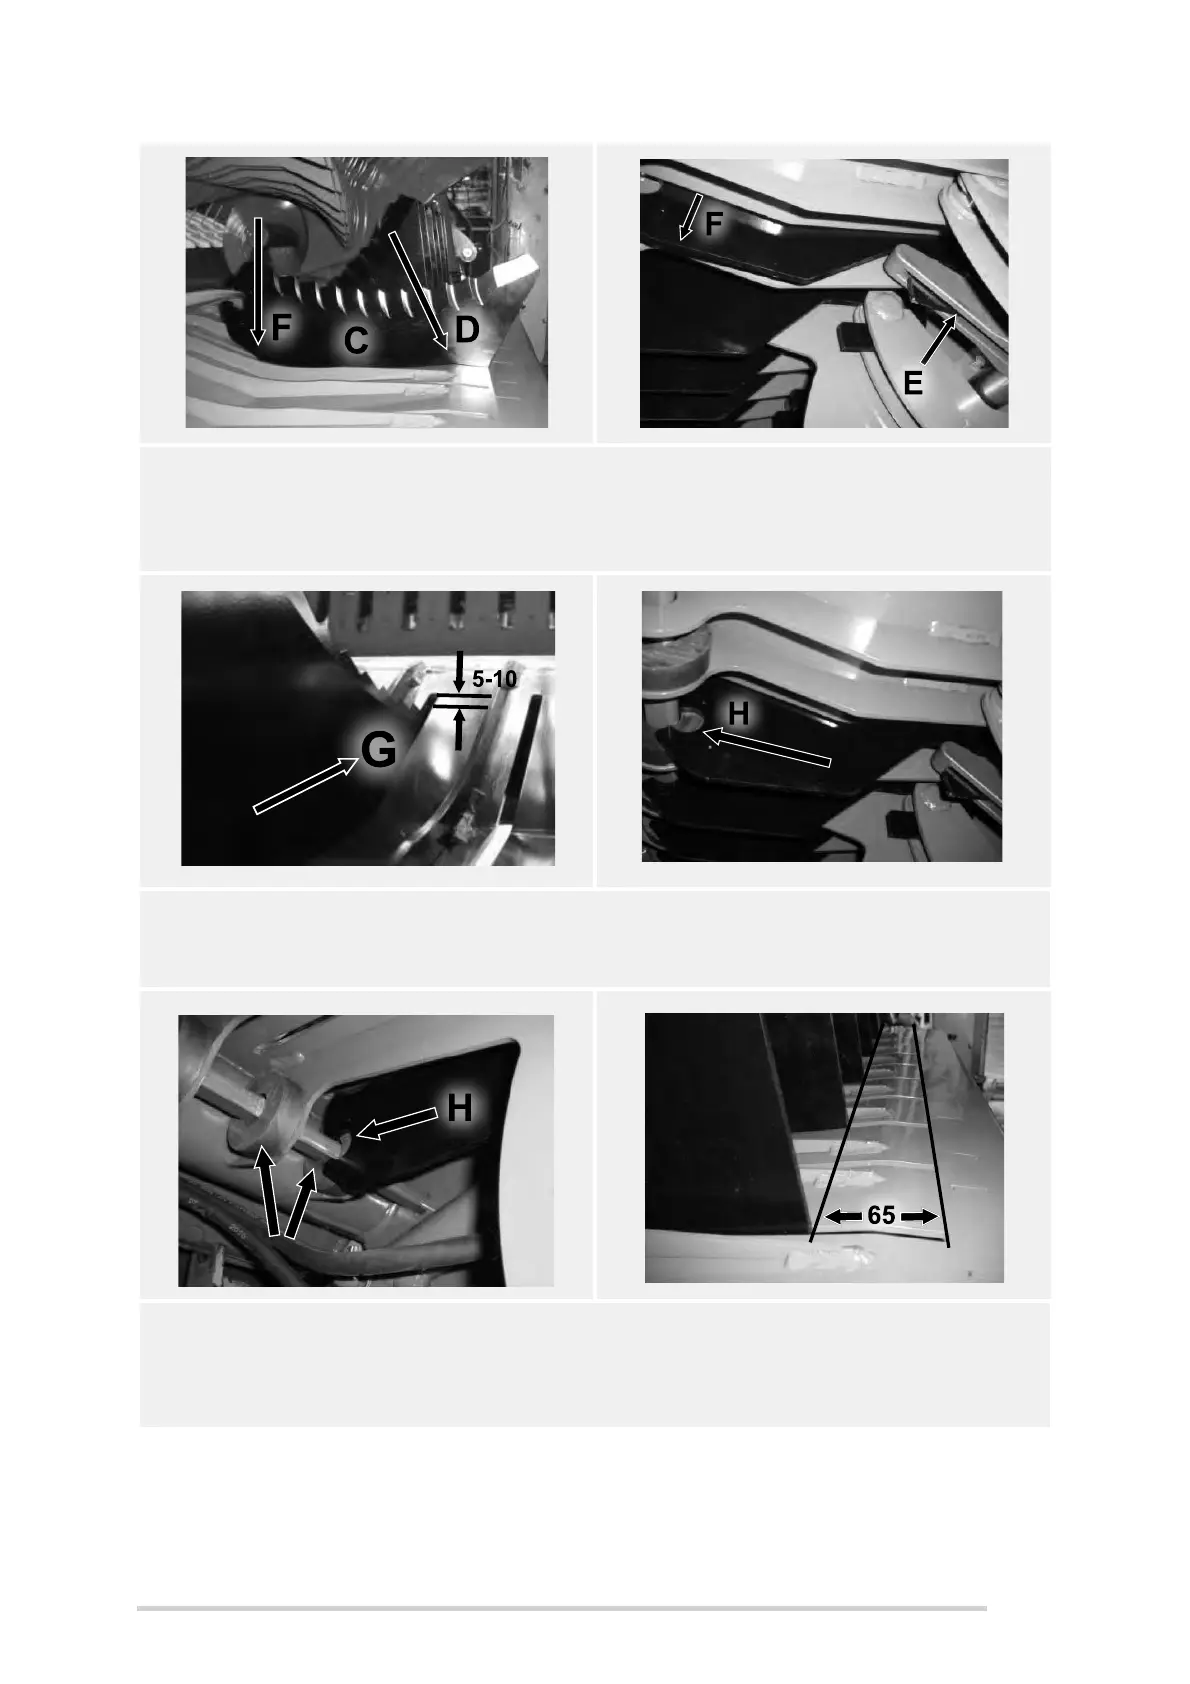
10. A new knife (C) can be installed by inserting into the back of the slot in the
drop floor (D), so it engages with “raised” actuator arm (E). Next rotate knife
downwards (F) whilst continuing to hold towards back of slot, until front
toothed area looks like it will clear front end of slot by 5-10 mm (G), as shown.
11. Now push knife forwards, continuing to maintain this 5 to 10 mm clearance
under front of slot. The keyhole-slot on the front end of the knife should now
guide itself over the “flats” of the lock-shaft (H).
12. Continue to push the knife forward until fully home, which should leave a gap
between the knife and back end of slot of approx. 65 mm (J), with maximum
protrusion of approx. 190 mm (K) (assuming knife-actuators are fully up). The
retaining magnets will hold knives in position until knife lock-shaft is closed.
Rotate knife down whilst pulling
towards back of slot in drop-floor
Knife engages with Actuator-arm
Knife Lock-shaft open
Flats horizontal
Knife retaining magnets