McHale Fusion 3 Baler & Wrapper
46
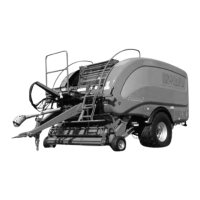
13. After installing, push the top of each knife forward as shown, in the direction
of the arrow (M), to ensure proper engagement within both lock-shaft and
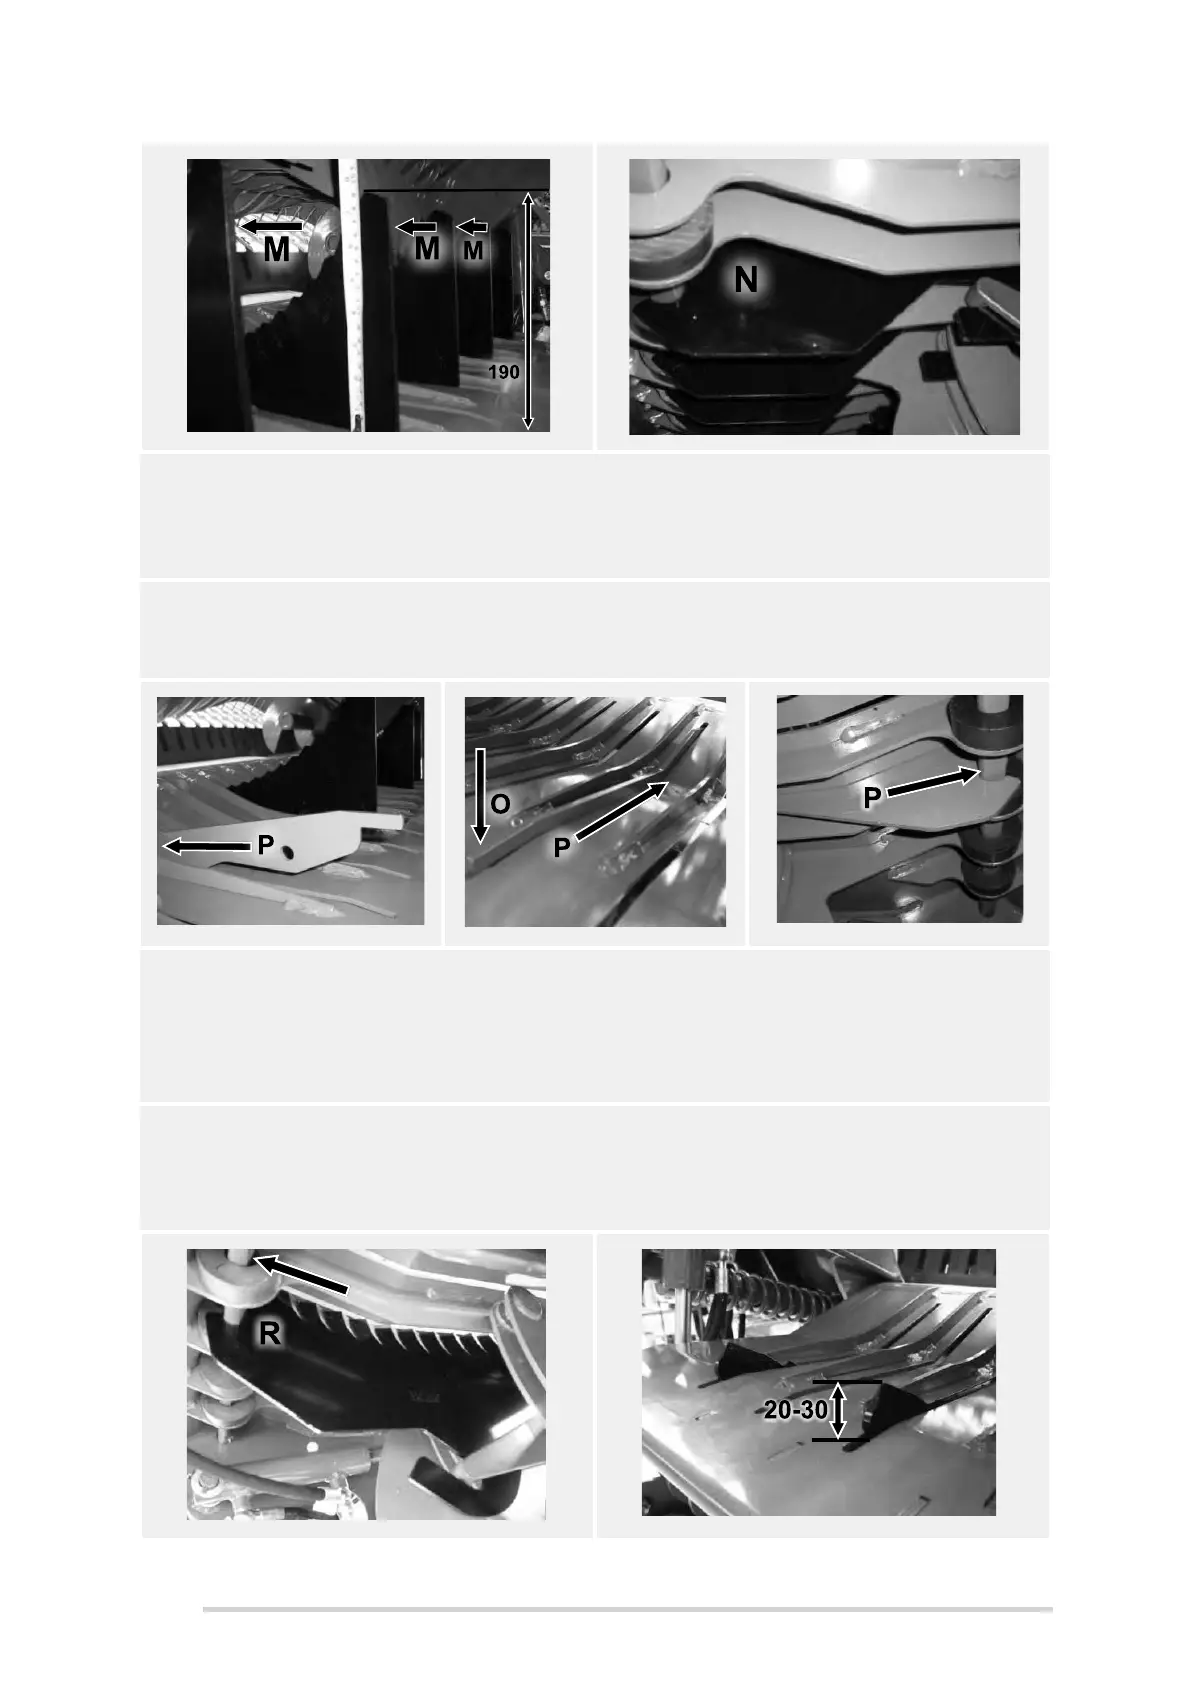
actuator-arm. If the knife moves, then it is not positioned correctly. The
correct position is shown at (N).
14. If knives are removed, for whatever reason, always replace with knife blanks
to prevent crop catching in the “open” slots. These are stored in the knife
holster. See “Knives/Blanks Storage” on page 47.
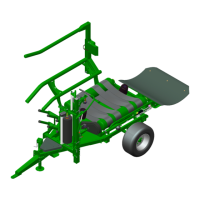
15. Installation is simpler, in that they only engage with the lock-shaft in front and
not with the actuator-arm. The knife-blank is dropped into slot towards front,
again maintaining the 5 to 10 mm gap (G), push forward (P), allowing the
keyhole-slot to engage with lock-shaft. Then rotate downwards (O) and push
forward fully.
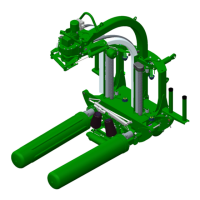
16. Always observe the row of knives after installation. They should all be
perfectly aligned and at the exact same height. If one or more do not line up,
then they are not correctly positioned. Typically the lowest and furthest
forward are correct.
Knife correctly positioned within
lock-shaft & actuator-arm
Push blank forwards
then rotate down
Blank forwards fully,
engage within lock-
shaft
Knife lock-shaft
closed
Flats vertical
Knife correctly
positioned within
lock-shaft & actuator-arm