19
www.roadwidener.com
Model SP-8 & 10
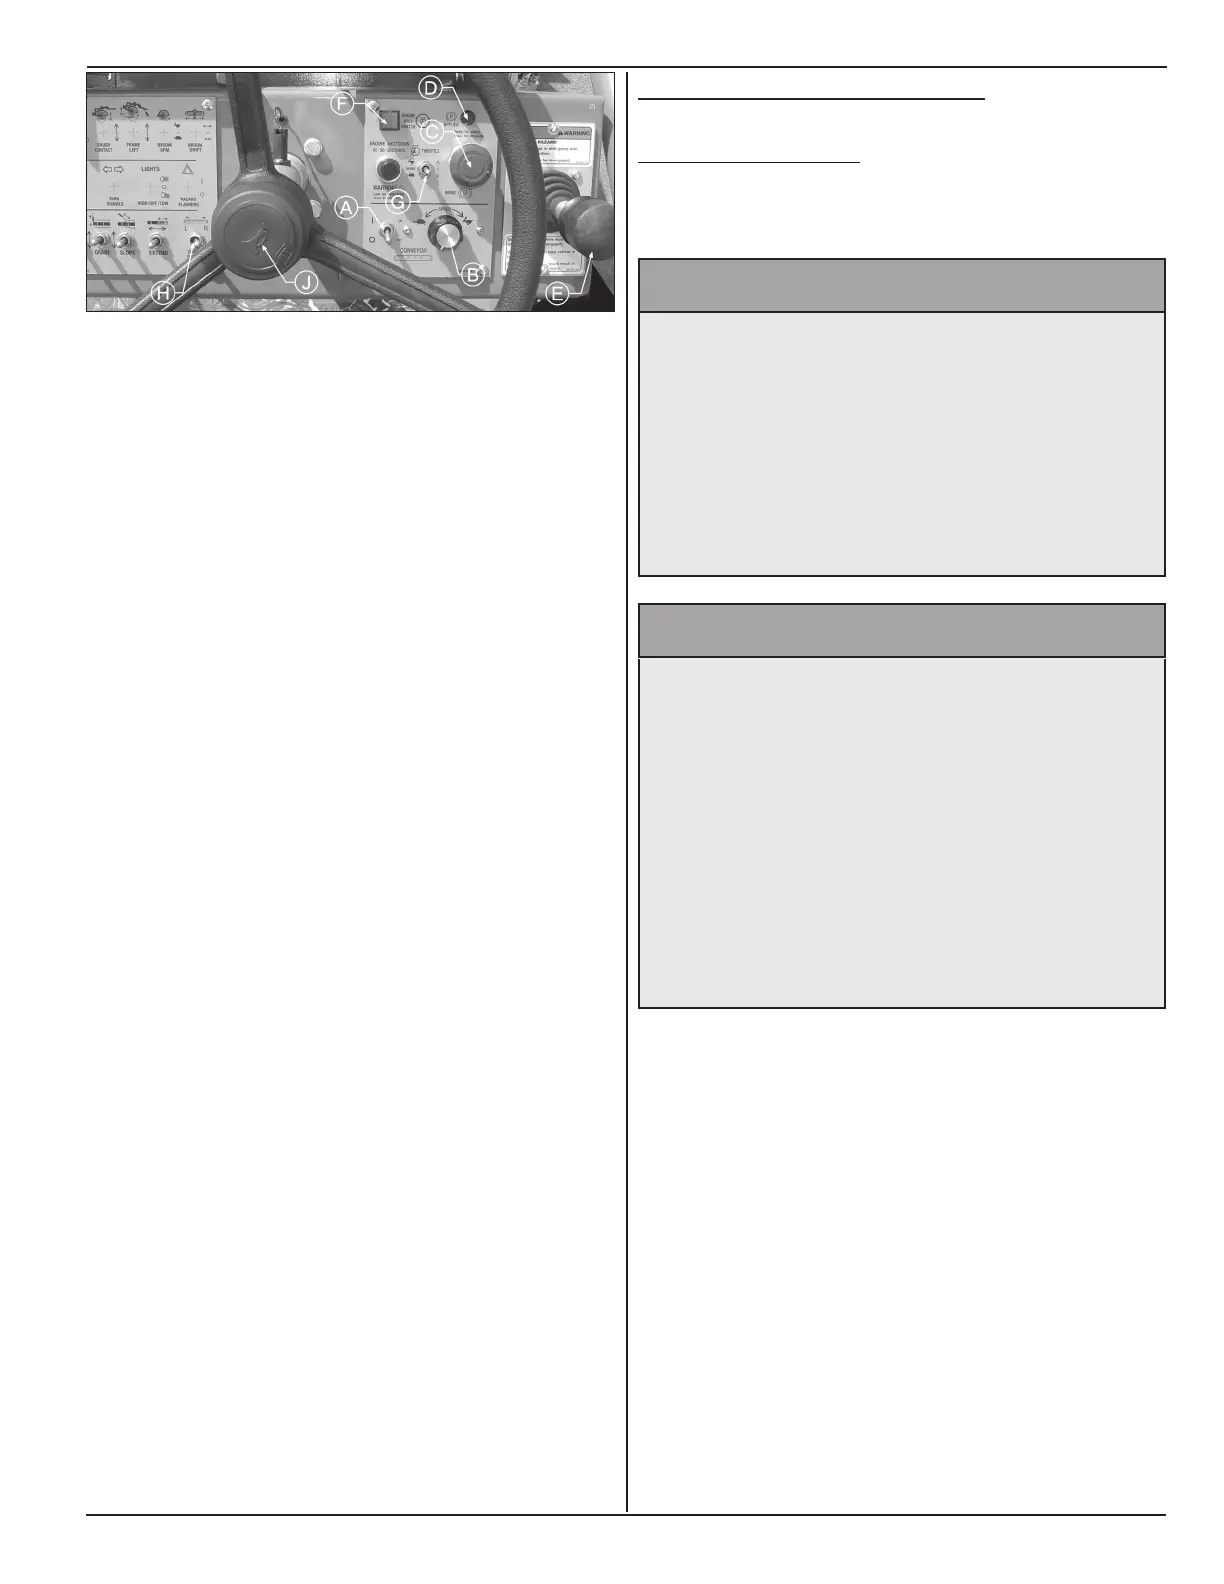
1. On engine, turn ignition key clockwise to “On”
position.
2. Check the operator console panel and make sure
the conveyor switch (A) is in the “Off” position and
the conveyor speed (B) is turned down to slow.
3. Check to make sure that the parking brake (E-stop)
button (C) is fully down and parking light (D) is “on”.
The brakes are automatically applied when the
engine is turned off.
4. Set the drive control stick (E) and gear shift lever
in neutral (center). Check if engine kill switch (F) is
reset.
5. For safe operation, engine will not start if the drive
control stick (E) is not in neutral, engine kill switch
(F) is not reset, or if the conveyor switch (A) is in
the “On” position.
6. Start engine and toggle throttle switch (G) to run at
a high idle or 1100 rpm for approximately 5 minutes
to warm up. Longer warm up may be needed in
colder temperatures.
7. After the warm-up period, increase engine speed
to 1/2 throttle.
8. Pull E-stop button (C) to middle position.
9. In this scenario, Rear brakes are still applied but
grade, slope and hydraulic extension cylinders can
be extended and retracted. At least 2000 rpm is
needed to move cylinders. Full throttle is needed
for full cylinder speed. Conveyor belt can also be
moved.
10. On dual side machine, toggle conveyor direction
switch (H) to select side for material discharge
and grade, slope and hydraulic extension cylinder
control.
11. Sound horn (J) to alert everyone near machine.
5.3 strIke-off BlAde setup
5.3.1 posItIon BlAde
Procedure illustrates blade on right side. On dual side
machines, procedure is the same for left side blade.
^ WARNING
Prevent serious injury or death.
Before performing inspections, service or
maintenance:
• Park machine on rm, level surface and
engage parking brake.
• Switch engine off.
• Close and lock control panel cover.
• Chock tires.
^ WARNING
Prevent serious injury or death.
Blade components are heavy.
Use an adequate lifting device to raise, lift
and move blade and blade components.
Blade Pivot - 31 lbs.
1-Ft blade section - 57 lbs.
2 Ft blade section - 98 lbs.
Outer Edger Assembly - 113 lbs.
Hydraulic Extension Assembly - 225 lbs.
1. Start machine as in section 5.2. If machine is in
motion, park machine on a rm level surface,
engage parking brake by pushing E-stop button
fully down. Keep engine running at full rpm.
2. On dual side machine, toggle conveyor direction
switch to right side.
3. Toggle grade switch on operator console upward
to raise blade assembly slowly up. This will release
blade from blade restraint. Swing blade outward
from machine body.
4. Set blade angle to approximately 45°. Blade length
may have to be changed for required spreading
width. See section 5.3.2 for changing blade
length. See following blade illustrations for blade
congurations.
 Loading...