28
connect the servo to the VBar Flybarless Con-
troller and mount the servo arm as close to 90° as possible
to the servo/tail push rod. The nal trim will be done by the
Autotrim feature (see page 32). For optimum performance,
90° angles should apply from the servo arm to the push rod
and from the push rod to the bell crank on the tail gear box.
This can be adjusted properly with the heli turned off, so
you can move the servo arm and push rod manually.
Check the servo direction, reverse if necessary. Select and
set the limits by moving the stick to both directions and
using the EDS dial to ne tune. On initial setup, the value
is set very low (40) to avoid binding and damage to the
servo and the mechanics. A sensible range of values will
be 80-110. If necessary, move the ball link on the servo
arm to get into this range. In case the values for both direc-
tions differ immoderately, move the servo arm one notch
over it’s true center position and try again.
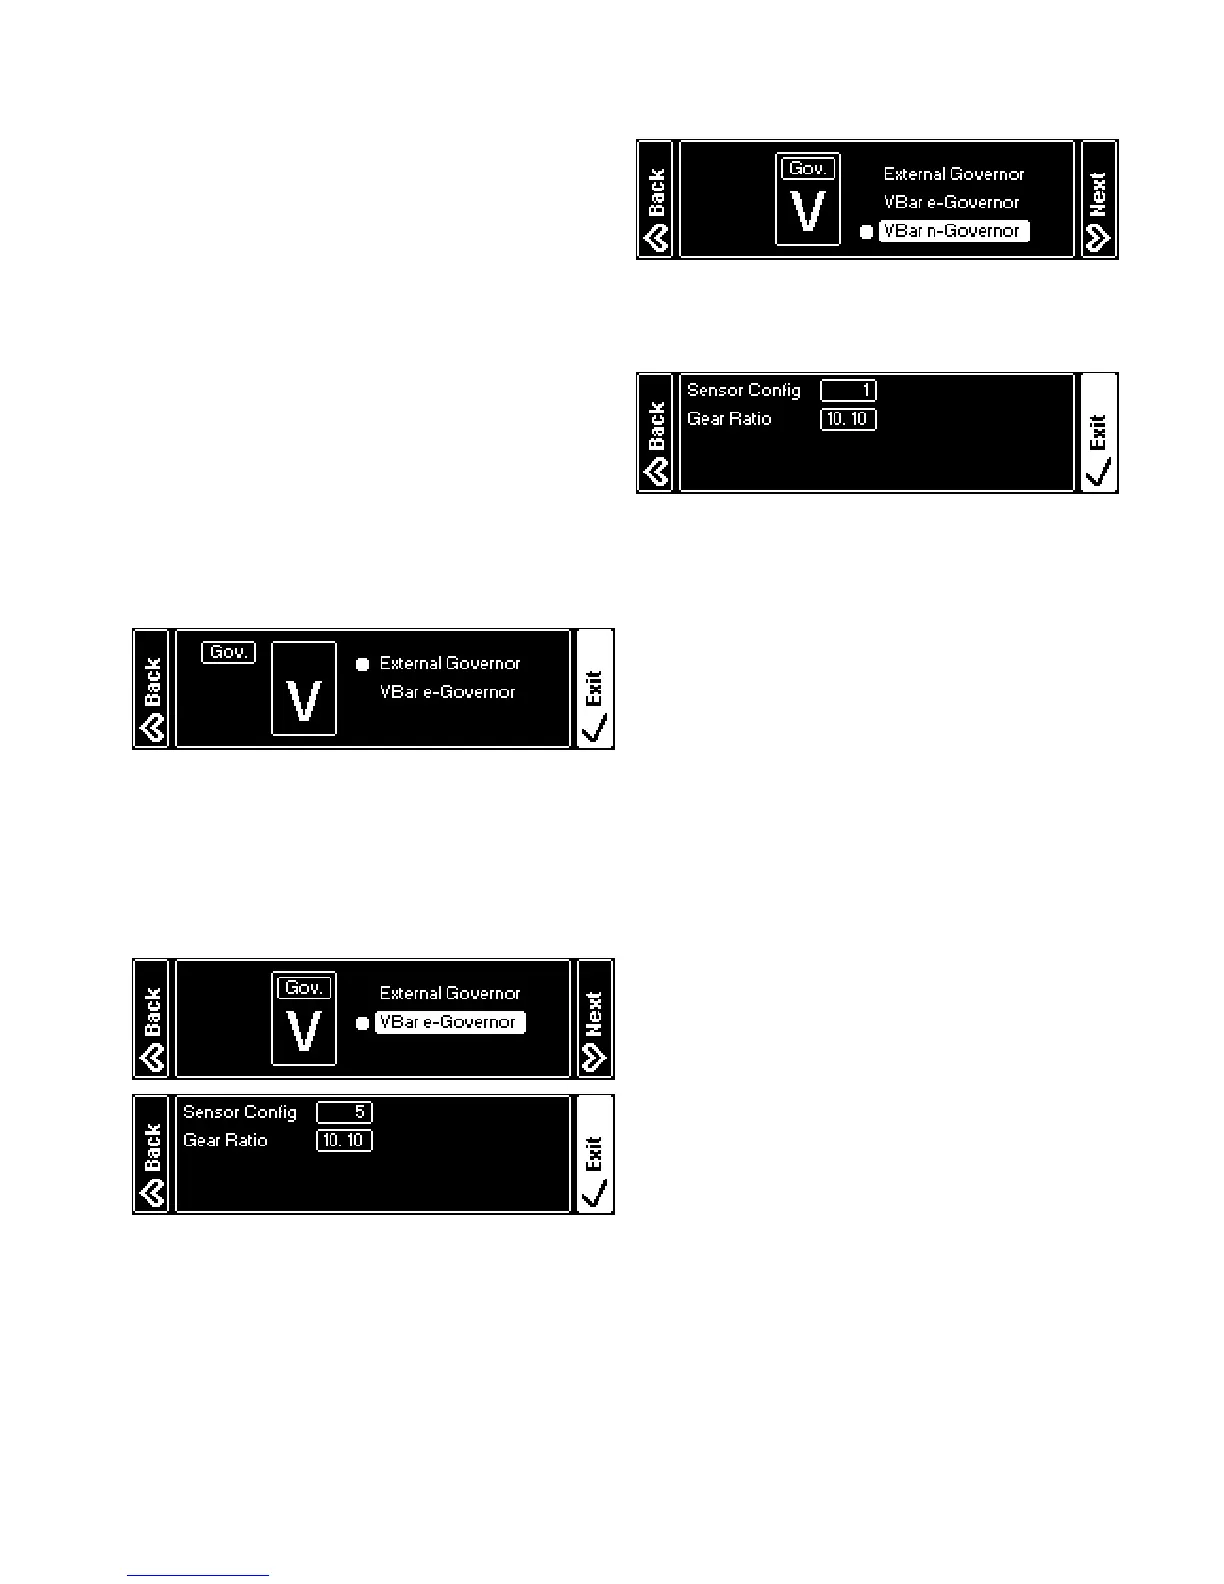
Select the type of Governor you intend to use:
(means the ESC will do the rpm control, VBar Control
will loop through the throttle signal) or
(means VBar Control and the VBar Flybarless Controller
will govern rpm).
If you select the
, the Wizard will nish
here. Continue setting up your ESC on page 29.
If you select
, calculate and enter the gear
ratio of your heli, and set the Sensor conguration properly
(half the pole count of your electric motor, e.g. ‘5’ for a 10-
pole motor). The Wizard will nish here.
☝ Attention To set up your ESC, now go to the
ESC Setup
Wizard
(see page 29).
☝ Attention In order to select the
VBar n-Governor
, you need
to have the Nitro Governor App intstalled on your VBar
Control Transmitter.
The value for
is the count of magnets or oth-
er markers dening the count of rpm. Calculate the gear
ratio of your heli and enter the value here.
The actual conguration of the
will be done by
means of the Nitro Governor-App (please download the
manual for this app from the list of apps on www.vstabi.
info).

 Loading...