27
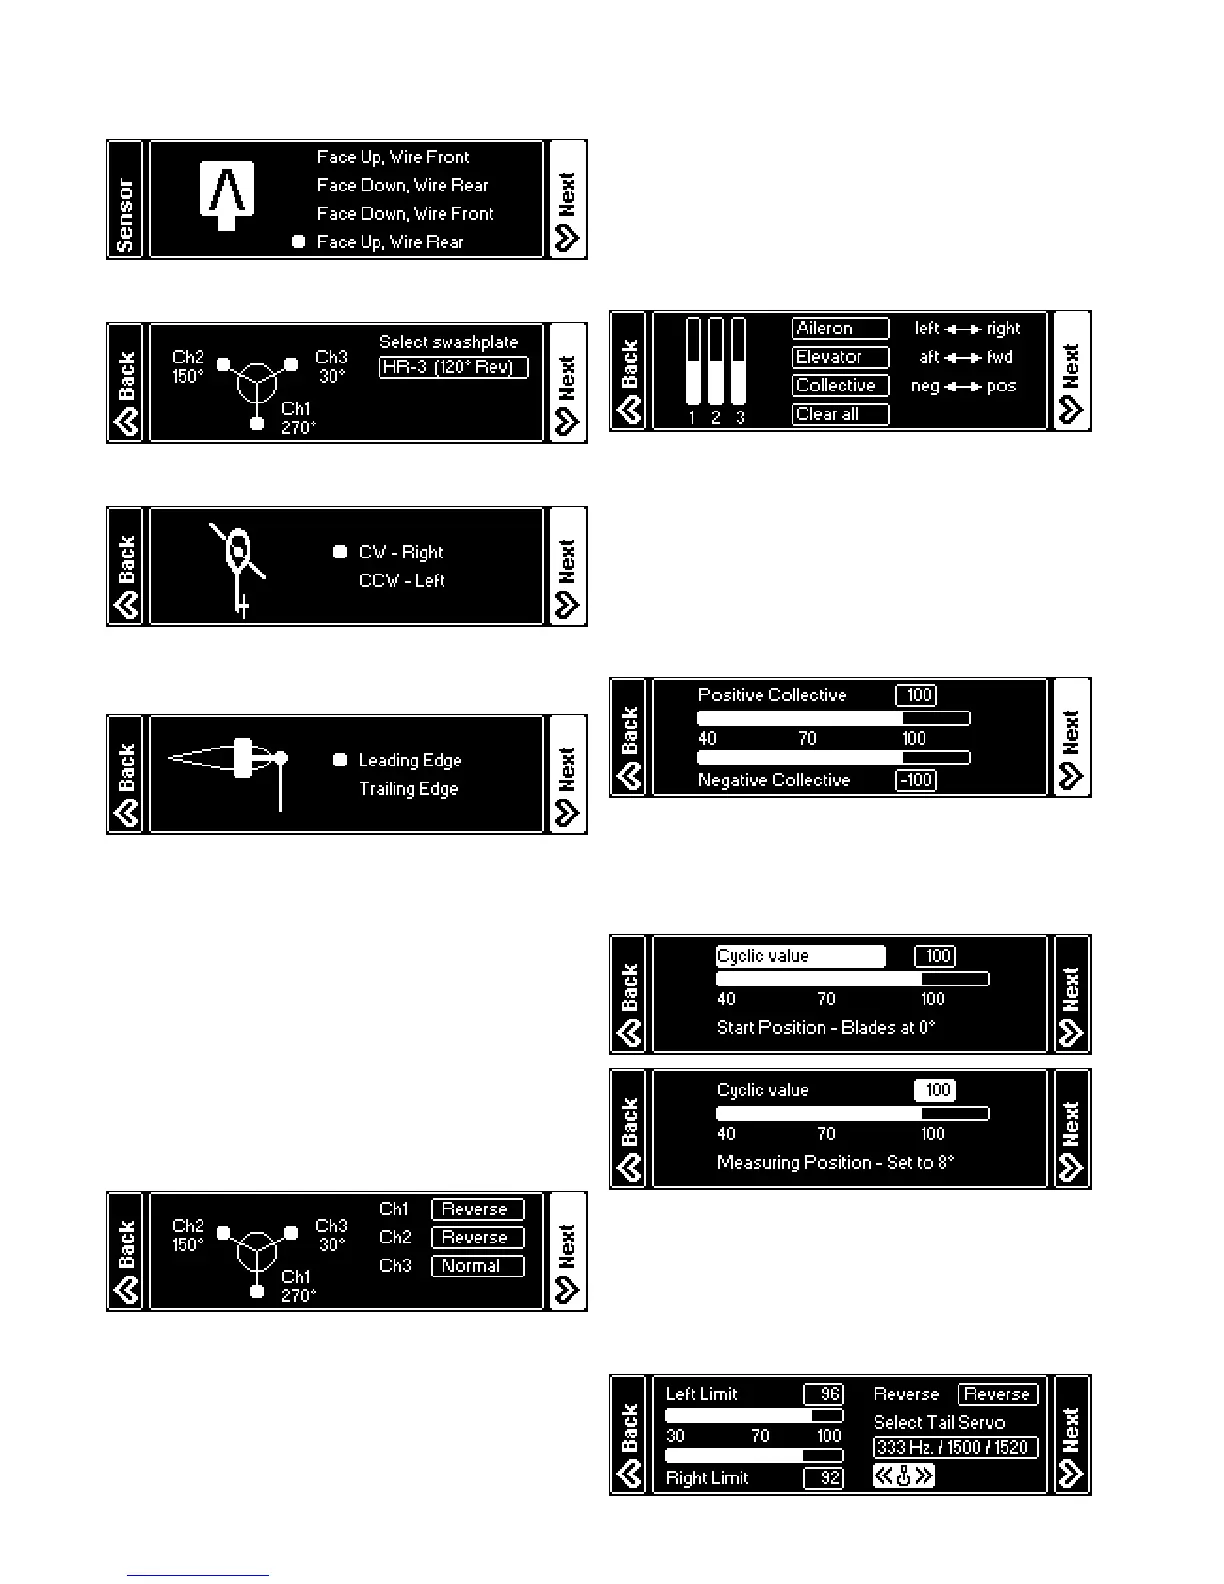
Mount the VBar or sensor of the VBar in suitable a place,
as recommended in the heli’s manual. Accordingly, select
the proper alignment of the sensor in the Wizard.
Select the swash plate type of your heli.
Select the direction of rotation of your heli.
Select leading or trailing edge control depending on the
layout of the rotor head.
☝ Attention If you have a heli with levers in between the rods
from the swash plate to the blade grips, which reverse the
direction of movement of the rods (seen e.g. on some TT
helis), please set this parameter opposing to the display
here, else some of the feed forwards (like tail rotor pre-com-
pensation) might work the wrong way.
Connect the swash plate servos according to the graphics
shown in the Wizard (nose of the model pointing away
from you). If you encounter issues with the control direc-
tions later on, double-check the servo connections. Now
mount the servo arms as close to 90° as possible to the
servos/links. Connect the links to the swash plate.
☝ Attention On a 4-point-swash-plate, double-check servo
directions and servo throws prior to connecting the links to
the swash plate, to avoid binding and damage to the servo
and the mechanics. For precision setup, please get the
Free Swash Plate Conguration-App from www.vstabi.info.
Check if the swash plate is moving correctly according to
the stick inputs. If not, reverse the individual servos as nec-
essary.
Use the trim controls to level the swash plate (90° to the main
shaft for aileron and elevator) and to set the swash plate to
the center of it’s available throw for collective. Make sure the
servo arms are exactly at 90° to the servos/links now. To do
so, adjust the links to the swash plate and/or move servo
arms to achieve the least possible electronic trim.
☝ Attention For adjusting 0° collective, fold the blades and
visually check that they are on the same level.
☝ Attention For the next step, unfold the blades to take load
from the servos.
Set the minimum and maximum collective angles inde-
pendently. The geometry on your heli is OK if 12-14° can
be achieved within 80-100 points here.
Calibrate the control loop by adjusting the Cyclic value for
8°. Move one blade over the tail boom for measuring. The
geometry on your heli is OK if 8° can be achieved within
80-110 points here.
Select the tail servo type (see list on page 34 or www.vstav-
bi.info/tailservos). In case your servo is not listed, check
the specs of your servo for center pulse (mandatory pa-
rameter) and frame rate. Select the proper center pulse
and the frame rate that comes closest to, but does not ex-
ceed, the frame rate your servo can handle.

 Loading...