Mitel 700 DECT Phone User Guide
8
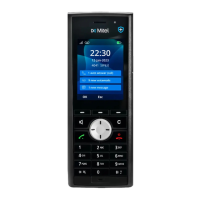
The Mitel 722dt, 732d, and 742d DECT phones have a Bluetooth interface which support
Bluetooth headset profiles for corresponding headsets.
SAFETY INFORMATION
Headsets (earphones and headphones) can produce very loud and high-pitched feedback.
Exposure to such feedback can damage hearing. Before using a headset, set the volume as low
as possible.
You can adjust the volume settings of the corded headset or Bluetooth by pressing the softkey
and selecting the Audio menu. For Bluetooth headsets, adjust the setting on the device (please
consult the User’s Guide for the device).
Access to the headset connection is closed with a cover. If the headset is not in use, close the
access so the device can be used in accordance with its protection class.
For 712dt and 722dt DECT phones, remove the cover from the device by pulling from front to back.
For the 732d DECT phone, remove the cover from the device by pulling from bottom edge to
upper edge.
USB AND EXTERNAL CHARGING CONNECTION
The USB C connection (2.0), located at the bottom, has two functions:
• as an interface for connecting to a PC to load data from or to the device. For example, if the
DECT phone is connected to a PC, the battery is charged at the same time. The charging
process is, however, slower than if the DECT phone is charged in the charging unit.
• as a connection socket for a USB charging device (see “Accessories” on page 69) to charge
the DECT phone even when it is in a leather pouch. The charging process is slower than
charging in the charger cradle.
Only use a shielded USB cable of the type “USB 2.0 A on USB C”.
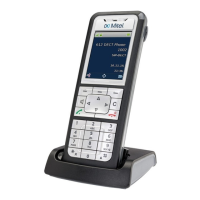
CONNECTING THE CHARGING UNIT
The Mitel 7x2d DECT phones can be used without any modifications to the charger cradle.
1. Connect the plug-in power supply to the charger cradle and place the connection cable
through the cable guide.
2. Place the charger cradle on a non-slip surface.
3. Change the plug of the power supply unit if necessary (see below).
POWER SUPPLY /POWER SUPPLY UNIT
The power supply unit is designed for 100V to 240V AC (50-60 Hz). It is supplied with four change
adapters enabling virtually worldwide use. Where necessary, connect the plug normally used in
your country to the power supply unit. There are two versions of the plug-in power supply unit
and they are connected slightly differently:
Version 1: Press the push button switch on the power supply unit and push out the existing plug
upwards. Insert the new plug from above into the power supply unit.