2-8 Installation
2Unpacking to installation
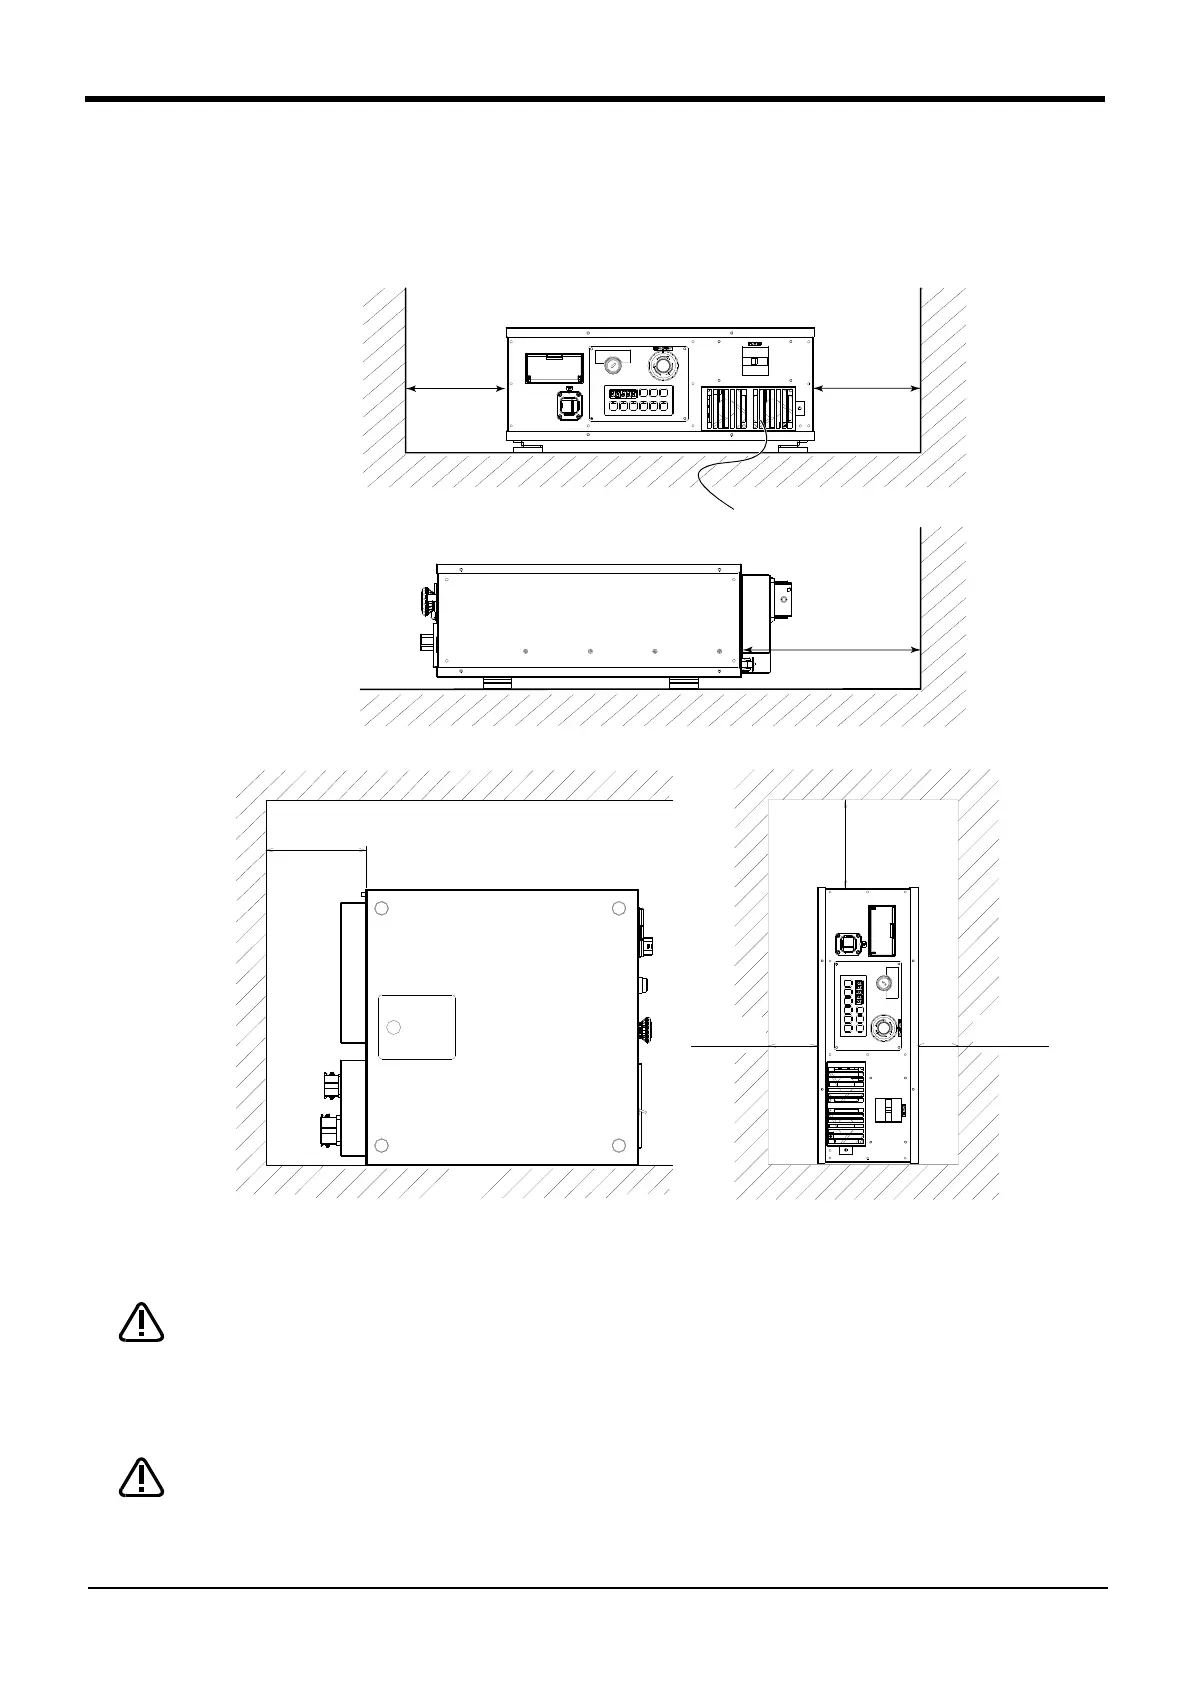
2.2.3 Installation procedures
The installed size is shown as follows.
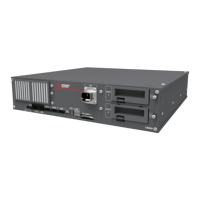
(1) CR750 controller
Fig. 2-2 : Installation dimensions (CR750 controller)
When using the controller in its upright position, please be sure to take measures to
prevent toppling, such as fixing the installation section. Fig. 2-3 shows a fixing plate for
upright use. Please refer to this when using the controller in its upright position. Please
use M4 x 8 screws (or shorter) to fix the controller to the fixing plate. (Make sure that
screws into the controller board’s internal section (lateral board thickness of 1.2mm)
stick out 6.8mm or less).
When storing the controller in a cabinet, etc., take special care to the heat radiating
properties and ventilation properties so that the ambient temperature remains within the
specification values. And, don't install the controller in the position where direct rays or
the heat of lighting hits. The skin temperature of the controller may rise, and the error
may occur.
1
5
0
m
m
以
上
50mm以上
20mm以上
250mm以上
<Placed horizontally>
* Turn right-hand side down toward front of the controller.
<Placed vertically>
Intake vent
250mm or more
250mm or more
150mm
or more
20mm
or more
50mm
or more
 Loading...