4-44 Handling the T/B
4Basic operations
4.2 Handling the T/B
4.2.1 Installing and removing the T/B
Installing and removing the T/B, with turning off the controller power. If T/B is Installed and removed in the
state of control source ON, emergency stop alarm will be occurred.
If you use the robot wherein T/B is removed, install the dummy connector of attachment for the product instead
of T/B. Take out and insert the dummy connector with the connector itself.
Please do not pull the cable of T/B strongly or do not bend it too much.
It becomes the breaking of a wire of the cable and the cause of breakage of the
connector. Please installing and removing so that stress does not start the cable
with the connector itself.
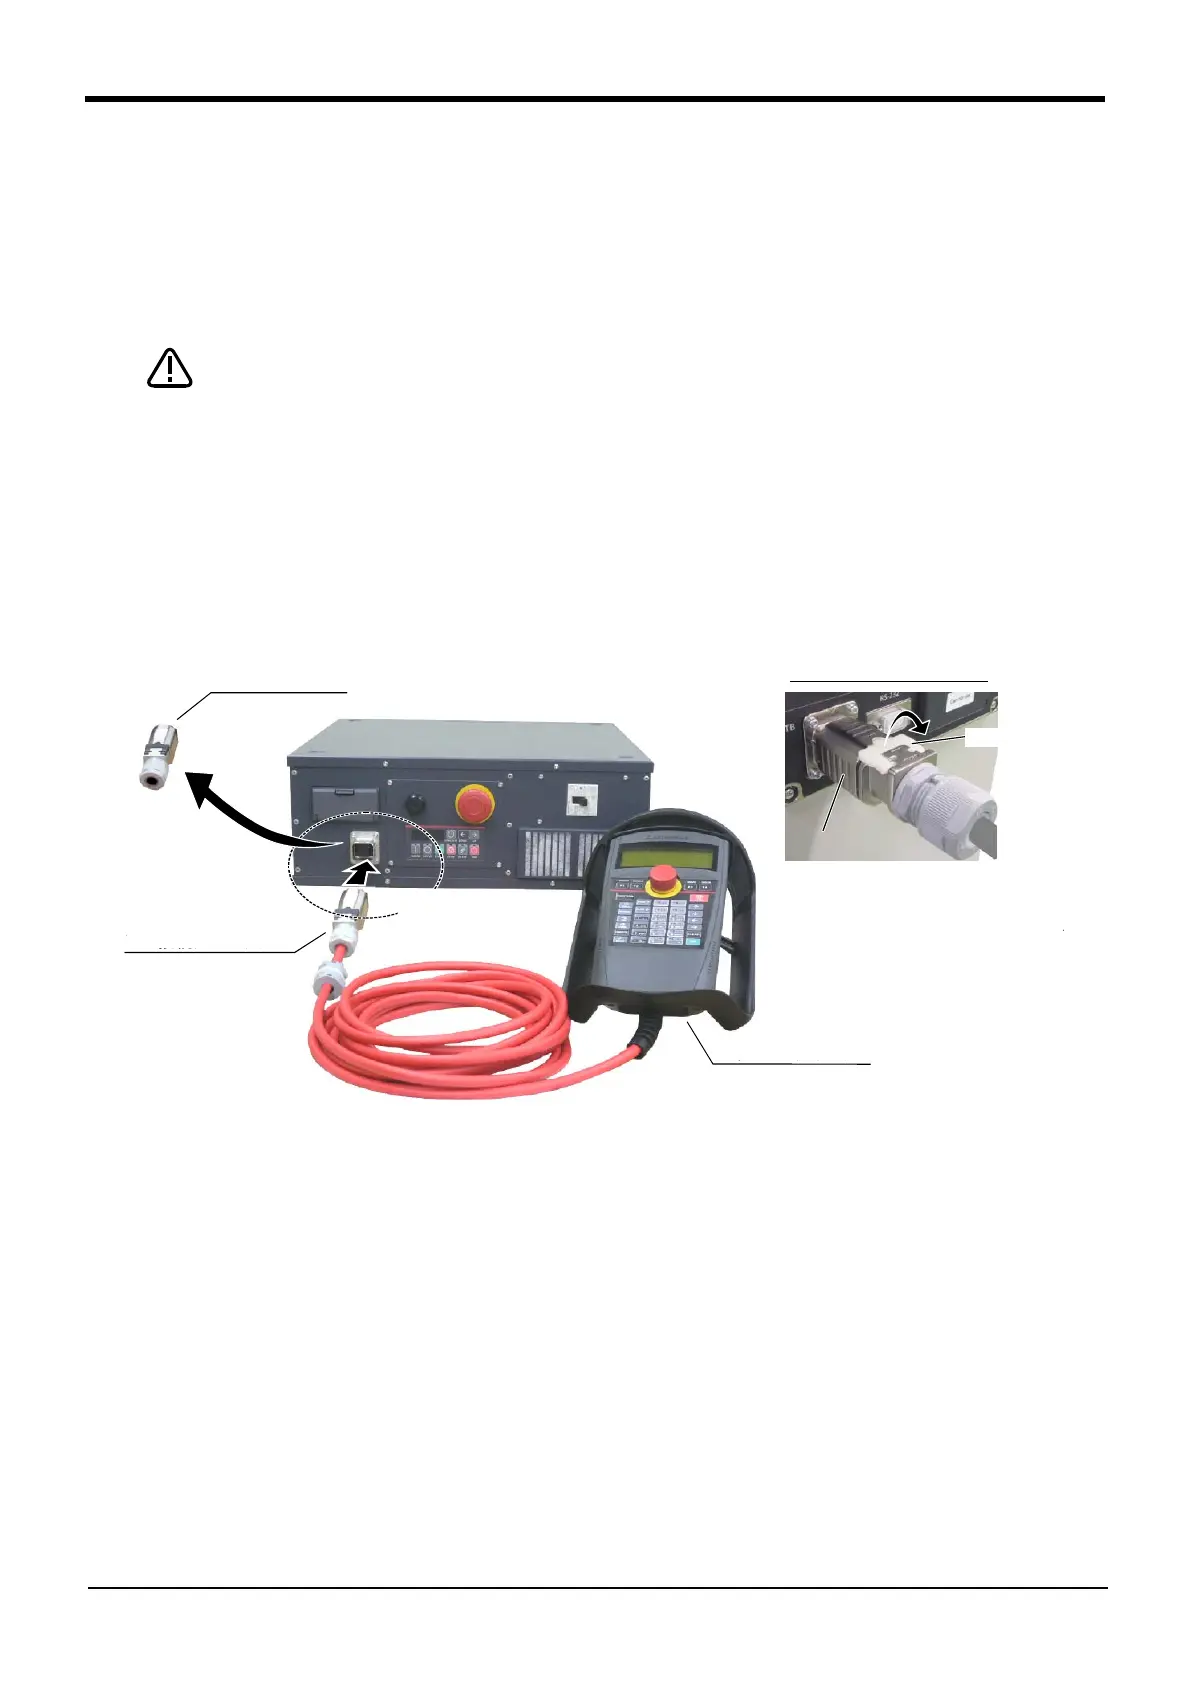
(1) Installing the T/B (CR750 controller)
Explain the installation method of T/B below.
1) Check that the POWER (power supply) switch of the robot controller is OFF.
2) Connects T/B connector to the robot controller. Use as the upper surface the lock lever shown in Fig. 4-3,
and push in until there is sound.
Fig. 4-3 : Installing and removing the T/B (CR750 controller)
The installation of T/B is finished.
ティーチングボックス
(T/B)
ダミーコネクタ
A
T/B接続用コネクタ
A部詳細
T/B接続用コネクタを取り外す時は、
ロック解除(ロックレバーを上側に起
こした状態)にし、B部のケースを手前
にスライドさせてラッチを外し引き抜き
ます。
ロックレバー
B
Controller
Dummy plug
T/B connector
Teaching pendant
Details of the A section
When removing the connector for
T/B connection, use lock release
(state which raised the lock lever),
make the case of the B section
side to the front, and remove and
pull up out the latch.
Lock lever
 Loading...