Disassembling and replacing modules
User manual 57106_hdb_en_13 33 / 94
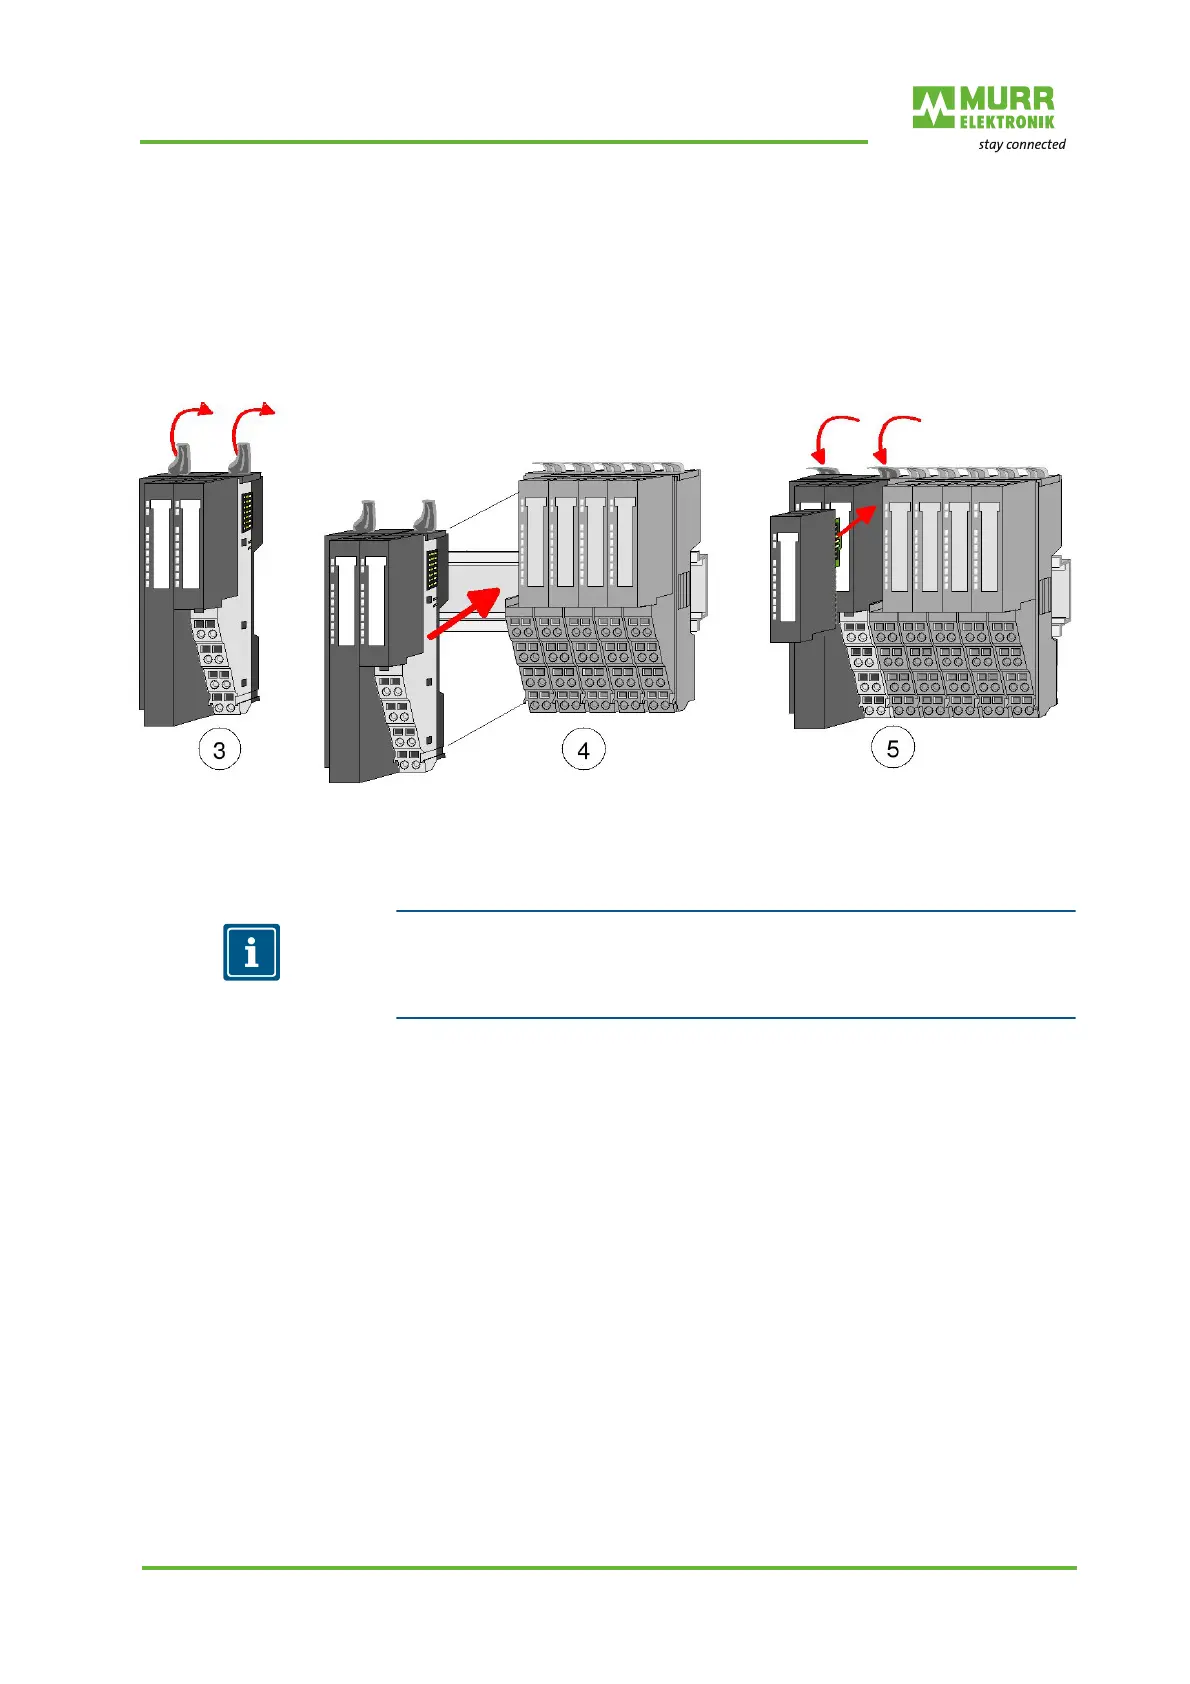
Installing the new bus
node
1 | Flap the locking levers of the bus node upwards.
2 | Plug the bus node in the left module.
3 | Slide the bus node with the help of the guide strips onto the DIN rail.
4 | Flap the locking levers downwards.
5 | Plug in the electronic module.
Now you can bring your system back into operation.
Fig. 7-2: Installing the new bus node
7.3 Replacing an expansion module
NOTE
For demounting and exchange of a bus node, a module or a group of modules,
due to mounting reasons you always have to remove the electronic module
right beside. After mounting it may be plugged again.
Dismounting 1 | Switch off the system's power supply!
2 | Remove the wiring from the module, if any. For details refer to section 8
"Installation".
3 | Unlock the electronic module to its right at the bottom.
4 | To remove the electronic module, pull it out towards the front.
5 | Flap the locking lever of the module to be replaced upwards.
6 | To remove the module, pull it out towards the front.
 Loading...