7
#5 Set up a test track. Obtain a length or two of flex track, or better yet, use that old
circle of Atlas Snap Track you’ve had kicking around for years. Do NOT connect the
PH-10 up to your layout at this time. We want you to test the operation of your new
DCC system without the complication of troubleshooting any layout wiring, closed
gaps, broken switch points, etc. Once you are confident that your new PH -10 DCC
system is up and running then hook it up to the layout (after finishing the Quick
Start Guide). Make sure that your layout wiring can stand a continuous 10 Amps of
current. We recommend a minimum of #14 feeder bus, preferably #12 and at least
#18 AWG power drops from the rails to the feeder bus.
Connect two wires from your test track to the TRACK screw terminals of the PH-10
plug. Plug in this connector into the socket marked TRACK.
#6 Carefully inspect all wiring to make sure proper connections have been made.
#7 Plug in the power source and/or turn on the power.
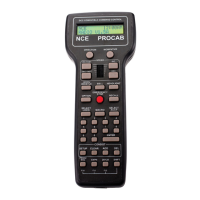
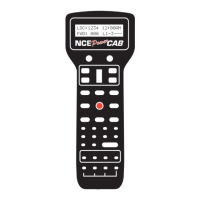
#8 The display of the cab should look something like:
LOC: 003 00:03AMLOC: 003 00:03AM
LOC: 003 00:03AMLOC: 003 00:03AM
LOC: 003 00:03AM
FWD: 000 -------FWD: 000 -------
FWD: 000 -------FWD: 000 -------
FWD: 000 -------
This is what we call the ‘NORMAL DISPLAY’. The fast clock in the upper right hand
corner will most likely show a different time.
The following cab buttons must be pressed in the proper sequence to acquire
control of locomotive #3 (in the above example locomotive #3 is already selected):
a. Press SELECT LOCO button once.
b. Press the “3” button once. DO NOT press 0 then 3.
c. Press ENTER.
Note: By convention, all locomotive decoders have their short address set to 3 at
the factory.
TIP #1
If you make a mistake while entering numbers on the cab just keep pressing
more numbers until the number entry field clears, then enter the correct numbers.
TIP #2
Whenever the cab is waiting for you to enter data (a flashing black square is
on the screen at the point where the numbers will go) you can press the PROG/
ESC key to “escape” what you were doing and return to normal operation mode.
TIP #3
Whenever you have pressed a button (such as SELECT LOCO) and you want
to keep what ever number that is already on the screen just press ENTER.
#9 To operate the locomotive, the following controls are used:
a. The thumbwheel will increase/decrease speed. The speed control buttons that
flank the thumbwheel on either side may also be used as desired to control the loco
speed.
b. Pressing the DIRECTION button will cause the loco direction to reverse.
CONGRATULATIONS! You are now operating one locomotive with DCC control. In
most cases, less than twenty minutes has elapsed since you started reading this
Quick Start Guide.
After completing your Quick Start, go to Page 8 - “Completing the Quick Start.”