9
1. What’s in the Box? and the Names of the Projector Parts
1-3. Names of the Projector Parts
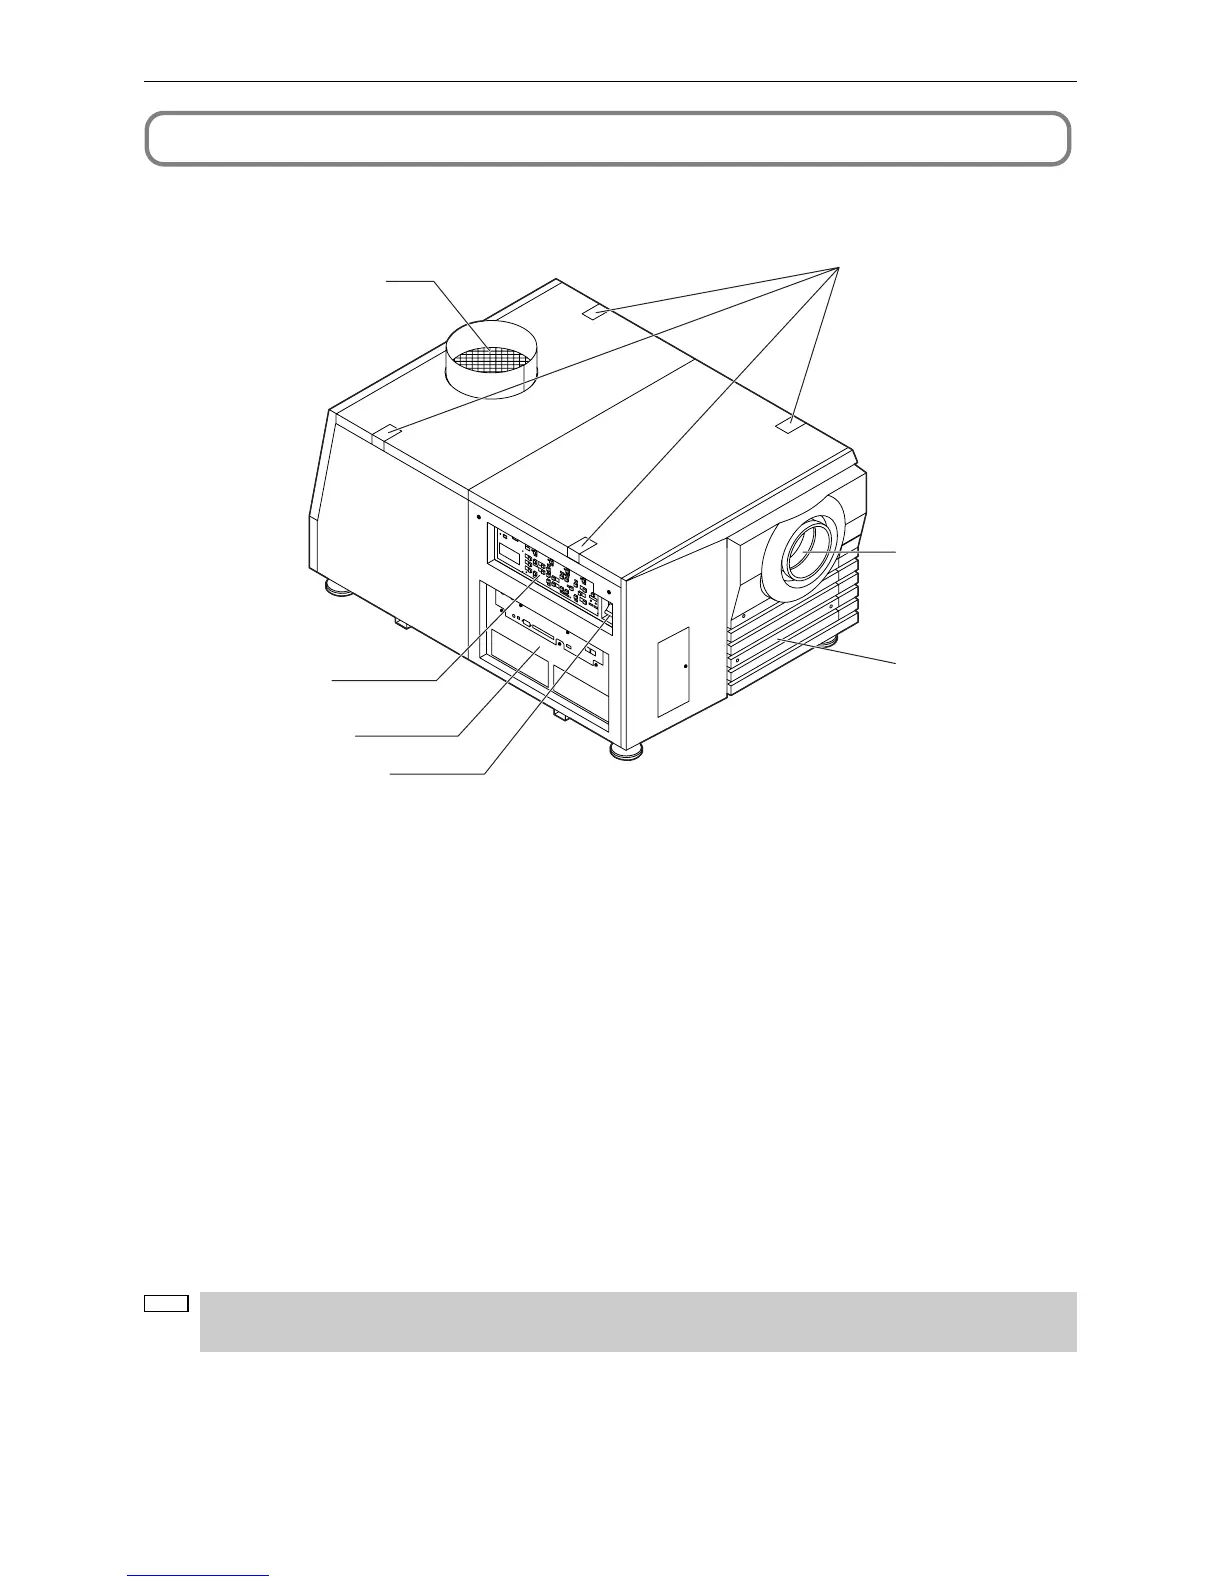
1-3-1. Front of the Projector
1
2
3
4
5
6
7
1. Air outlet
Connects to an exhaust device to exhaust heat from the lamp. Please contact your dealer/distributor to install the exhaust
device.
2. Control panel
On the control panel, power to your projector is turned on or off, titles are selected, and various adjustments are made of
projected screen. (See page 12)
3. Connection terminals
Various image signal cable are to be connected here. (See page 11)
You can expand signal input terminals by installing an optional multi-media switcher (MMS).
4. Main power switch
While AC power is being supplied, set the main power switch to ON, then your projector will enter a standby state.
5. Touch panel mounting opening (four position on top)
Use the holder arm for the touch panel to attach the touch panel (optional).
6. Lens (optional)
Images are projected from the lens. Request your dealer/distributor to install or replace the lens.
7. Interlock connector (Inside front of projector)
This is the connector for the projector safety device. This is used to control the projector from an external source. Consult
with your dealer/distributor about using this.
NOTE
Do not touch the air outlet and backside of the main unit when your projector is operating. Otherwise, the high
temperature may cause burns.