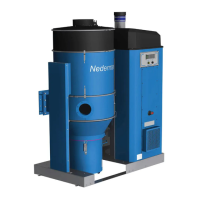
FlexPAK 800/1000
EN
32
NOTE! The unit is CE-marked. Connecons to the unit, inial start-up and maintenance are
to be carried out according with this manual.
9.1 Empty the collector bin
WARNING! Explosion risk.
Never use the unit without a plasc bag.
WARNING! Risk of personal injury.
• Ensure that there is no vacuum in the dust separator before removing the collector bin.
• Crush hazard. Be careful when lowering and reng the collector bin. Use proper
protecve equipment.
• Wear goggles, dust mask and gloves when emptying the collector bin.
CAUTION! Risk of equipment damage.
Use only Nederman original spare parts and accessories.
NOTE! The plasc bag is to be replaced when lled up to 2/3, see gure 11.
To replace the plasc bag:
1. Check that the risk area is clear.
2. Ensure that there is no vacuum in the dust separator.
3. Remove the collector bin.
4. Seal and remove the plasc bag. Use a cable e or equivalent, see gure 12.
5. Fit a new plasc bag in the collector bin.
6. Ret the collector bin onto the dust separator.
7. Check that the pressure equalizer hose is aached to the collector bin, see gure 14.
8. Check that the collector bin seals properly once vacuum is re-applied to the dust
separator.
9.2 Filter package
NOTE! Fing the steel ring correctly is important to maintain the ghtness and durability
of the unit.
Filter replacement is to be noted in the service protocol of the unit. Replacing individual
lter bags is possible, but it is recommended that the whole lter package is replaced since
it is quicker and causes less spreading of dust. The work is easy, if the unit is placed so it can
be lted, see Figure 15. Also, the lter may be lied straight up, see Figure 16, with a crane
or other liing device.
If the lter bags are replaced separately, the plasc holders will also have to be replaced.
Figure 17, items A–C, shows how the rubber sealing rings are to be ed. When a used
sealing ring is to be re-used, the form when open may dier from the original form as
shown in item A. Use a screwdriver to bring the edge of the module between the rubber
lips to obtain the result shown in item C.
9.3 Spare parts
CAUTION! Risk of equipment damage.
Use only Nederman original spare parts and accessories.
 Loading...