EasyManuals Logo

NI GPIB Series User Manual

NI GPIB Series
127 pages
To Next Page IconTo Next Page
To Previous Page IconTo Previous Page
Page #53 background imageLoading...
Page #53 background image
HOME
TitleShort-Hidden -53
©
National Instruments Corporation
Configure and Install Your PC/104-GPIB
Next
Step
Previous
Step
53
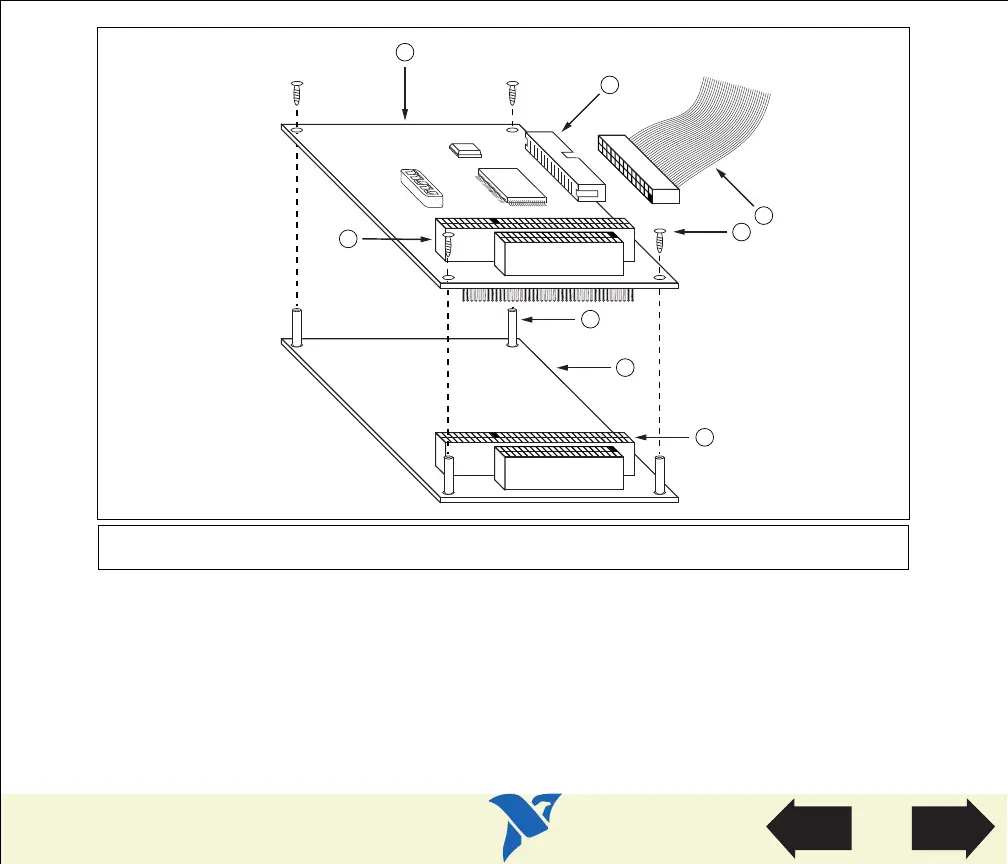
Figure 10. Installing the PC/104-GPIB
5. Plug the GPIB ribbon cable into the GPIB connection on the PC/104-GPIB. The GPIB connection
is keyed so that it fits in only one direction. Do not force the GPIB ribbon cable connector into
place. The GPIB ribbon cable is 20 in. long and terminated with a panel-mount GPIB connector
that can be mounted for easy access in your system.
1 PC/104-GPIB
2 GPIB connection
3 GPIB ribbon cable
4Screw
5 Standoff
6 Parent module
7 PC/104 connector
8 PC/104 header
OFF
54321
1
2
3
4
5
6
7
8

Table of Contents

Questions and Answers:

Question and Answer IconNeed help?

Do you have a question about the NI GPIB Series and is the answer not in the manual?

NI GPIB Series Specifications

General IconGeneral
Operating Systems SupportedWindows, Linux, macOS
Driver SoftwareNI-488.2
Bus InterfaceIEEE 488
Data Transfer RateUp to 8 MB/s
CompatibilityIEEE 488.1, IEEE 488.2
Connector Type24-pin IEEE 488 connector
Maximum Cable Length20 m total system length
Number of Devices SupportedUp to 14 devices per bus

Related product manuals