41
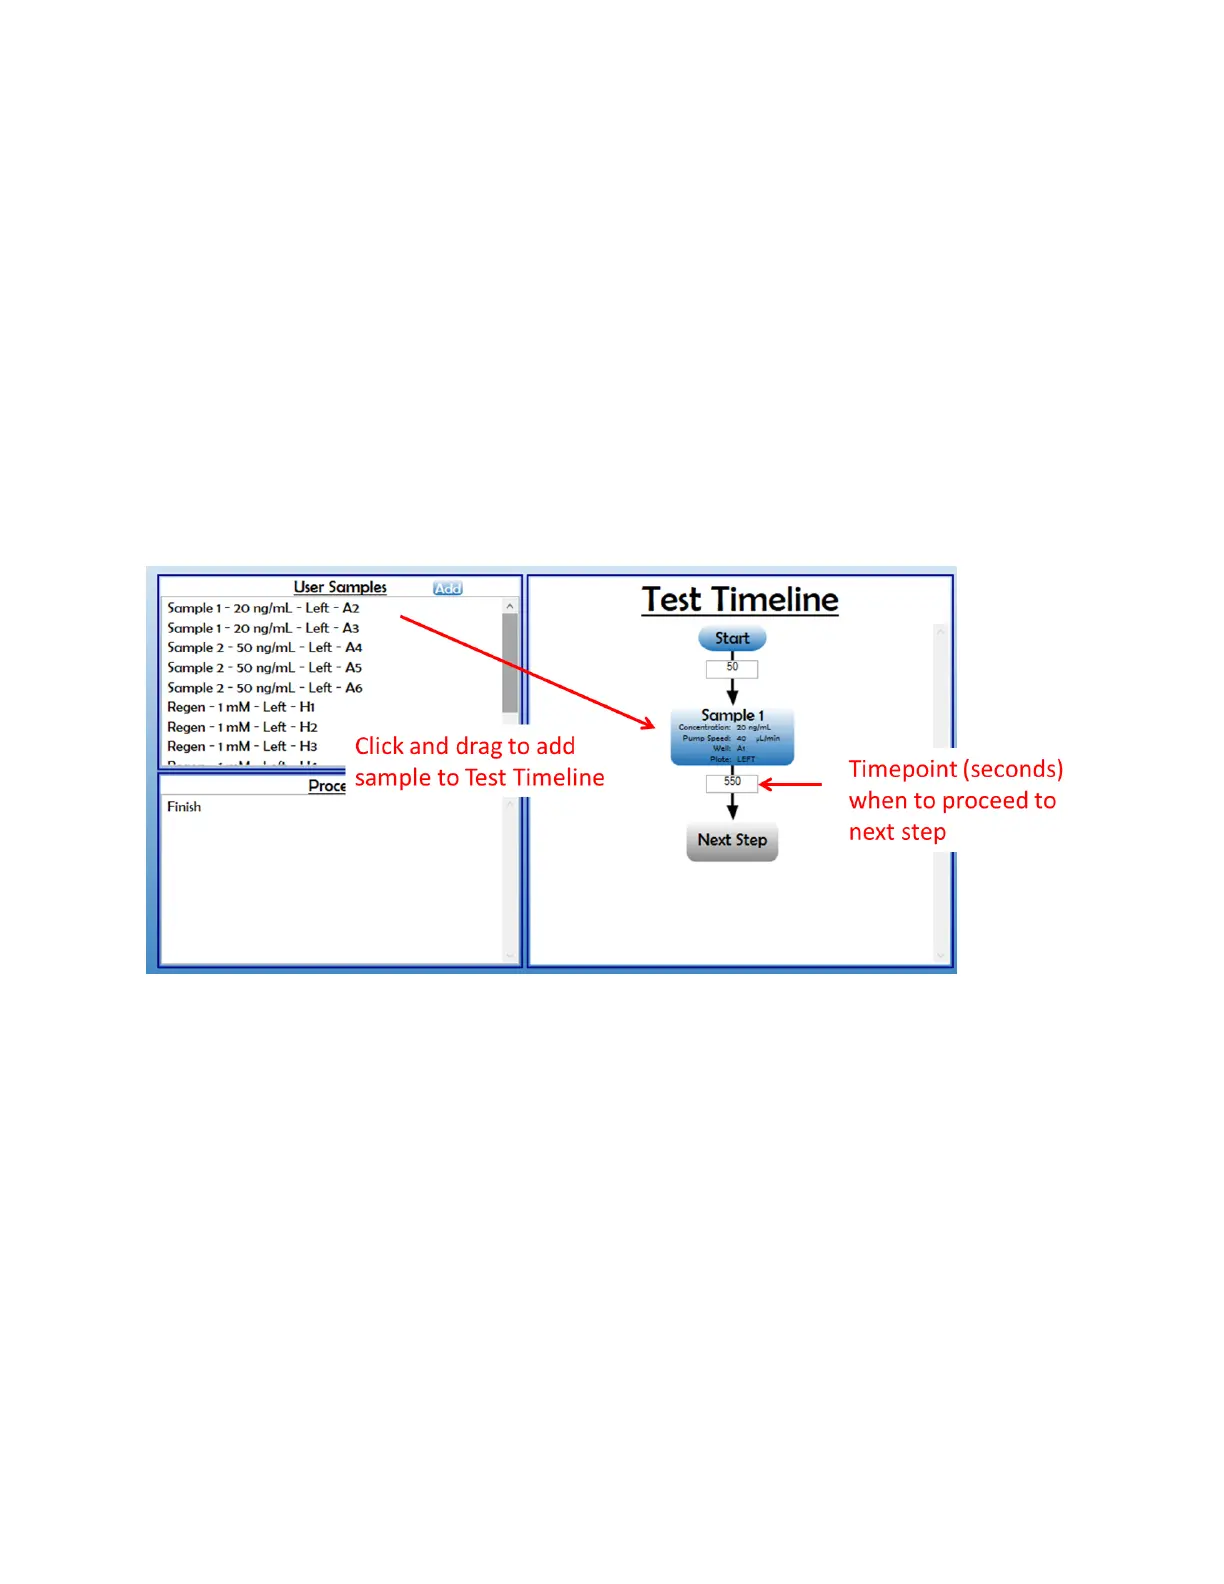
7. Once the sample details are loaded, the Test Timeline can begin to be setup. The Test Timeline
will be the procedure that the XT autosampler follows. A Start event is preloaded into the
timeline for you, with a 50 second delay. To add a sample injection step into the Timeline, click
and drag the sample from the User Sample box into the “Next Step” position in the Timeline
process [Figure 2.28]. The sample details will be added into the Test Timeline step and removed
from the User Sample box. This will allow you to easily see which samples have not been
loaded into the timeline. Below the sample details in the timeline, a text box is present for you
to enter the amount of time delay for the autosampler to wait for the next step. The time
displayed is cumulative amount of time from the start time (0). In the timeline shown below,
this means that 50 s after the test start, Sample 1 will be injected, then the autosampler will
wait an additional 500 s (at time 550 s) to go to the next step in the Timeline. To set appropriate
timepoints for the next injection, keep in mind the interaction time the sample will have with
the sensor (dependent on the speed) and the amount of time the sensor will need to re-
equilibrate to the baseline.
Figure 2.28 Adding samples to Test Timeline and inputting timepoint to proceed to next step.
8. Continue adding the User Samples into the Test Timeline until the User Sample box is empty.
To complete the Test Timeline, click and drag the “Finish” process into the Test Timeline
[Figure 2.29].