55
line
A
B
A
CLINOX PRO • AIR • POWER • SURFACE
USER MANUAL
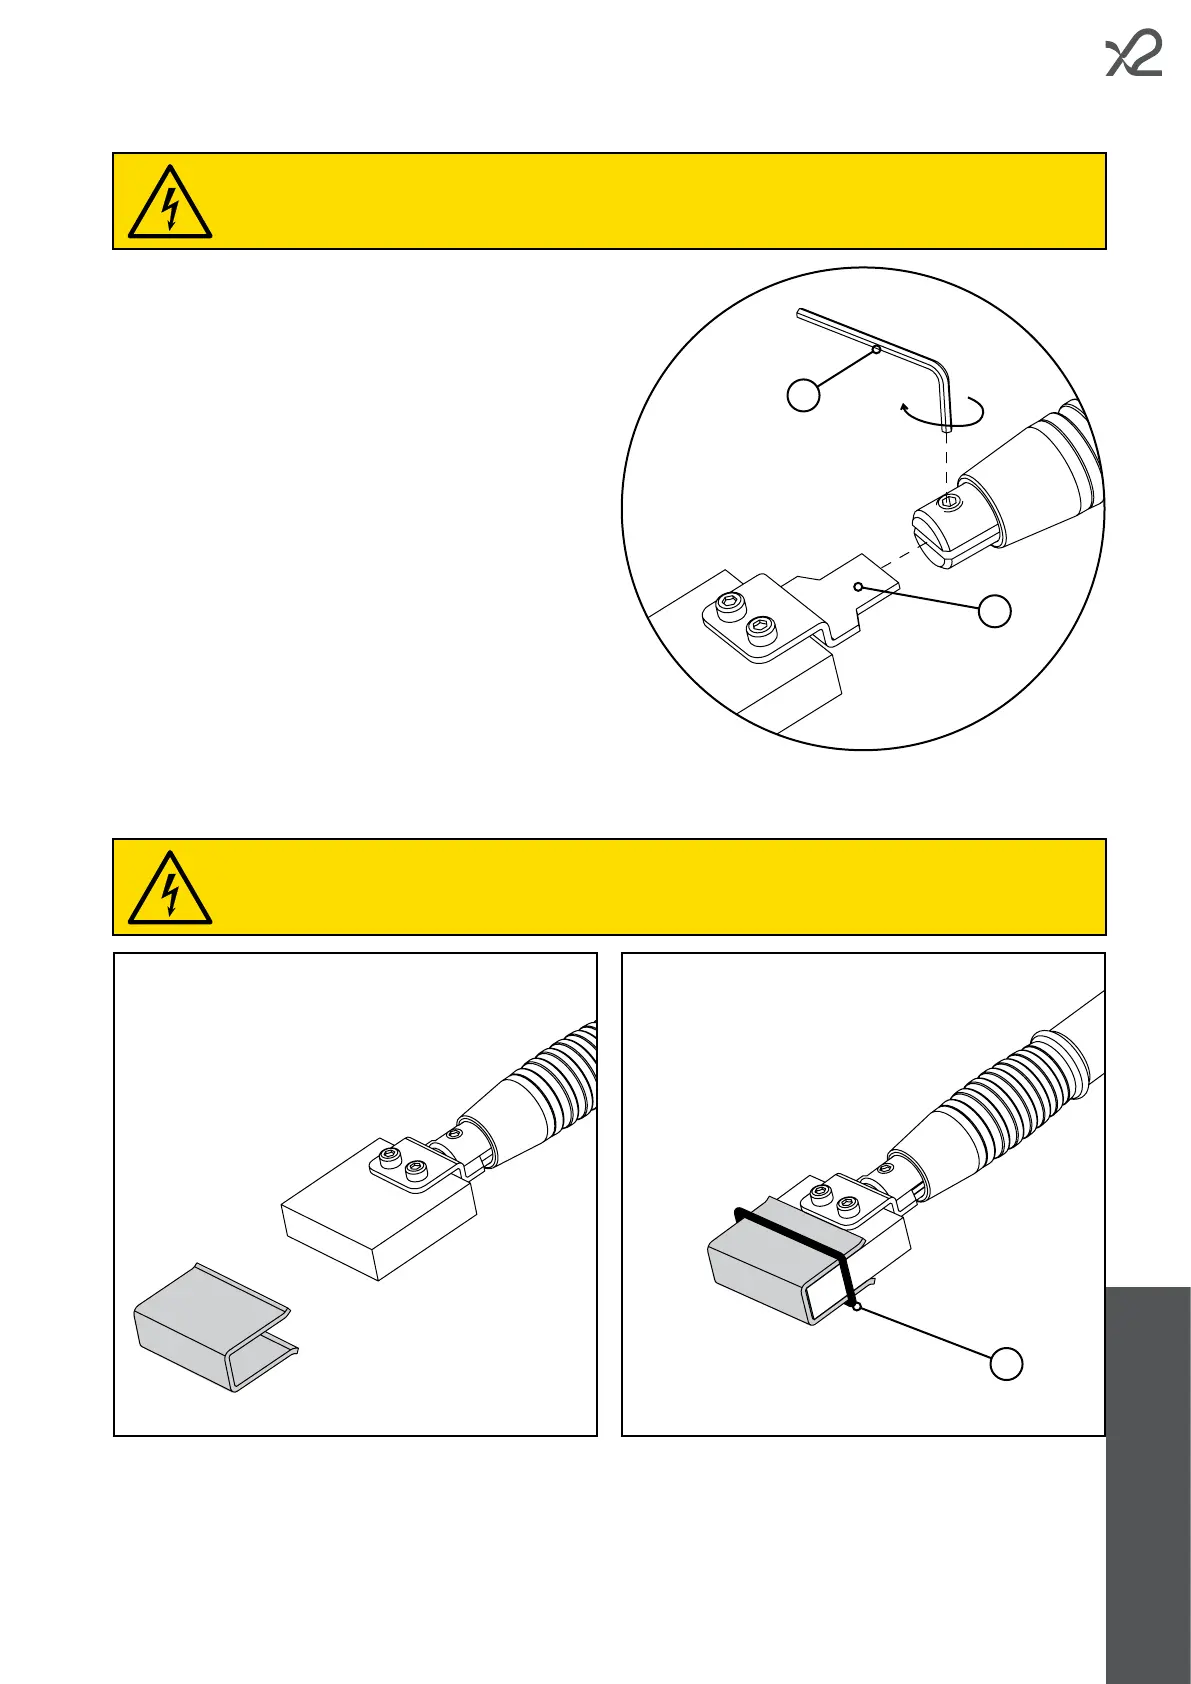
9.2.
• Take the marking insert.
• Insert the coupling tab (A) into the appropriate slot in the
marking torch.
• Tighten the grub screw using a 2.5mm hex wrench (B).
9.3.
• Install the insert on the torch (see chapter 9.2).
• Fold the felt into a "U" shape and stick it on to the electrode.
• Fasten the felt in place using the O-ring (A).
When installing the felt, the marking torch must not be connected to the device.
When installing the inserts and adapter, the marking torch should not be connected to the device.